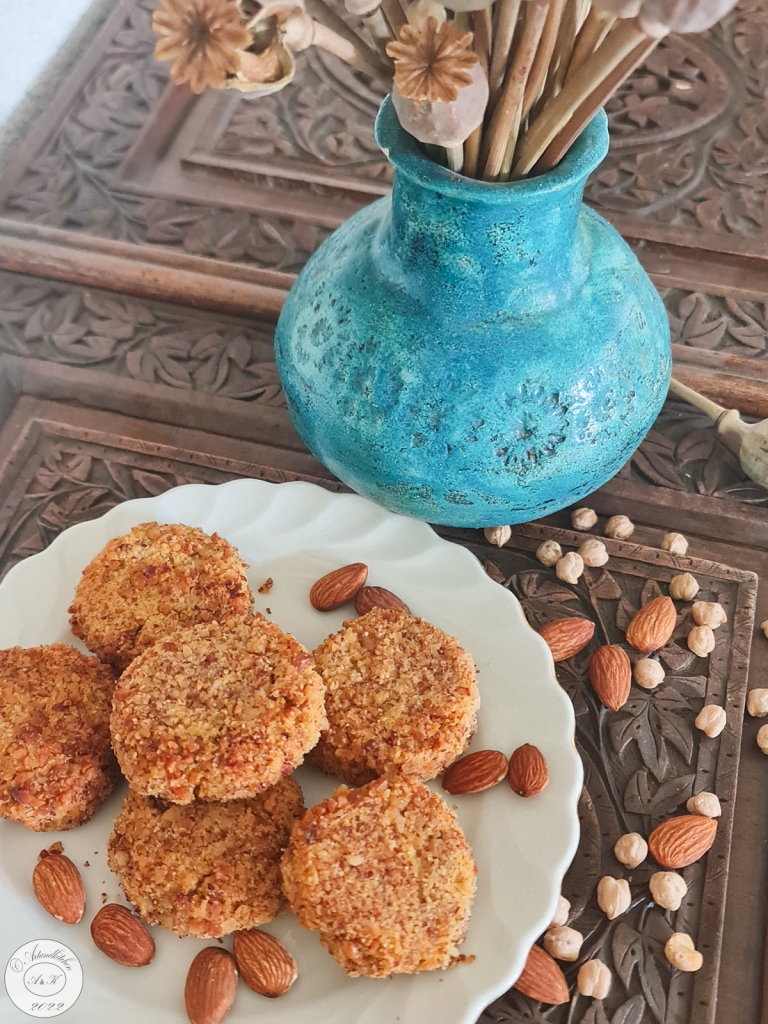
Chickpea Croquettes with Parmesan Cheese and Almonds

Today I would like to present you a very tasty recipe of chickpeas cakes enriched with Parmesan cheese, almonds and spices.

They are very easy to be prepared and only a few ingredients are needed.

With a rich salad and if you maybe a yogurt sauce they can make a great full but still light meal.

You may adapt the recipe to you taste for example with some herbs, with garlic or roasted onions or other spices. Enjoy!

You may also make bigger ones and make of them burgers.

Chickpea Croquettes with Parmesan Cheese and Almonds

  • Servings: 4-6
  • Difficulty: medium
  • Print

Ingredients

  • 400 g chickpeas, precooked and drained
  • 80 g Parmesan cheese, grated
  • 80 g almonds, grinded
  • 1 egg
  • ½ teaspoon coriander ground, quantity to taste (or other spices or herbs to taste)
  • Salt and pepper to taste
  • More or less 100 g grinded almonds for coating
  • Oil for frying (I used olive oil)

Preparation

  1. Drain well your chickpeas and blend them until smooth
  2. Add cheese, almonds, egg, spices and salt and pepper. Combine well working this with a fork or a spoon. Adjust spices, salt and pepper to taste. If the mixture results to wet, add some more grinded almonds.
  3. Scoop some mixture, form to ball with your hands, make the little flat and coat them in the additional grinded almonds. Place on a plate until you will have all them ready.
  4. In a non-sticky skillet heat little oil. Place the croquettes to fry gently. Brush or drizzle the upper side with oil. Turn when they begins to brown and cook on the other side until golden. Do not overcook them as they are delicious especially if moist.
  5. Serve them preferably warm.

Autor: https://artandkitchen.wordpress.com/  

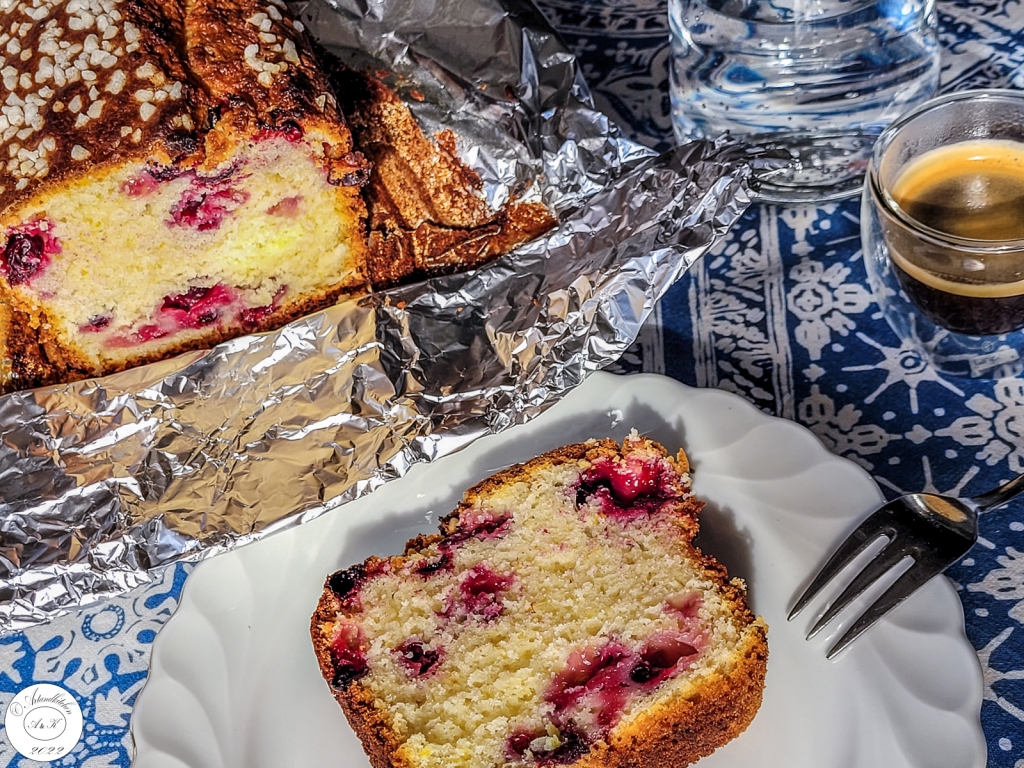
Cassis (Black Currants) and Lemon Cake

One of our absolute beloved, fresh and spongy super quick cake!  

The source of this recipe is a popular recipe which we got in Spain and we adapted it reducing the oil and the sugar only for personal taste. We use Greek plain yogurt + fresh lemon instead of yogurt with lemon taste. In Spain this cake is also called “bizcocho 1 2 3 “.

We prepare if you are traveling into holidays apartments (yes, we I carried the empty tin with us) for a fast breakfast and a snack for our road trips.

For the easiest version you may use the container of your yogurt as the measure of 1 cup.

See also the Spanish version on youtube: https://www.youtube.com/watch?v=pgdaD_EJX-E&ab_channel=Elrinc%C3%B3ndelpancasero

The combination of cassis and lemon gives to this cake a very strong and refreshing flavour.

We tried also these great variations:

  • Limes instead of lemons
  • Black berries, blueberries or “josta berries” instead of cassis
  • Skip the berries and convert this cake into a lemon cake

Black Currants and Lemon Cake

  • Servings: about 12
  • Difficulty: easy
  • Print

Ingredients

Batter:

  • 1 cup yogurt (any yogurt but for us Greek plain yogurt is the best)
  • ½ cup oil (original recipe: 1 cup)
  • 1 ½ cups sugar (original recipe 2 cups)
  • 3 (if you use the size of the container of the yogurt instead of “cup”) or 4 eggs (if using the official “cup”)
  • 1 lemon, zest grated
  • 1 lemon, juice
  • 3 cups flour
  • 2 teaspoons baking powder (1 envelope)
  • 1 teaspoon vanilla (1 envelope)

Fruits:

  • 1 cup black currents (cassis)  or other berries

Topping (optional)

  • Sugar pearls

Preparation:

  1. Preheat the oven to 180°C/350°F and line you mold (about 30 cm of length) with baking or aluminum foil.
  2. In a big bowl combine all the ingredients for the batter.
  3. Fold under the berries.
  4. Pour the dough into your prepared mold and add the topping.
  5. Cook for 50-60 minutes at 180°C/350°F or until done (toothpick test)
  6. Let cool down and serve.

Autor: https://artandkitchen.wordpress.com/  

Avocado and Oranges Salad with Fennel Fronds

Fronds are those cute frilly light green leafy things attached to the stalks that grow out of a fennel bulb. They look like fresh dill, and they have a light taste similar to aniseeds. I grow fennels in my garden especially for these, I add this to spinach or chard to make the Greek kaltzunias (little small pies) and to attract butterflies in my garden. If you buy fennel with these, don’t throw these away and if you do not need them at the moment, freeze them! If you do not get them, then replace them with tinny fennel bulb slices.

The origin of fennel and orange salad is not completely known, but it may have its roots in the Arab world and come to Europe after the invasions of Spain and. The orange salad was created as a poor dish (wild fennel can be found at the border of many roads) and it doesn’t require cooking. Today, the fennel and orange salad is known all over the world and it is served as an appetizer/salad or as a final dish after an important meal.

I love to collect fennel fronds if traveling in Greece in Early spring, the same period as oranges get ripe.

In this recipe I completed the ingredients with avocado for its soft texture and the taste which combines well with citrus, In addition a roasted pine nuts give a welcome crunchy texture.

For the dressing I opted for some white balsamic vinegar flavoured with honey and Dijon mustard.

Avocado and Oranges Salad with Fennel Fronds

  • Servings: 4
  • Difficulty: easy
  • Print

Salad

Ingredients

  • Green salad leaves to cover the bottom and the sides of the serving bowl, washed
  • 2 ripe but firm avocados (reserve some slices for decoration drizzled with lemon juice)
  • 1 tablespoon lemon juice
  • 2 oranges peeled and diced (make a few slices and reserve for decoration)
  • 2-4 tablespoons fennel fronds, chopped (reserve some for the topping)
  • 2-4 tablespoons green onions slices (reserve some for the topping)

Dressing

  • 2 tablespoons white balsamic vinegar
  • 1 tablespoon lemon juice
  • 1 tablespoon Dijon mustard
  • 4 tablespoons olive oil
  • 2 teaspoons honey
  • Salt and pepper to taste

Topping

  • Reserved herbs
  • 2 tablespoons pine nuts, lightly roasted

Procedure

  1. Arrange the green salad in the bowl.
  2. Peel and slice the first avocado, place then in another bowl and sprinkle with the lemon juice and toss well with your hands. Peel and slice the second avocado add this to the first and gently again toss them together.
  3. Add the other ingredients for the salad over the avocados.
  4. Combine well the ingredients for the dressing.
  5. Pour the dressing over the salad and very gently toss them together.
  6. Place the mixture over the arranged salad leaves, decorate with the reserved avocado and orange slices and sprinkle with the herbs and the pine nuts

Autor: https://artandkitchen.wordpress.com/

Mast-o-Khiar – Persian Yogurt Dip

ماست و خیار Mast-o-khiar is a delicious, cooling and very popular Persian dish that is served with most meals. You will find the combination of yogurt and cucumbers in Greece (Tsatziki), but also in many other Balkan and Arabic countries and as well from Turkey to India (Raita).

The use of rose petals (fresh or dried) and rosewater for cooking was popular all over the Middle East and spread to Europe during the Middle Ages.  However rosewater had been replaced by vanilla once world exploration had been brought from America to Europe. 

About 20 years ago we planted in our garden a very strong scented white and red striped rose, since then its petals had been used in our cooking for several sweet recipes and we prepared hundreds of rose jam jars.

The basic ingredients for Mast-o-Khiar are yogurt, cucumber, mint, rose petals, salt and garlic. Other herbs can be added as well as chopped walnuts and raisins.

Tip: skip the cucumber for a delicious sauce for salad.

Mast-o-Khiar - Persian Yogurt Dip

  • Servings: 4
  • Difficulty: easy
  • Print

Ingredients

Dip:

  • 1 cup Greek or Balcan yogurt ( better 7-10% but you may also use the 2% fat reduced quality)
    • 100 g (about ¾ cup) chopped cucumber
    • 2 tablespoons fresh mint, chopped (I use the “Diosmos” Greek mint for this dish)
    • 1 tablespoon fresh dill, chopped (optional)
    • 1 garlic clove pressed or/and 2 tablespoons fresh chives finely chopped
    • 2 tablespoons dried rose petals, crushed or minced
    • salt and pepper to taste
    • 2 tablespoons chopped walnuts (optional)
    • 2 tablespoons coarsely chopped raisins (optional)

Topping (as desired):

  • dried or/and fresh rose petals
    • dried or/and fresh mint
    • dried or/and fresh dill
    • chopped walnuts
    • raisins

Procedure

  1. Combine well all the ingredients for the dip and adjust salt and pepper to taste.
  2. Pour the mixture into a serving bowl or dish. Refrigerate for at least one hour or best to allow the flavors to blend.
  3. Just before serving, sprinkle the ingredients for the topping with a nice geometrical pattern or simply randomized.

Autor: https://artandkitchen.wordpress.com/

See also:

Rhubarb Tarte-Tatin

This month we got a lot of rain! Too much! Nevertheless my rhubarb seems to like it and it is growing like a weed.

The best way to keep it under control and make my family happy is to bake something with it! 

In the past years I made different cakes with rhubarb, but as usually I wish to try something different and see how it comes out!

This recipe is super simple, not so many ingredients are needed, it is quick done and it looks fabulous!

Serve this fresh cake best with roasted pistachios or almonds.

Rhubarb Tarte-Tatin

  • Servings: 8
  • Difficulty: easy
  • Print

Ingredients

Base:

  • 15 g butter, melted
  • 100 g sugar
  • 500 g Rhubarb, cleaned cut into 3-5 cm pieces (or as you like)

Batter:

  • 50 g butter, softened
  • 150 g Greek yogurt
  • 100 g sugar
  • 1 teaspoon vanilla sugar
  • 2 Eier
  • 225 g flour
  • 1 teaspoon baking powder

Topping:

  • 2 tablespoons chopped roasted pistachios (alternative: almonds)

Procedure

  1. Preheat the oven to 200°C/400°F.
  2. Cover the bottom of a Springform with baking paper.
  3. For the base: Brush with the melted butter and sprinkle with the sugar. Arrange Rhubarb on it.
  4. In a bowl, whisk together the butter, the yogurt, the sugar and the vanilla sugar. Add the eggs and whisk until well combined.
  5. In another bowl, sift together flour and baking powder.
  6. Add the dry mix to the wet mix and incorporate well with a spatula.
  7. Spoon the batter over the arranged rhubarb and smooth well with a spatula.
  8. Bake at 200°C/400°F for about 30-35 minute or until risen, golden brown and a skewer inserted into the middle of the cake comes out clean.
  9. Remove from the oven and let sit for about 5 minutes. Run a knife around the edges and carefully remove the border of the Springform and let cool down completely on a grid.
  10. Invert on a serving plate, remove the bottom of the Springform and carefully the baking paper.
  11. Serving suggestion: garnish with chopped roasted pistachios.

Autor: https://artandkitchen.wordpress.com/