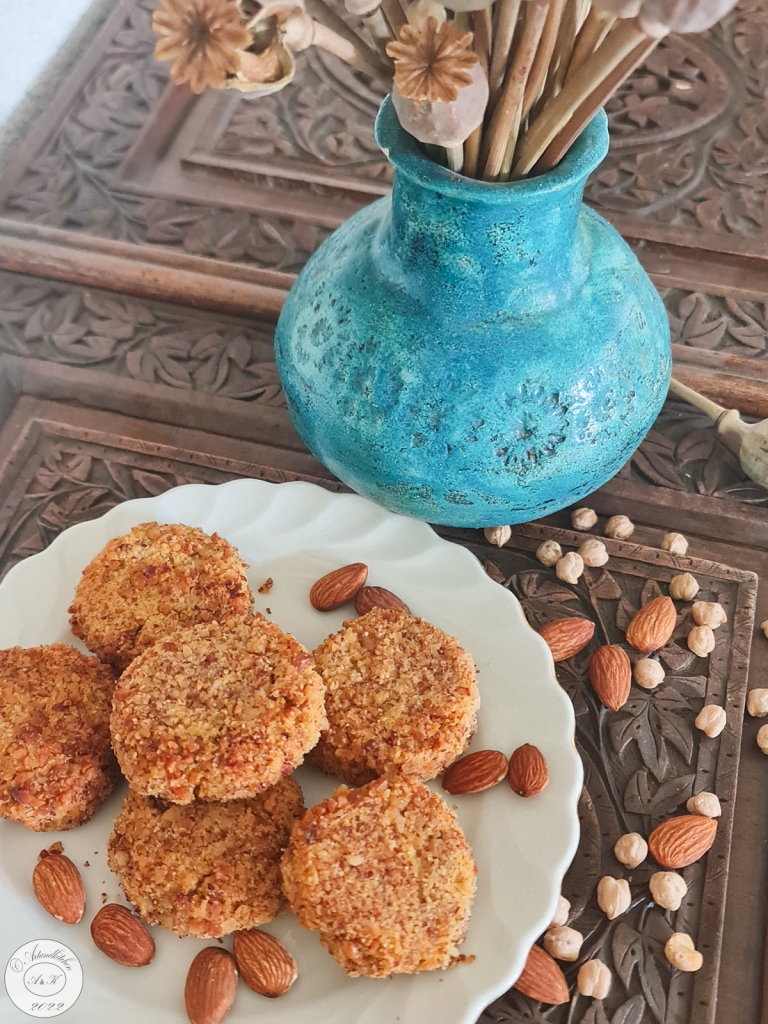
Chickpea Croquettes with Parmesan Cheese and Almonds

Today I would like to present you a very tasty recipe of chickpeas cakes enriched with Parmesan cheese, almonds and spices.

They are very easy to be prepared and only a few ingredients are needed.

With a rich salad and if you maybe a yogurt sauce they can make a great full but still light meal.

You may adapt the recipe to you taste for example with some herbs, with garlic or roasted onions or other spices. Enjoy!

You may also make bigger ones and make of them burgers.

Chickpea Croquettes with Parmesan Cheese and Almonds

  • Servings: 4-6
  • Difficulty: medium
  • Print

Ingredients

  • 400 g chickpeas, precooked and drained
  • 80 g Parmesan cheese, grated
  • 80 g almonds, grinded
  • 1 egg
  • ½ teaspoon coriander ground, quantity to taste (or other spices or herbs to taste)
  • Salt and pepper to taste
  • More or less 100 g grinded almonds for coating
  • Oil for frying (I used olive oil)

Preparation

  1. Drain well your chickpeas and blend them until smooth
  2. Add cheese, almonds, egg, spices and salt and pepper. Combine well working this with a fork or a spoon. Adjust spices, salt and pepper to taste. If the mixture results to wet, add some more grinded almonds.
  3. Scoop some mixture, form to ball with your hands, make the little flat and coat them in the additional grinded almonds. Place on a plate until you will have all them ready.
  4. In a non-sticky skillet heat little oil. Place the croquettes to fry gently. Brush or drizzle the upper side with oil. Turn when they begins to brown and cook on the other side until golden. Do not overcook them as they are delicious especially if moist.
  5. Serve them preferably warm.

Autor: https://artandkitchen.wordpress.com/  

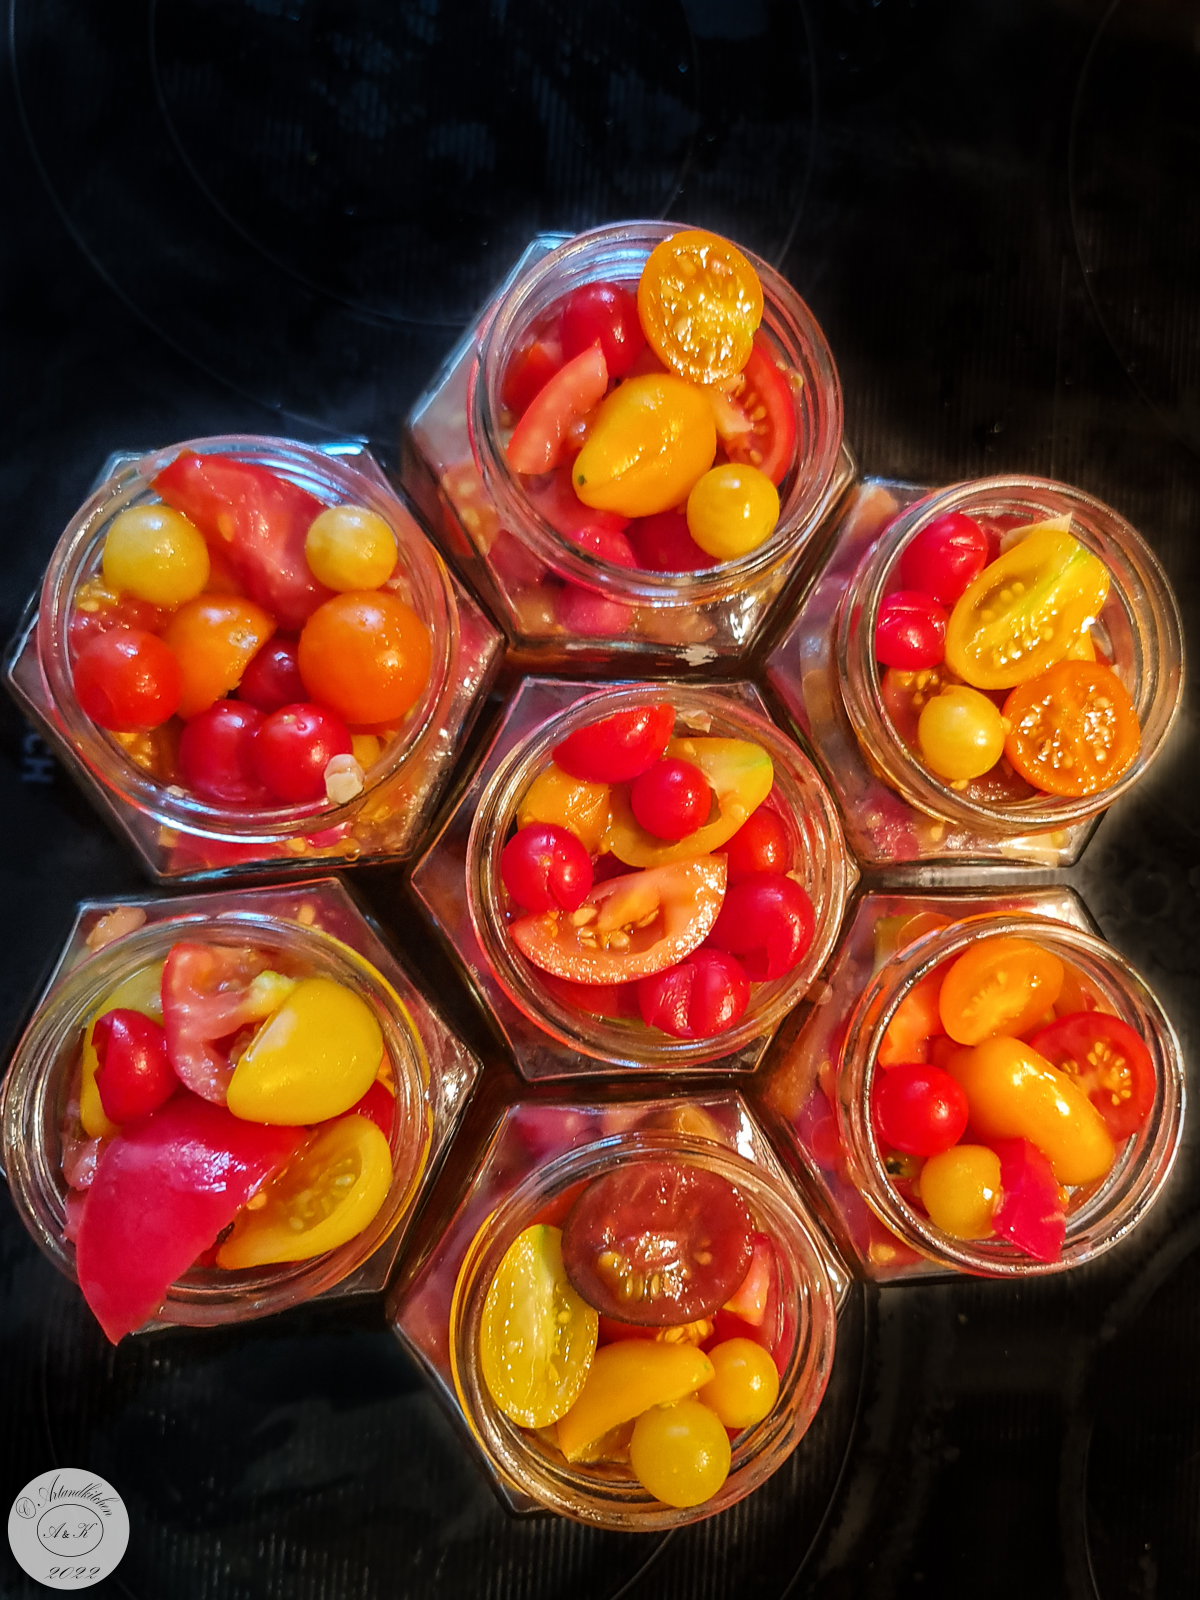
Preserved Tomatoes with Basil in Jars

Do want to keep the taste of the summer for the winter?

This is a simple but easy way to preserve the full flavour of your tomatoes and at the same time to have quick ready dish when you feel you are missing the sun and your fresh tomatoes from the garden.

This year we got a wonderful tomatoes harvest and we are still harvesting every day. We exchanged seed with friends and so we got an incredible variety of tomatoes and other vegetables. Now the winter is approaching, we all have to save electricity and with this method you will prepare great pasta dishes without spending a lot of time in cooking your tomatoes sauce.

Important! For sterilization with a pressure canner, please follow the instruction for the equipment. Depending on the Country you live, you will find completely different safety instruction about canning and possible botulinum poisoning.

Processing time for canning articles:

Preserved Tomatoes with Basil in Jars

  • Difficulty: medium
  • Print

Ingredients

natural-preserved-tomatoes-with-basil-6 All quantity to taste and according to your harvest J
  • Ripe tomatoes
  • Olive oil (about 4 tablespoons per kg tomatoes)
  • Garlic, chopped to taste
  • Balsamic vinegar (4 tablespoons per kg tomatoes), this is needed for longer storage
  • Salt (about 1 teaspoon per kg tomatoes)
  • Basil leaves or flowers to taste

Preparation

  1. Clean and dice tomatoes according to their size. I did not dice wild tomatoes, I halved cherry tomatoes and the other tomatoes in 1- 1.5 cm big sizes.
  2. Heat oil and add the garlic. Roast only a few minutes until fragrant.
  3. Remove garlic-oil mixture and pour it over the prepared tomatoes. Add vinegar and little salt.
  4. Combine gently and let sit for about 2 hours. They will release some juices.
  5. Add basil and stir well.
  6. Place the tomatoes mixture into the jars. Fill jars, leaving 2 cm headspace. Press gently down the tomatoes in order to cover the pieces with their juices.. Slide a nonmetallic spatula (a plastic knife works well) around the inside edge of the jar, pressing back gently on tomatoes to release any air bubbles. Do not add water.
  7. Use a clean, damp cloth to wipe any tomato residue from the outer rim of the jar. This is necessary in order seal tight the jars. Screw lid evenly and firmly, but not too tight; just until resistance is met and lids are fingertip tight.
  8. I performed the “heat treatment” of the canned tomatoes in water bath. Place the jars into big pot (or use a canner). Fill with warm water. The water must cover the jars by 2 cm. Bring to a rolling boil, cover the pot and boil for 60 minutes if using 250-500 ml jars. Let cool down completely before removing the jars from the pot. Check if the lid is tightly closed after cooling down.  For heat treatment, please follow the instruction of your equipment (for example the pressure canner) and the following link: https://extension.umn.edu/preserving-and-preparing/canning-quick-reference-chart.
Suggestion: place the jar in water bath or shortly in microwave and serve over hot pasta with fresh grated Parmesan cheese and fresh basil Autor: https://artandkitchen.wordpress.com/

This slideshow requires JavaScript.

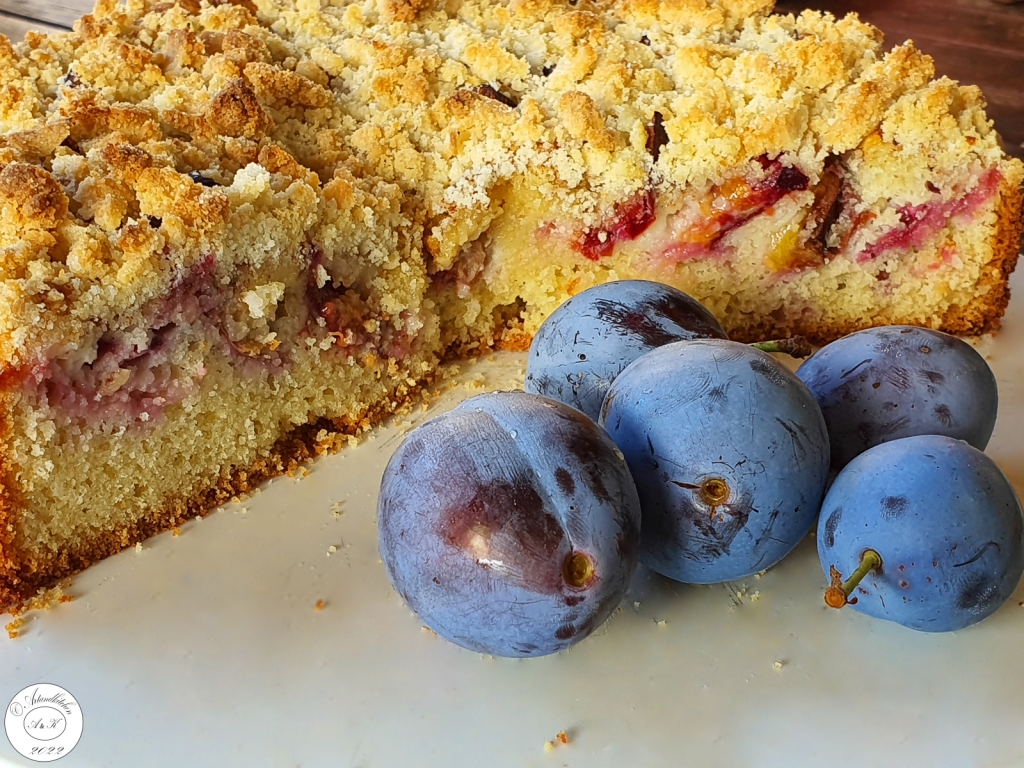
Plum Almond Crumble Cake

This sumptuous delicious almond cake is topped with plums and perfumed with cinnamon. It has a soft base, a juicy fruity layer and at the same time it has a crunchy topping.

I imagine that this recipe could be used for many kind of fruits. Not only apricots, peaches, nectarines, but also apples, pears and why not, many kind of berries.

Plum Almond Crumble Cake

  • Servings: about 12
  • Difficulty: easy
  • Print

Ingredients

Tin preparation

  • Oil or butter to coat the tin
  • About 2 tablespoons ground almonds

Cake

  • 80 g oil
  • 185 g sugar
  • 4 large eggs
  • 250 g flour
  • 2 tsp baking powder
  • 1 tsp vanilla powder
  • 100 g ground almonds
  • 85 g plain Greek yogurt (10 %fat)

Topping

  • 500 fresh plums , quartered and stoned
  • Cinnamon to dust, optional

Crumble

  • 100 g ground almonds (minus almonds used for the tin)
  • 30 g flour
  • 50 g sugar
  • 50 g butter

Preparation

  1. Preheat the oven to 175°C (convection oven) or 180°C (conventional oven).
  2. Coat the tin (I used a 26 cm wide springform) with oil or butter and dust with ground almonds.
  3. For the cake, put the oil, sugar, eggs, flour, baking powder, vanilla, ground almonds and yogurt in a big bowl. Beat with an electric whisk until smooth and pour this batter into the tin.
  4. Arrange the plums vertically pushing them partially into the sponge batter and dust with cinnamon to taste.
  5. Put all the crumble ingredients in a bowl, cut in the butter with a forj and rub together with your hands until crumbly. Finally scatter the crumble over the plums
  6. Bake for about 50 minutes until done (test: a skewer poked into the cake mixture comes out clean but plums will remain sticky).
  7. Let cool down on a wire rack.

Serving suggestion:

  • Serve cold with plain yogurt, sour cream or whipped cream
    • Serve lukewarm with vanilla ice cream

Autor: https://artandkitchen.wordpress.com/  

Avocado and Oranges Salad with Fennel Fronds

Fronds are those cute frilly light green leafy things attached to the stalks that grow out of a fennel bulb. They look like fresh dill, and they have a light taste similar to aniseeds. I grow fennels in my garden especially for these, I add this to spinach or chard to make the Greek kaltzunias (little small pies) and to attract butterflies in my garden. If you buy fennel with these, don’t throw these away and if you do not need them at the moment, freeze them! If you do not get them, then replace them with tinny fennel bulb slices.

The origin of fennel and orange salad is not completely known, but it may have its roots in the Arab world and come to Europe after the invasions of Spain and. The orange salad was created as a poor dish (wild fennel can be found at the border of many roads) and it doesn’t require cooking. Today, the fennel and orange salad is known all over the world and it is served as an appetizer/salad or as a final dish after an important meal.

I love to collect fennel fronds if traveling in Greece in Early spring, the same period as oranges get ripe.

In this recipe I completed the ingredients with avocado for its soft texture and the taste which combines well with citrus, In addition a roasted pine nuts give a welcome crunchy texture.

For the dressing I opted for some white balsamic vinegar flavoured with honey and Dijon mustard.

Avocado and Oranges Salad with Fennel Fronds

  • Servings: 4
  • Difficulty: easy
  • Print

Salad

Ingredients

  • Green salad leaves to cover the bottom and the sides of the serving bowl, washed
  • 2 ripe but firm avocados (reserve some slices for decoration drizzled with lemon juice)
  • 1 tablespoon lemon juice
  • 2 oranges peeled and diced (make a few slices and reserve for decoration)
  • 2-4 tablespoons fennel fronds, chopped (reserve some for the topping)
  • 2-4 tablespoons green onions slices (reserve some for the topping)

Dressing

  • 2 tablespoons white balsamic vinegar
  • 1 tablespoon lemon juice
  • 1 tablespoon Dijon mustard
  • 4 tablespoons olive oil
  • 2 teaspoons honey
  • Salt and pepper to taste

Topping

  • Reserved herbs
  • 2 tablespoons pine nuts, lightly roasted

Procedure

  1. Arrange the green salad in the bowl.
  2. Peel and slice the first avocado, place then in another bowl and sprinkle with the lemon juice and toss well with your hands. Peel and slice the second avocado add this to the first and gently again toss them together.
  3. Add the other ingredients for the salad over the avocados.
  4. Combine well the ingredients for the dressing.
  5. Pour the dressing over the salad and very gently toss them together.
  6. Place the mixture over the arranged salad leaves, decorate with the reserved avocado and orange slices and sprinkle with the herbs and the pine nuts

Autor: https://artandkitchen.wordpress.com/

Roasted Figs with Camembert Cheese and Honey

Camembert Cheese Figs trees are native in the Middle East and western Asia and had been cultivated since ancient times. Today they are widely grown throughout the world, both for its fruit and as an ornamental plant. Two crops of figs can be produced each year. The first or breba crop develops in the spring on last year’s shoot growth. The main fig crop develops on the current year’s shoot growth and ripens in summer (August in Southern Europe) or autumn (September to October in Central Europe). The main crop is generally superior in quantity and quality, but some cultivars produce good breba crops. There are three types of edible figs: some of them need pollination by the fig wasp with pollen for fruiting and some not. In Central Europe where this wasp is not present, the cultivation of figs is possible. This year we had a many figs during summertime (breba crops) and in addition, after the warm September, we are getting many figs again and we are enjoying them. I would like to present you this simple but very impressive recipe, which is perfect for a starter or appetizer.

Roasted Figs with Camembert Cheese and Honey

  • Servings: 8 figs
  • Difficulty: easy
  • Print

Ingredients:

  • 8 Figs, washed
  • 100 g Camembert cheese or Brie cheese, diced
  • Nutmeg, quantity to taste
  • Salt, only a very small pinch for each fig (I used my basil flower salt)
  • blanched sliced or slivered almonds (alternatively chopped walnuts)
  • 4 teaspoons honey, quantity to taste
  • Fresh savoury or thyme (alternatively dried thyme)

Procedure:

  1. Remove the stem of the figs and simply slice into the figs as if you were quartering them but do not go all the way down. You want the figs to open out like a flower but not fall apart completely.
  2. Distribute the cheese into the center of the figs
  3. Sprinkle little nutmeg and salt on them
  4. Adjust the almonds over the cheese
  5. Bake them in the preheated oven at 200°C/400°F or until the almonds are lightly roasted and the cheese begins to melt.
  6. Arrange the figs on serving dishes spoon the honey over them and add the herbs.
  7. Serve if possible immediately
Autor: https://artandkitchen.wordpress.com/

Quince and Potato Cheesy Gratin

Apples and grapes are already places in the storage room or converted in juice. Now it’s the turn for the our beloved quinces; this year we have really a lot of them and I’m looking for to try as much as possible different recipes. We all love sweets and cakes, but as quinces are very versatile, I hope we will travel virtually around the world and bring something new in our kitchen.

This recipe was inspired on an apple and bread ramequin. It is an autumn recipe for and comfort fully satisfying meal; you may serve this for Thanksgiving as well! 

Quince and Potato Cheesy Gratin

  • Servings: 4-6
  • Difficulty: easy
  • Print

Ingredients:

  • 1000 g quinces, cored and sliced (about 5 mm thin)
  • 1000 g baking potatoes, peeled and sliced (about 5 mm thin)
  • 100 g mozzarella cheese, sliced
  • 150-200 g Swiss Cheese as for example Gruyere, sliced
  • 2 eggs
  • 250 ml milk
  • 100 ml heavy cream
  • 1 tablespoon flour
  • ½-1 tablespoon fresh rosemary chopped (or 1 teaspoon dried)
  • ½ tablespoon fresh savory chopped (or fresh thyme or ½ teaspoon dried)
  • ¼ teaspoon nutmeg powder
  • Salt (about 1 teaspoon) and pepper to taste

Procedure:

  1. Preheat the oven to 180°C/350°F.
  2. Layer quinces and potatoes diagonally in a baking dish.
  3. Place mozzarella and Swiss cheese between the slices.
  4. In a bowl combine all the other ingredients and whisk until smooth.
  5. Pour the mixture equally over the ingredients in the baking dish.
  6. Bake for about 1 hour at 180°C/350°F until the potatoes are soft. If necessary during the cooking time cover with a parchment foil or lid in the case the surface turns to dark.

Variations & Ideas:

  • Instead quinces use apples or pears
  • Instead of potatoes use stale bread or sweet potatoes
  • Replace mozzarella and Swiss cheese with any grated melting cheese
  • Instead of milk, heavy cream, eggs and flour use 500 ml of béchamel sauce
  • Experiment with different spices
  • Cut slices of leftover gratin and fry on all sides for a crispy way to give it new life

    Autor: https://artandkitchen.wordpress.com/

Day 27 Stay at Home or In the Garden: Overnight Sourdough Waffles

Who does not dream warm crispy waffles for breakfast?

Our daughter prepared her new sourdough starter and this was her very first recipe with her new “baby”. We enjoyed these super delicious waffles for breakfast with our honey.

This waffles can be prepared with sourdough starter leftovers after refreshment of your culture.

At the end, we got much more waffles than what we needed, but we froze what we did not eat and we will probably reheat the waffles directly placing them for a very short time in the hot iron again! Here other ways to reheat them: https://www.vintagecooking.com/how-to-reheat-leftover-waffles/

Overnight Sourdough Waffles

  • Servings: 20 pieces
  • Difficulty: easy
  • Print
     

Ingredients

Overnight Dough

  • 1 cup active sourdough starter 
  • 1 cup yogurt
  • 1 cup milk
  • 2 cups flour
  • 6 tablespoons sugar

Final Batter

  • 2  eggs
  • ¼ cup  melted butter or vegetable oil
  • ½ teaspoon salt
  • 1 teaspoon baking soda
  • 1 tablespoon vanilla

Instructions

  1. Combine and mix all the ingredients for the Overnight Dough in a big bowl. Cover (do not close tightly). Let sit overnight at room temperature or for more or less 8 hours. After this time the dough should be risen and a spongy.
  2. In a bowl, combine the additional ingredients.
  3. Stir or better fold under this mixture into the sponge. The dough should stay soft!
  4. Preheat your waffle iron.
  5. Cook the waffles according to your waffle maker’s instruction.
  6. In our case, we used ½ cup batter for each waffle (about 10 to 10 cm square). This took 5 minutes for each pair of waffles. After this time, they were golden brown, cooked through and crispy outside. To remove the waffles form the iron we used a silicon spatula.
  7. Repeat with the remaining batter. At the end, we got 20 waffles.

Autor: https://artandkitchen.wordpress.com/

This slideshow requires JavaScript.

Day 22 Stay at Home or In the Garden: Greek Chickpeas Soup

Missing Crete and missing Greece, we made a culinary excursion to Sifnos preparing and enjoying a super simple and delicous chickpeas soup called “revithia soupa” (ρεβύθια σούπα).

The ingredients for this soup are super simple: chickpeas, lemon, oilive oil, onion, water and salt. 

As traditionally these soup is prepared in the night from Saturday to Sunday with the remaining heat of the wooden oven and we really used the wooden oven the day before, this was just the right moment for this soup.

More about the history of this soup and the recipe: https://artandkitchen.wordpress.com/2015/03/24/revithia-soupa-greek-chickpeas-soup/


Day 21 Stay at Home or In the Garden: Bread and Honey

Best way to start the morning: a delicious homemade bread, with homemade honey and fabulous coffee.

The recipes:

Sourdough Bread Baked in Wooden Oven

Hot Golden Spiced Frappuccino

This slideshow requires JavaScript.

Day 19: Stay at Home or In the Garden: Arancini di Risotto allo Zafferrano

Every time we prepare saffron risotto (Italian Pilaf), we prepare some more as next day we love the leftovers lightly fried in the skilled until it becomes a crunchy crust.

Today I noticed a recipe form Sicily called “arancini”, this was the inspiration for mine, and I created a North Italian version with North Italian ingredients….and the ingredients I have at home now after two weeks of “stay at home” and without shopping trips!

In the fridge, we had some grated mozzarella, but I suggest it possible to use the fresh one (cut into cubes) or another soft North Italian or Swiss Italian cheese as for example “formaggella”.

Arancini di Risotto allo Zafferrano

  • Servings: 4-6
  • Difficulty: easy
  • Print
     

Ingredients

Oil for the baking try and for your hands

  • 1000 g cold saffron risotto, mine was prepared with dried porcini
  • 5 tablespoons grated parmesan cheese or better formaggella, quantity to taste
  • 150 g mozzarella, grated or cut into cubes
  • 6 tablespoons bread crumbs
  • Dried herbs to taste (I suggest rosemary) to taste
  • Salt (I used my homemade salt with dried basil flowers) to taste
  • Pepper to taste

Procedure

  1. Combine the risotto with the parmesan if this was not included already in the saffron recipe. Dived it into about 12 portions.
  2. Dived the cheese into the same quantity of portions.
  3. Coat your baking tray and your hand with oil.
  4. Take the first risotto portion with you hand, flatten it little bit and place the cheese inside. Carefully close it into a ball and place it on the tray. Repeat with all the rice and cheese portions. Remember to coat your hands when needed.
  5. Combine breadcrumbs, herbs salt and pepper.
  6. Roll the first ball into the crumbs mixture and place it on the tray again.
  7. Preheat the oven to 200°C and bake the balls until golden brown and crispy. This takes about  25-30 minutes.

Autor: https://artandkitchen.wordpress.com/

This slideshow requires JavaScript.