Mast-o-Khiar – Persian Yogurt Dip

ماست و خیار Mast-o-khiar is a delicious, cooling and very popular Persian dish that is served with most meals. You will find the combination of yogurt and cucumbers in Greece (Tsatziki), but also in many other Balkan and Arabic countries and as well from Turkey to India (Raita).

The use of rose petals (fresh or dried) and rosewater for cooking was popular all over the Middle East and spread to Europe during the Middle Ages.  However rosewater had been replaced by vanilla once world exploration had been brought from America to Europe. 

About 20 years ago we planted in our garden a very strong scented white and red striped rose, since then its petals had been used in our cooking for several sweet recipes and we prepared hundreds of rose jam jars.

The basic ingredients for Mast-o-Khiar are yogurt, cucumber, mint, rose petals, salt and garlic. Other herbs can be added as well as chopped walnuts and raisins.

Tip: skip the cucumber for a delicious sauce for salad.

Mast-o-Khiar - Persian Yogurt Dip

  • Servings: 4
  • Difficulty: easy
  • Print

Ingredients

Dip:

  • 1 cup Greek or Balcan yogurt ( better 7-10% but you may also use the 2% fat reduced quality)
    • 100 g (about ¾ cup) chopped cucumber
    • 2 tablespoons fresh mint, chopped (I use the “Diosmos” Greek mint for this dish)
    • 1 tablespoon fresh dill, chopped (optional)
    • 1 garlic clove pressed or/and 2 tablespoons fresh chives finely chopped
    • 2 tablespoons dried rose petals, crushed or minced
    • salt and pepper to taste
    • 2 tablespoons chopped walnuts (optional)
    • 2 tablespoons coarsely chopped raisins (optional)

Topping (as desired):

  • dried or/and fresh rose petals
    • dried or/and fresh mint
    • dried or/and fresh dill
    • chopped walnuts
    • raisins

Procedure

  1. Combine well all the ingredients for the dip and adjust salt and pepper to taste.
  2. Pour the mixture into a serving bowl or dish. Refrigerate for at least one hour or best to allow the flavors to blend.
  3. Just before serving, sprinkle the ingredients for the topping with a nice geometrical pattern or simply randomized.

Autor: https://artandkitchen.wordpress.com/

See also:

Guacamole con Tomates

Guacamole is very popular Mexican dip with many variations.

This variation, which includes also the use of tomatoes, is the most appreciated in our family and every times is comes out a bit different as we do not measure the ingredients, we change it a little bit depending on what we have on hand.

This is great as appetizer with tortilla chips, but also with wraps or other dishes.

Guacamole con Tomates

  • Servings: 2
  • Difficulty: easy
  • Print

Ingredients

  • 50 g chopped onions
  • 1 avocado, ripe
  • 1 tablespoon lime juice
  • 1 tablespoon fresh cilantro, chopped
  • 1 pinch of salt, to taste
  • 1 medium tomato or about 10 cherry tomatoes, diced
  • 1 teaspoon Worcestershire sauce (optional)
  • 1 dash chili powder or other little chili sauce or some paprika powder (optional)

Procedure

  1. Place the chopped onions in a small bowl with cold water (this for about 10 minutes)
  2. In a small bowl mash the avocado with the fork
  3. Drain the onions and add them to the mashed avocado along with the other ingredients.
  4. Combine very well and season to taste

Autor: https://artandkitchen.wordpress.com/

Dried Figs stuffed with Almonds and Orange Zest

This year we had a very warm summer and the garden gave us a lot delicious figs, which we shared with friends.

However, it was only during our holidays on Crete after noticing that most of the figs fall on the floor and, as I hate food waste, I decided to try to dry some figs and prepare a great souvenir of the summer in a jar.

The good thing we had for this, beside the figs of course was the sun; the strong Greek sun is best to preserve these figs and for this reason, I searched in the internet how I should proceed.

To make them more special, I decided to modify an Italian recipe (from the *Puglie* region) and so I started to collect ripe but still firm green and black figs and to dry them in the sun!

Figs can be dried halved or cut in two pieces; I opted to cut them into two halves as the effect of the sun would be stronger drying the figs quickly and the rays would destroy all possible parasites.

The best way to dry them would be on a grid, but since I did not have this, I used my normal baking try with a black baking foil, which attracted the sun and kept the heat; in two days, the figs were dry enough, some of them almost to dry! J

If you don’t have the opportunity to collect and dry the figs, you should opt for the dry figs from the store and halve them with a scissor taking care to keep them partially attached.

These figs are an unusual addition to the holiday table and make a unique Christmas gift from the kitchen!

Dried Figs stuffed with Almonds and Orange Zest

  • Difficulty: easy
  • Print

You need

  • 50 dried figs, butterflied
  • 1 orange, peel only removed with a vegetable peeler and cut into small pieces
  • 50 almonds
  • 1 tablespoon powdered sugar
  • 1 pinch o cinnamon
  • 10-20 bay leaves

Procedure

  1. Add a piece of orange peel on one side of the butterflied fig.
  2. Add an almond on each it and cover with the other side. Press them well together.
  3. Bake for 10 minutes at 180°C/350°F, Check on the color and temperature as cooking time may vary from oven to oven!
  4. In the meantime, combine the powdered sugar with the cinnamon.
  5. Switch off the oven, take out the figs out, dust with sugar and place them in the oven for other 5 minutes.
  6. In order to store them for a long time, place the still warm figs into sterilized jars layered and with several bay leaves between the layers for added flavor. Store the jar in a cool dry place.

Tip1: After sun drying the figs, some of them resulted very dry, too dry for this preparation, for this reason I placed them in bowl, sprinkled them with water (about tablespoons for 5 cups of dried figs) covered them, and placed in the microwave for 2 two minutes. After resting for about 10 minutes they were ready for this preparation.

Tip2: Quartered walnuts and orange zest by lemon or tangerine zest may replace Almonds!

Author: https://artandkitchen.wordpress.com/

This slideshow requires JavaScript.

Papas Arrugadas con Mojo Verde Y Rojo – Canarian Wrinkly Potatoes with Green and Red Sauce

papas-arrugadas-con-mojo-rojo-y-verde

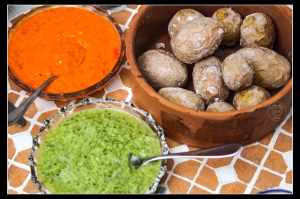
Almost anyone that has visited the Canary Islands would have enjoyed these potatoes served as a side dish. These little salty and absolutely delicious potatoes are amazing when served with Mojo sauces.

We just came home from our holidays on Tenerife and this is a recipe which I need to share and I hope you will enjoy.

Probably the origin of this cooking method came from the people who tried to cook their potatoes in sea water until the water was evaporated and the white coat of salt covered the potatoes.

How healthy is sea water depends on the water quality, some say that it is better not to try and on the other hand some chefs appreciate this very much.

I found this cooking method very interesting as the “wrinkly” result of due to the osmotic phenomenon which occurs while cooking: the potatoes are covered with salted water and to balance the salt concentration while cooking the juices of the potatoes migrate through the “semipermeable”, the potatoes wrinkle and at the end a crystalline layer of salt cover the skins.

In the contrary if the concentration of salts is greater outside then inside (cooking in water without salt), water tends to migrate through the semipermeable membrane to balance the concentration and the potatoes will swollen and the skin will break.

We enjoyed mojos sauces every day, here you will give you my recipes. The original way to prepare mojos was with the mortar; today a good blender is perfect for this recipe and you will get this extraordinary sauces ready in a few minutes.

These mojos are great served with other dishes as well as with meat, fish and over grilled cheese; in restaurants are often served just after arriving with the bread! Don’t wait and try them out.

Papas Arrugadas con Mojo Verde Y Rojo – Canarian Wrinkly Potatoes with Green and Red Sauce

  • Servings: 2-4
  • Difficulty: easy
  • Print

You need papas-arrugadas-con-mojo-rojo-y-verde

Papas arrugadas

  • 500 g small salad or new potatoes, washed
  • Water
  • 25 g sea salt (or more, about 100 g)
  • 1/2 teaspoon salt if you while cooking you use “only” 50 g sea salt

For the Mojo Verde

  • 50 g fresh cilantro (can be partly or entirely substituted by parsley)
  • 6 tablespoons mild olive oil
  • 1 clove garlic
  • 1 tablespoon white wine vinegar
  • 1/2 teaspoon sea salt
  • 1 pinch cumin, optional
  • Dried and fried or toasted white breadcrumbs, optional to taste
  • 1/2 green pepper, optional

Mojo Picón or mojo rojo

  • 50 ml olive oil
  • 5 ml vinegar
  • 2 garlic cloves, or more to taste
  • 1 chili
  • 1 red pepper, cored and seeds removed
  • 1/2 tablespoon paprika
  • 1 pinch smoked paprika, optional (my personal addition)
  • 1/2 tablespoon cumin ground
  • 1/2 teaspoon salt
  • Dried and fried or toasted white breadcrumbs, optional to taste

Procedure

Papas arrugadas

  1. Place the potatoes into a pan and add just enough water so potatoes are not completely covered. Add the salt and bring to the boil.
  2. Reduce heat to medium at a lively simmer uncovered until potatoes are tender, 20-30 minutes. Stir gently with a wooden spoon from time to time.
  3. At this point the water should have reduced a lot.
  4. Drain the excess water and place the potatoes in the still warm pan the salt and pepper if you like. Heat gently and stir to coat. Cook until wrinkled for about 5 minutes. (You can perform this step in a preheated oven at 220°C as well).

Mojo verde

  1. If you have a blender, you many simple blend all the ingredients until smooth.
  2. If you prefer the traditional method, start by mashing the garlic with mortar, gradually add the chopped cilantro, then oil and work until smooth then season with the cumin and vinegar to taste.

Notes: This sauce may result quite liquid, if you prefer a thicker one, you many add some breadcrumbs to the preparation.

The other, most traditional option is the addition of green pepper. The simplest way is to use a blender and add this to the other ingredients (I found out that with a mall piece of zucchini works as well)

Mojo Picón or mojo rojo

  1. Simply blend all the ingredients, except of the breadcrumbs.
  2. Season to taste with more salt, garlic or chili.
  3. Add gradually the breadcrumbs until you will reach the consistence you like

Autor: https://artandkitchen.wordpress.com/

Salsa Tatemada – Mexican Charred Veggies Salsa

salsa-tatemada-6

During my stay in Mexico, I had the pleasure to be guest of very good friends and to have an excursion in an enchanted valley and cook our meal on the fire.

Iris share her recipe, she prepared delicious tacos which were served with guacamole, grilled green onions, grilled nopalitos and the delicious salsa tatemada. The best salsa I ever had and a wonderful recipe for my Mexican food memories!

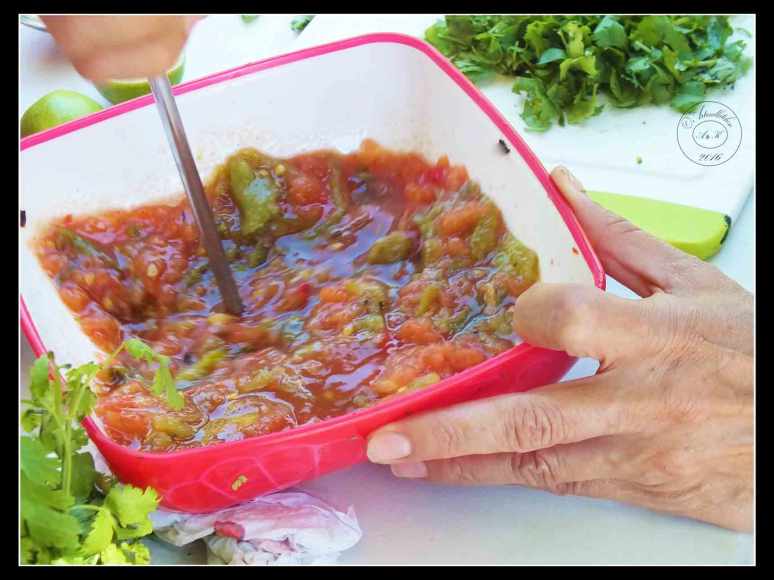
Salsa tatemada means “charred” salsa, because you have to char (grill, roast) your veggies before chopping or puree them. We did not have a mixer, for this reason Iris made this by hand with the instrument you would use to puree cooked potatoes.

I really like the salsa, I found it phenomenal and I also loved the texture (not reduced to puree); for this reason I prepared this at home and I chopped the vegetables finely using my “mezzaluna knive” (a knife consisting of a curved blade with a handle on each end).

At home I also had to adapt the ingredients: instead of jalapeños I used pepperoncini and instead of poblanos I used long shaped red peppers. In any case the salsa turned out wonderful.

Follow here all my post about Baja California Sur

Salsa Tatemada – Mexican Charred Veggies Salsa

  • Servings: 1 -2 cups
  • Difficulty: easy
  • Print

Autor: https://artandkitchen.wordpress.com/ salsa-tatemada-6

You need:

  • 3 tomatoes (jitomates)
  • 2 poblanos peppers (many recipes don’t ask for these)
  • 2 jalapeñoor to taste
  • 2-3 tablespoons chopped fresh cilantro or to taste
  • salt to taste

Procedure

  1. Char the veggies on a grid over hot charcoal.
  2. Turn the veggies until they are soft and the skin of the peppers black.
  3. Place then in a pot with cover, it will be easier to remove the skin.
  4. Remove the skin and eliminate the seeds of the peppers (jalapeños and poblanos).
  5. Puree the grilled veggies best with a mortar or chop them very finely.
  6. Add cilantro and salt to taste.
  7. Serve with grilled meat or simply with tortilla chips

This slideshow requires JavaScript.

Muhammara – Red Pepper and Walnut Spread

Muhammara---Red-Pepper-and-Walnut-Spread-1

Muhammara has its origins in Lebanon but you will find this in Syria, Turkish and other Levantine cuisines and it is eaten as a dip with bread, as a spread for toast, and as a sauce for kebabs, grilled meats, and fish.

The principal ingredients are usually fresh roasted peppers, grounded roasted walnuts, breadcrumbs, and olive oil. As condiment garlic or onion or shallots, salt, lemon juice and pomegranate molasses. As spice I added cumin and paprika, but other spices as coriander, nutmeg, cloves, allspice, cinnamon, mustard and mint are other options.

If you don’t get the pomegranate molasses you can do it yourself bringing to boil ¼ cup of pomegranate juice with one teaspoon sugar and reduce it until thickened; alternative a mix of honey and lemon or honey and little balsamic vinegar.

Muhammara - Red Pepper and Walnut Spread

  • Servings: about 8
  • Difficulty: medium
  • Print

Autor: https://artandkitchen.wordpress.com/


You needMuhammara---Red-Pepper-and-Walnut-Spread-4

  • 5 red peppers, best if you have the long shaped ones (alternative 2-3 red bell peppers
  • 3/4 cup walnuts
  • 6 tablespoon bread crumbs
  • 1 scallion, grated
  • 1 garlic clove, crushed
  • 1 teaspoon lemon juice
  • 1 tablespoon pomegranate molasses
  • 2 tablespoon olive oil
  • 1 teaspoon ground cumin
  • 1 teaspoon paprika
  • 1/4 teaspoon smoked paprika, optional if you cannot broil the pepper on the BBQ
  • 1 teaspoon red pepper flakes
  • Pepper to taste
  • 1 teaspoon salt

 Procedure

  1. If you have the possibility to broil the peppers on the BBQ or open fire, that’s the best method and the spread will turn super the best. If not preheat the oven to 250°C, then turn the grill on. Broil the peppers turning them every 2-4 minutes until the skin is well browned and the peppers soft.
  2. Remove the peppers form the oven and place them in bowl. Cover immediately and let rest for about 15 minutes.
  3. In the meantime roast lightly the walnuts. Chop when cooled down enough to be handled.
  4. Remove skin, seed and stem of the peppers under current water. Drain and chop finely.
  5. Combine chopped red peppers with chopped walnuts as well as all the other listed ingredients. Some people process this with the food processor but I prefer to do it by hand keep the consistence as well as structure.
  6. Let rest for at least 30 minutes before serving.

This slideshow requires JavaScript.

Homemade Crackers with Roasted Beet and Chickpeas Hummus

Homemade-Crackers-with-Roasted-Beet-and-Chickpeas-Hummus

I created these decorative crackers to be served with an impressive red hummus and other dips I’ve posted before.  Both recipes can be prepared in advance and are perfect to be served as appetizer with crackers or pita bread.

I prepared humus with fresh beets, but if you are running out of time I can imagine that it is possible to prepare this with vacuumed boiled beets. You can adapt the spices to your taste!

This impressive red hummus can be prepared in advance and is perfect to be served as appetizer with crackers or pita bread. I prepared this with fresh beets, but if you are running out of time I can imagine that it is possible to prepare this with vacuumed boiled beets.

You can adapt the spices to your taste!

Homemade crackers

  • Difficulty: easy
  • Print

Autor: https://artandkitchen.wordpress.com/Homemade-Crackers-with-Roasted-Beet-and-Chickpeas-Hummus

You need

  • 200 g white flour
  • 60 g whole wheat flour
  • 1 pinch instant yeast
  • 40 g olive oil
  • 1/2 baking powder
  • 1/4 salt
  • 100 ml water or milk
  • Additional salt for topping, optional (see step 3)

Procedure

  1. Knead all the ingredients tougher until you get a smooth dough. Cover and let rest for about 1 hour in a warm place. During this time the yeast will begin to form small bubbles.
  2. Make two portions and roll out (2 mm thick or thinner) the first portion.
  3. Note: You can add more salt spreading some on the sheet and pressing this in with the rolling pin.
  4. Cut out pieces with your favorite shape or cut out in rectangles and place them on a parchment foil. Repeat with the second half. Now you can combine the leftovers and add a teaspoon water to make the dough smooth and cut out again. Repeat until the dough is finished.
  5. Pinch the pieces with a fork a few times.
  6. Preheat the oven and bake for about 10 minutes at 180°C or until the borders begins to turn light brown. Let cool down on a grid to dry completely.


Roasted Beet and Chickpeas Hummus

  • Servings: 8-12
  • Difficulty: easy
  • Print

Autor: https://artandkitchen.wordpress.com/

Roasted-Beet-and-Chickpeas-Hummus

You need

  • 2 small beets, or one big one
  • 1 teaspoon olive oil (to coat the beets
  • 1 can (400 grams/14 ounces) chickpeas, drained and rinsed
  • 1/2 lemon, juice
  • 1/4 teaspoon cumin
  • 2 large cloves garlic, minced
  • 2 tablespoons tahini, substitute: roasted sesame seeds
  • 1/4 cups water
  • 1/2 teaspoons salt, or to taste
  • Pepper to taste
  • 2 tablespoons extra virgin olive oil
  • Green decoration: chopped pistachios, mint leaves or parsley, optional

Procedure

  1. Peel the beets und cut into chunks coat with 1 teaspoon with olive oil. Spread the chunks in a baking tray. Place the beets under the broiler until the borders begins to brown. Remove immediately form the oven.
  2. Add remaining ingredients except for salt, pepper and olive oil and blend until smooth.
  3. Taste and adjust seasonings as needed, adding more salt, lemon juice or olive oil if needed. If it’s too thick, add a bit more water.
  4. Transfer to nice bowl, drizzle with olive oil and decorate with your green selection just before serving!

Gnocchi di Zucca con Salsa ai Porcini

Gnocchi-di-Zucca-con-Salsa-ai-Porcini

Today’s inspiration was a small pumpkin from the garden but at the beginning I planned to prepare simply some spätzle as they are quick to be prepared.

To go with this I was not sure if I wanted to prepare my walnut sauce or a mushrooms sauce. At once I remembered I had some porcini mushrooms in the freezer and with an Italian sauce I found that Italian gnocchi would be better. Perhaps too much work for a weekday dinner, but I could already imagine how good it would be and went in the kitchen.

All together I had about 2 hours, as the boiling/baking time for the potatoes/pumpkin and then the cooling time took a lot of time. The final cooking for the gnocchi and the sauce was quick and the smell coming out of the oven was divine.

Some people may like little cheese as topping; in our case the sauce was so tasty that we really did not need this.

Note: for the sauce I opted for the baking method as frozen mushrooms could turn mush, which is not really attractive. If you have fresh ones (any kind!) you may prepare the sauce in the skillet.

For the best results I really suggest to use porcini mushrooms; I can remember that my grandmother fried dried porcini after soaking them in water, this is another option.

I friend of mine said that eggplants are similar to mushrooms, this would be a method to stretch porcini if you don’t have a lot of them (if you try this, please let me know!).

Gnocchi di Zucca

  • Servings: 4
  • Difficulty: medium
  • Print

Autor: https://artandkitchen.wordpress.com

Gnocchi-di-zucca

For the pumpkin gnocchi you need:

  • 400 g pumpkin pulp, peeled, seed removed and sliced
  • 400 g potatoes, washed
  • 150 g flour, more if necessary
  • 2 teaspoons salt
  • 1 dash nutmeg
  • Four to dust
  • Salt for boiling water
  • 2-4 tablespoons vegetal oil for boiling water

Procedure:

  1. Place pumpkin on a baking tray. Bake at 200°C/400°F for about 30 minutes until soft and lightly roasted
  2. In the meantime boil the potatoes until soft. Time depends form the size
  3. When pumpkin is ready remove from the oven, place in a bowl and mush with the form, do the same with potatoes after peeling them.
  4. Flatten potatoes and pumpkin and let cool down until lukewarm.
  5. Add flour, salt and nutmeg, work with the fork in a big bowl until combined, if it is too wet add some more flour, the should be not to sticky and but still soft!
  6. Slice some of the dough, dust with flour (abundant) and roll it out, cut into 1.5 cm (1/2”) pieces and place on a floured baking tray with parchment paper.
  7. Bing a big pot with water to boil (about 3-4 liters), add salt and water.
  8. Transfer the gnocchi using the parchment paper to the boiling water.
  9. After about 5 minutes the gnocchi should rise, they are now ready.
  10. Use a colander and transfer them into a greased baking mold. Place into warm oven (about 150-180°C) until serving or keep warm if the sauce is not ready

Salsa ai Porcini

  • Servings: 4
  • Difficulty: easy
  • Print

Autor: https://artandkitchen.wordpress.comSalsa-ai-Porcini

For the porcini sauce you need:

  • 300 g porcini mushrooms, frozen and diced
  • 1 tablespoons butter
  • 1 small onion, finely diced (or one shallot)
  • 2/3 cup white wine
  • 1 teaspoon flour
  • 1/3 cup water
  • 1 teaspoon broth granulate (beef, chicken or vegetables broth granulate)
  • 1/3 cup heavy cream
  • Pepper to taste
  • Salt or broth granulate to adjust
  • Parsley to sprinkle

Procedure:

  1. Preheat the oven to 220°C /450°F.
  2. Pour frozen mushrooms on a greased baking mold (mine was about 25 cm / 10 inch wide) and bake for about 5 minutes.
  3. Add onion and bake until the borders of the mushrooms begins to brown.
  4. Dissolve four in wine and water and add granulate.
  5. Pour this mixture over the mushrooms. Stir only once, gently.
  6. When sauce begins to thicken (after about 5 minutes) add heavy cream and pepper. Stir once gently.
  7. Adjust salt if necessary and bake for other 3 minutes.
  8. Remove from the oven, sprinkle with parsley and serve with the gnocchi or pasta.

Carrot and Ginger Yogurt Sauce

Carrot-and-Yogurt-Sauce

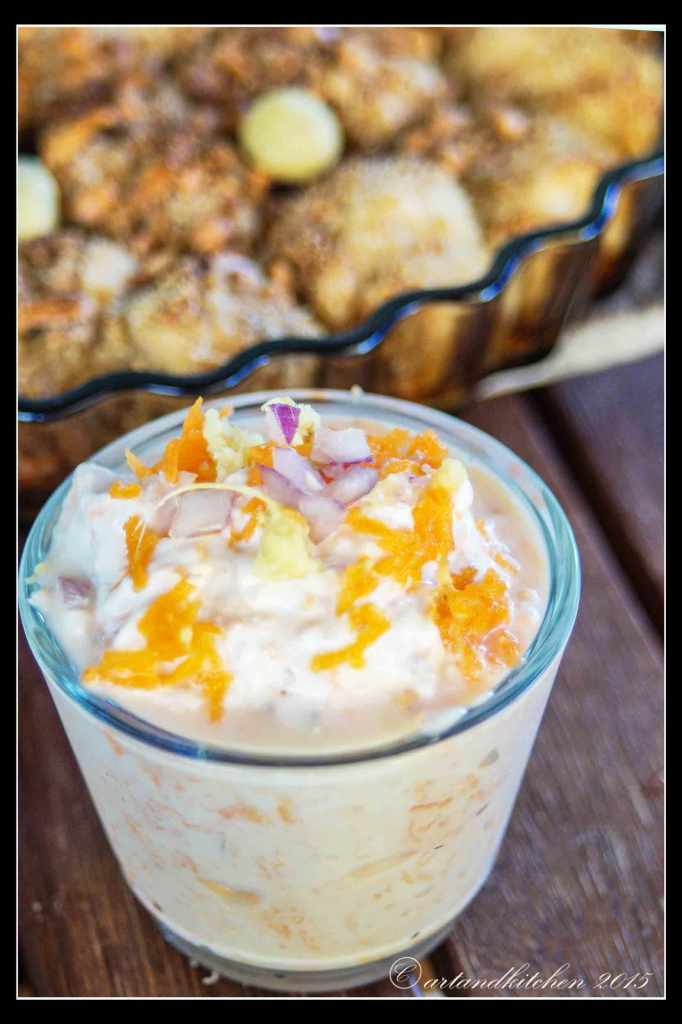
Traveling is my main source of inspiration and this sauce had been ispired form the Indian dish Gajar ka raita (Carrot with yogurt) we had the chance to try years ago in north India.

Having good plain yogurt always on hand and not being a mayo friend yogurt sauces became my favorite quick sauces; they are light, fresh and very versatile. Traveling from Greece to India we can find many different kind of them, starting for example with the Greek Tzatziki.

I can’t call this this sauce “carrot raita” as it’s a very simplified version of it, but we loved this crunchy and refreshing one very much.

Carrot and Ginger Yogurt Sauce

  • Servings: 2/3 cup
  • Difficulty: easy
  • Print

Autor: https://artandkitchen.wordpress.com/

Carrot-and-Yogurt-Sauce

You need:

  • 1 teaspoon vegetal oil
  • 1-2 teaspoons black mustard seeds (optional, this time I did not use this)
  • 1 pinch of cumin ground (whole is fine as well, but in this case fry it with the mustard together)
  • 1 pinch of garam masala ground
  • 1 pinch coriander ground
  • 1/2 cup of strained plain yogurt
  • 1/2 cup grated carrots
  • 1 tablespoon ginger, fresh grated
  • 1 tablespoon red onions, finely chopped
  • Salt to taste

Procedure:

  1. If you like to use the mustard seeds heat oil in a small skillet and fry mustard seed until they start splattering. Remove from heat and until hot add the spices (cumin, garam masala and coriander), stir.
  2. In a medium bowl whisk yogurt and carrots together.
  3. Press out juice from ginger through a sieve or simply pressing the grated ginger in your hand. Press it directly in the yogurt mix.
  4. Mix now everything together.
  5. For decoration I reserved little carrots, onion and ginger, but seed are great as well.
  6. Chill until serving.

Homemade BBQ Sauce

Homemade-BBQ-Sauce

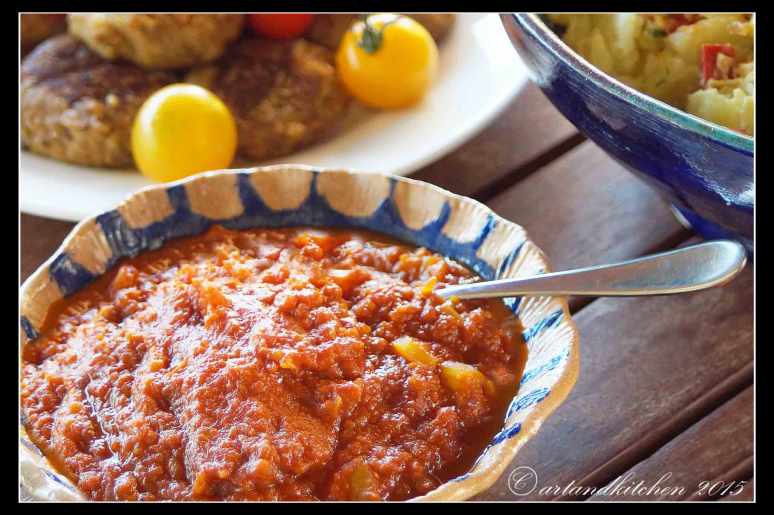
To prepare a homemade BBQ sauce is easy, but you need few ingredients to prepare this.

The result will be great and will make a good change from the ready sauce from the store!

Homemade BBQ Sauce

  • Servings: 1 cup
  • Difficulty: easy
  • Print

Autor: https://artandkitchen.wordpress.com/

Homemade-BBQ-Sauce

You need:

  • 1 (15 oz.) can tomatoes (pelati), drained and chopped or finely chopped ripe tomatoes
  • 1 finely chopped pepper, any kind to taste finely chopped (I used a yellow one)
  • 1/4 cup apple cider vinegar
  • 1/3 cup honey or agave nectar
  • 1/4 cup tomato paste
  • 3 tablespoons Worcestershire sauce
  • 1 tablespoon smoked paprika (substitute sweet paprika + a few drops of liquid smoke)
  • 1 teaspoon garlic powder
  • 1/2 teaspoon freshly-ground black pepper
  • 1/2 teaspoon onion powder
  • 1/4 teaspoon coriander powder
  • 1/2 teaspoon salt, to taste
  • Tabasco, piri-piri sauce or chili powder to taste for extra heat

Procedure:

  1. Combine all the ingredients in a medium saucepan and bring to boil to reduce until thickened. If you like a smooth sauce use the hand blender for a few seconds.
  2. Adjust with salt and chili to taste.
  3. To be consumed fresh or to be filled still boiling in a jar for later opportunities.