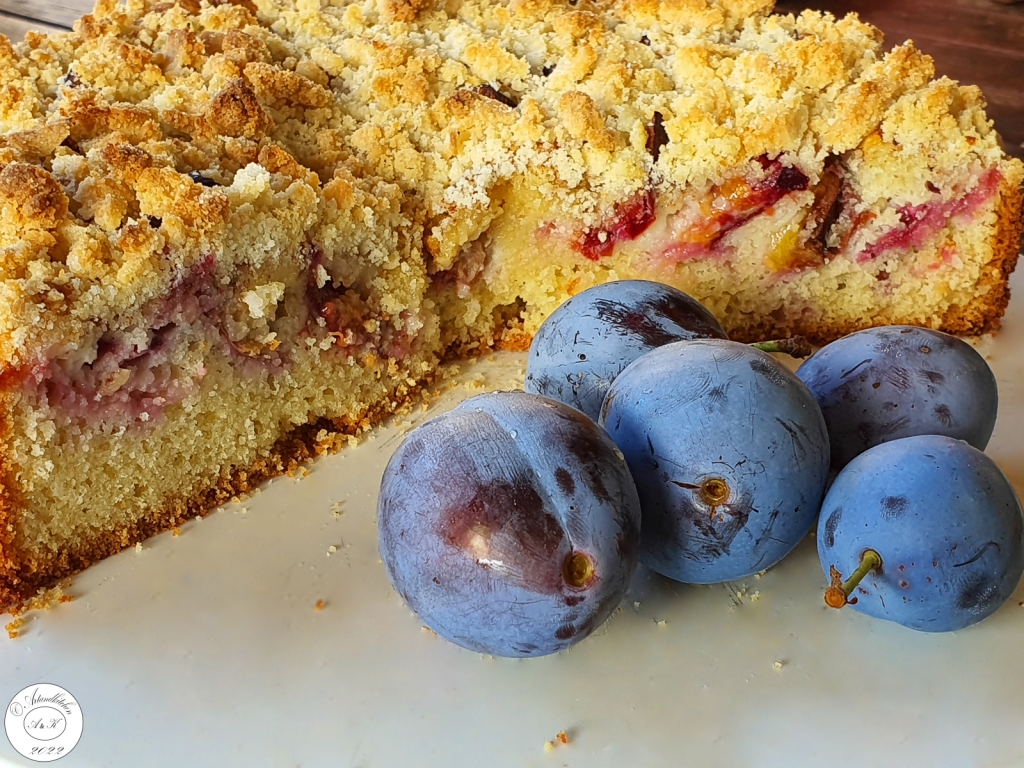
Plum Almond Crumble Cake

This sumptuous delicious almond cake is topped with plums and perfumed with cinnamon. It has a soft base, a juicy fruity layer and at the same time it has a crunchy topping.

I imagine that this recipe could be used for many kind of fruits. Not only apricots, peaches, nectarines, but also apples, pears and why not, many kind of berries.

Plum Almond Crumble Cake

  • Servings: about 12
  • Difficulty: easy
  • Print

Ingredients

Tin preparation

  • Oil or butter to coat the tin
  • About 2 tablespoons ground almonds

Cake

  • 80 g oil
  • 185 g sugar
  • 4 large eggs
  • 250 g flour
  • 2 tsp baking powder
  • 1 tsp vanilla powder
  • 100 g ground almonds
  • 85 g plain Greek yogurt (10 %fat)

Topping

  • 500 fresh plums , quartered and stoned
  • Cinnamon to dust, optional

Crumble

  • 100 g ground almonds (minus almonds used for the tin)
  • 30 g flour
  • 50 g sugar
  • 50 g butter

Preparation

  1. Preheat the oven to 175°C (convection oven) or 180°C (conventional oven).
  2. Coat the tin (I used a 26 cm wide springform) with oil or butter and dust with ground almonds.
  3. For the cake, put the oil, sugar, eggs, flour, baking powder, vanilla, ground almonds and yogurt in a big bowl. Beat with an electric whisk until smooth and pour this batter into the tin.
  4. Arrange the plums vertically pushing them partially into the sponge batter and dust with cinnamon to taste.
  5. Put all the crumble ingredients in a bowl, cut in the butter with a forj and rub together with your hands until crumbly. Finally scatter the crumble over the plums
  6. Bake for about 50 minutes until done (test: a skewer poked into the cake mixture comes out clean but plums will remain sticky).
  7. Let cool down on a wire rack.

Serving suggestion:

  • Serve cold with plain yogurt, sour cream or whipped cream
    • Serve lukewarm with vanilla ice cream

Autor: https://artandkitchen.wordpress.com/  

Rhubarb Tarte-Tatin

This month we got a lot of rain! Too much! Nevertheless my rhubarb seems to like it and it is growing like a weed.

The best way to keep it under control and make my family happy is to bake something with it! 

In the past years I made different cakes with rhubarb, but as usually I wish to try something different and see how it comes out!

This recipe is super simple, not so many ingredients are needed, it is quick done and it looks fabulous!

Serve this fresh cake best with roasted pistachios or almonds.

Rhubarb Tarte-Tatin

  • Servings: 8
  • Difficulty: easy
  • Print

Ingredients

Base:

  • 15 g butter, melted
  • 100 g sugar
  • 500 g Rhubarb, cleaned cut into 3-5 cm pieces (or as you like)

Batter:

  • 50 g butter, softened
  • 150 g Greek yogurt
  • 100 g sugar
  • 1 teaspoon vanilla sugar
  • 2 Eier
  • 225 g flour
  • 1 teaspoon baking powder

Topping:

  • 2 tablespoons chopped roasted pistachios (alternative: almonds)

Procedure

  1. Preheat the oven to 200°C/400°F.
  2. Cover the bottom of a Springform with baking paper.
  3. For the base: Brush with the melted butter and sprinkle with the sugar. Arrange Rhubarb on it.
  4. In a bowl, whisk together the butter, the yogurt, the sugar and the vanilla sugar. Add the eggs and whisk until well combined.
  5. In another bowl, sift together flour and baking powder.
  6. Add the dry mix to the wet mix and incorporate well with a spatula.
  7. Spoon the batter over the arranged rhubarb and smooth well with a spatula.
  8. Bake at 200°C/400°F for about 30-35 minute or until risen, golden brown and a skewer inserted into the middle of the cake comes out clean.
  9. Remove from the oven and let sit for about 5 minutes. Run a knife around the edges and carefully remove the border of the Springform and let cool down completely on a grid.
  10. Invert on a serving plate, remove the bottom of the Springform and carefully the baking paper.
  11. Serving suggestion: garnish with chopped roasted pistachios.

Autor: https://artandkitchen.wordpress.com/

Quince and Potato Cheesy Gratin

Apples and grapes are already places in the storage room or converted in juice. Now it’s the turn for the our beloved quinces; this year we have really a lot of them and I’m looking for to try as much as possible different recipes. We all love sweets and cakes, but as quinces are very versatile, I hope we will travel virtually around the world and bring something new in our kitchen.

This recipe was inspired on an apple and bread ramequin. It is an autumn recipe for and comfort fully satisfying meal; you may serve this for Thanksgiving as well! 

Quince and Potato Cheesy Gratin

  • Servings: 4-6
  • Difficulty: easy
  • Print

Ingredients:

  • 1000 g quinces, cored and sliced (about 5 mm thin)
  • 1000 g baking potatoes, peeled and sliced (about 5 mm thin)
  • 100 g mozzarella cheese, sliced
  • 150-200 g Swiss Cheese as for example Gruyere, sliced
  • 2 eggs
  • 250 ml milk
  • 100 ml heavy cream
  • 1 tablespoon flour
  • ½-1 tablespoon fresh rosemary chopped (or 1 teaspoon dried)
  • ½ tablespoon fresh savory chopped (or fresh thyme or ½ teaspoon dried)
  • ¼ teaspoon nutmeg powder
  • Salt (about 1 teaspoon) and pepper to taste

Procedure:

  1. Preheat the oven to 180°C/350°F.
  2. Layer quinces and potatoes diagonally in a baking dish.
  3. Place mozzarella and Swiss cheese between the slices.
  4. In a bowl combine all the other ingredients and whisk until smooth.
  5. Pour the mixture equally over the ingredients in the baking dish.
  6. Bake for about 1 hour at 180°C/350°F until the potatoes are soft. If necessary during the cooking time cover with a parchment foil or lid in the case the surface turns to dark.

Variations & Ideas:

  • Instead quinces use apples or pears
  • Instead of potatoes use stale bread or sweet potatoes
  • Replace mozzarella and Swiss cheese with any grated melting cheese
  • Instead of milk, heavy cream, eggs and flour use 500 ml of béchamel sauce
  • Experiment with different spices
  • Cut slices of leftover gratin and fry on all sides for a crispy way to give it new life

    Autor: https://artandkitchen.wordpress.com/

Day 40 Stay at Home or In the Garden: Vegetable Tart with Seeds

Parwin suggested this versatile recipe for a “Stay at Home recipe exchange” game. This came out so delicious, that I thought it would be a good idea to share this for our friends.

As the recipe does not specify the ingredients, your are really free to use what you have on hand and make a delicious meal for you family.

Below I will give you the recipe and here my choices.

  • Dough: home made with sourdough
  • Pesto: red and green pesto Genovese
  • Vegetables: red peppers and defrosted green tomatoes form the garden (picked in fall as we removed the plants form the vegetable garden), sliced red onion
  • Seeds: pine nuts, pumpkin, chopped roasted pistachio
  • Herbs: parsley, basil and oregano
  • Salt: Basil salt

Vegetable Tart with Seeds

  • Servings: 4
  • Difficulty: easy
  • Print

Ingredients

  • Dough: readymade or self-made (any kind, but not sweet)
  • Pesto (any kind)
  • Vegetables, sliced or in small pieces, fresh or defrosted
  • Seeds as pumpkin, sesame, almonds, pine nuts (any kid)
  • Fresh herbs as parsley, oregano, thyme or basil
  • Salt and pepper, to taste

Procedure

  1. Place the dough on you baking try.
  2. Spread the pesto over the dough.
  3. Add vegetables.
  4. Top with seed.
  5. Adjust salt and pepper to taste.
  6. Bake about 25 min at 180°C or as needed (time depends on the dough and the toppings); you may also bake it at higher temperatures, but simply check when the bottom is ready
  7. Remove from the oven and serve with fresh herbs.
  8. Place salt and pepper on the table.

  https://artandkitchen.wordpress.com/

Day 29 Stay at Home or In the Garden: Colored Easter Eggs

An almost impossible event: Easter breackfast in the garden; and this at our latitude. 

We celebrated the event coloring our eggs in a natural way, super easy and always welcomed.

Unlike to other years we spent our Easter at home with our family, we event did not go shopping for this event, but those eggs and litttle decoration made this day special again.

The bread we enjoyed this moring was: Beautiful Challah (Sourdough Version)

with butter, honey and homemade jams.

Color Variations:

Blue using red cabbage, yellow using turmeric, brown with coffee, maroon with beets, bluish gray with blueberries, green with spinach boiled spinach leaves and the rust color with paprika.

Colored Easter Eggs

  • Servings: 6 pieces
  • Difficulty: easy
  • Print
     

Ingredients

  • 6 eggs
  • 4 onions(dried skin only or other ingredients), preferably red onions
  • herbs, leaves and flowers (or wax)
  • 6 short nylon socks
  • vegetable oil, optional

Procedure

  1. For reddish brown color: Crunch the onionskins into a medium saucepan and cover with water. Bring to a boil, then lower heat and simmer 15 minutes. Remove from heat and let sit until the water is a rich reddish brown. Keep the solution warm, but not hot.
  2. Clip the herbs and leaves into small lengths and individual leaves.
  3. Place herbs and flowers around the first egg in the nylon sock. Fix the flowers and the leaves stretching the nylon sock around the egg and tie it tightly with a knot or twist tie to hold the leaves in place. Note: leaves on an egg will block the onion dye from reaching the area covered by the leaves.
  4. Load the eggs into the coloring solution taking care that they should stay completely covered. If necessary, add just enough water to cover them.
  5. Bring the pot to simmer, cover, and remove from heat. Let the eggs soak in the dye until the whole pot comes to warm room temperature.
  6. Remove the eggs from the solution, snip off the knots and rinse off the eggs, discarding the nylons and herbs.
  7. Pat the eggs dry, and rub them with a bit of vegetable oil to bring out the shine and brilliant deep reddish brown color.

Autor: https://artandkitchen.wordpress.com/


Day 12: Stay at Home or In the Garden: Soft Sourdough Pretzels

These days we stay more at home and we make all meals with ingredients from scratch.

A few days ago, I began to think about pretzels, I really wanted some and I had a pretzels recipe which worked for me. My old recipe is now 5 year old and in the meantime, I switched for commercial yeast and to sourdough.

It was time to revise my recipe and to adapt it to my currently needs.

I changed also the glaze bath to baking soda to ash soda; I also decided to change the shape from 24 mini pretzels to 12 medium-small pretzels.

Proofing time had to be changed. I started with my work in the afternoon and as I realized that these would never be ready for dinner, we placed the dough overnight in the fridge and continued the next morning in order to have the pretzels for lunch.

The result was awesome; I will make these again soon!

For this recipe, we used soda ash (sodium carbonate) but with baking soda (sodium bicarbonate) it will work as well. The important this is respecting the boiling time!

Soft Sourdogh Pretzels

  • Servings: 12 small pieces
  • Difficulty: medium
  • Print

Ingredients

Dough

  • 1/2 cup active starter
  • 1 tablespoon sugar
  • 1 cup water
  • 2 3/4 cups flour
  • 2 tablespoons softened butter or margarine
  • 1 teaspoon salt

Glaze

  • 1/2 cup soda ash
  • 5 cups water

Topping

  • Coarse salt or better fleur de sell

Procedure

  1. Put starter, sugar, water and 1 cup of flour in bowl and stir well. Let sit covered for about 2 hours to proof.
  2. Add rest of flour as well as all the other ingredients and knead dough until smooth and not sticky.
  3. Place dough back in bowl, cover and let rise until doubled. Note: you can relent this process and place the bowl in the fridge overnight. Next day remove form the fridge and let finish to rise.
  4. When dough has risen, punch down.
  5. Divide dough into 12 portions and form rolls of about 60 cm or the size you like. Take care that the center of the roll should be thicker. Shape the logs into pretzels and place them on greased tray or over parchment foil.
  6. Allow pretzels to rest for about 30 minutes.
  7. In the meantime, prepare the glaze: boil water with soda ash. Reduce heat. Also, preheat the oven to 250°C/ 475°F.
  8. Remove pretzels gently from the trays (2 trays with each 6 pieces), place them one by one into the boiling baking soda solution (I could place max 2 of them in the solution at once). Boil for about 30 seconds on one side, then flip them over and boil 30 second on the other side. Remove them using a large slotted spoon and place on a baking sheet with parchment paper or simply greased.
  9. Score the thicker part of the pretzels and sprinkle with the salt.
  10. Let rest and rise for about 30 minutes.
  11. Bake at 250°C/ 475°F for about 15 minutes or until they are a medium to dark golden brown. Note: bake in two batches if your oven does not allow two trays simultaneously.

Autor: https://artandkitchen.wordpress.com/

Quick Leckerli – Quick Gingered Bread from Basel

The Leckerli (or Läckerli are Gingered bread form Basel) was invented more than 500 years go at the time of the Basel Council (1431 to 1449) to be served at the assembled church dignitaries. These turned out famous and soon they turned became a world famous pastry: a rectangular piece of ginger bread, glazed with sugar, made from honey, sugar, flour, candied fruit, nuts and kirsch.

This variation is quite easy and the result is amazing.

Impress your friend serving these delish served with a cup of tea or coffee.

Well wrapped they make a cute and special gift.

See also the other Leckerli recipe.

Quick Leckerli – Quick Gingered Bread from Basel

  • Servings: about 100 pieces
  • Difficulty: easy
  • Print

Ingredients

Spice mixture

  • 2 tablespoons ground cinnamon
  • 1 teaspoon ground ginger
  • 1 teaspoon ground green cardamom
  • 1/2 teaspoon ground star anise
  • 1/2 teaspoon ground cloves
  • 1/2 teaspoon ground allspice
  • 1/2 teaspoon ground mace or nutmeg
  • 1/2 teaspoon ground coriander

Dough

  • 400 g honey, liquid and lukewarm
  • 1 orange, grated zest only
  • 10 g baking soda
  • 200 g almonds, chopped
  • 200 g candied orange zest chopped
  • 100 candied ginger chopped (optional, my choice)
  • 2 tablespoons Kirsch
  • 500 g whole wheat flour
  • 150 g sugar
  • 4 teaspoons spice mixture
  • 2 tablespoon cacao flour

Glaze:

  • 12 tablespoon powdered sugar
  • 3 tablespoons orange juice
  • 1 tablespoon Kirsch

Procedure:

  1. Prepare the spice mixture:  For the best flavor, toast the spices in it until very fragrant in a skillet and grind them just before use. The quality of each of them may differ a lot!
  2. In a big bowl or better a food processor with hocks, combine all the ingredients form honey until Kirsch.
  3. Add flour and cacao and knead until combined and a dough is formed. It will be quite stiff.
  4. Turn this on a parchment foil, roll it out until 8 mm thick, and place this on your baking sheet. I used simply the biggest baking tray.t
  5. Bake in the preheat oven at 180°C for 17-20 Minutes, stop before the borders turns dark.
  6. In the meantime, prepare the glaze combining the ingredients.
  7. Remove the oven and immediately brush with the glaze.
  8. When almost cold cut them in rectangles of about 3 to 4 cm

Autor: https://artandkitchen.wordpress.com/

Homemade Basler Leckerli – Swiss Gingerbread from Basel

This year I did not prepare Christmas cookies, but know I really wished to prepare something special, something from my town (Basel, Switzerland) where it is popular in bakeries and even grocery stores.

I’ve already prepared Leckerli, or better in Swiss German “Läckerli” or “Läggerli”, several times, but it was long time ago as I prepared them. Once I also used this recipe to build a cute gingerbread house.

This year I’ve revised my old recipe and I’ve decided to propose these cookies into small bites for longer pleasure.  I love to take one, let turn soft in the mouth and then melt!

These cookies are dense, quite dry and wonderfully flavored with honey (I used the honey of our bees!), spices, citrus and almonds. They are something like “hard gingerbread” combined with candied fruits; no candied ginger is included in this traditional recipe. You are free to add some if you wish!

Basler Läckerli date back to the 15th century as they were created at the time of the Basel Council (1431 to 1449) to sustain the assembled church dignitaries. The word “Läkerli” comes from “lecker” ant it meas “delicious” in German and “-li” is a diminutive suffix in the Swiss-German language.

See also the other Leckerli recipe.

Homemade Basler Leckerli - Swiss Gingerbread from Basel

  • Servings: 2-4
  • Difficulty: medium
  • Print

You need:

Dough

  • 500 g honey
  • 300 g sugar
  • 1 tablespoon cinnamon
  • 1/4 teaspoon cardamom ground
  • 3 cloves, grounded with the mortar
  • 1/8 teaspoon nutmeg ground
  • 100 g candied lemon zest
  • 100 g candied orange zest
  • 200 g almonds, coarsely chopped
  • 1/2 lemon zest, grated
  • 2 tablespoon “Kirsch”
  • 600 g flour + about 100 g more if necessary
  • 1/2 teaspoon baking powder, sifted

Glaze

  • 150 g sugar
  • 100 ml water

Procedure:

  1. In a heavy pot, bring honey with sugar to boil. Remove from the heat.
  2. Add all the other ingredients except flour and baking powder. Mix well.
  3. Add half of the flour and stir to combine the hand mixer provided with dough hooks. Now add the rest of the flour and the baking powder, work with the hooks until well combined and the dough does not stick to the finger (be careful, it is hot). If necessary, add more flour.
  4. Turn the dough on a well-floured working surface and knead well.
  5. Sprinkle the dough with flour (in this way the dough will not stick on the rolling pin) and roll it out the dough out on parchment foil placed directly in the baking try. It should be about 6 mm thick. As the dough is very hard, it is easier if somebody helps you to hold the tray and the parchment foil.
  6. Let sit for at least one hour or best overnight.
  7. Bake for 15-18 minutes at 220°C in a preheated oven (or 200°C if using a convection oven).
  8. In the meanwhile, prepare the glaze: heat sugar with water until the sugar is melt, let simmer until the syrup turns thick and you see that at the borders of the pot the first crystals begins to form (this takes about five minutes).
  9. Remove from the oven and immediately cut the dough (I used the pizza cutter) rectangular pieces of about 3,5X5 cm (for the standard size) or, as in my case if you prefer into 1,5X1,5cm bites.
  10. Brush the still warm Läckerli with the hot glaze. At this point, the syrup should built crystals and a wonderful white shining cover will glaze the Läckerli.
  11. As soon as the glaze is turning white, separate the Läckerli again, let cool down and dry out completely.
  12. Store in airtight container up to 6 month.
Glaze (Modern variation): this replace the step “7” above!
  • 250 g powdered sugar
  • 2 tablespoons water
  • 2 tablespoons “Kirsch”
  1. In while the cookies are in the oven, combine powdered sugar with water and Kirsch. If necessary, add one more tablespoon Kirsch (or water). Stir until well-combined and very thick.

Autor: https://artandkitchen.wordpress.com/

Specialties from Basel:

Roasted Pumpkin Salad with Lime and Herbs Dressing

Each year we grow some pumpkin on or compost and just before the winter comes we collect them and we keep the in the cold cellar for the winter.

A few days ago, we needed some salad or veggies to complete or dinner but one of my guest had a dental surgery and only soft ingredients could be considered. At once, I remembered my pumpkin and I imagined that this would be perfect for this purpose.

I’ve also thought a lot about the way to serve this and how I can transform this in a very special dish.

This had be great in taste and appealing for the eye!

From another recipe (that at that moment I could not find again) I remembered a wonderful dressing which I loved so much and which could be used for this recipe.

The topping is crunchy, and except of the guest who had some dental problems, the caramelized nuts would add taste and texture to the melt in the mouth pumping slices.

For the arrangement I found some mini bowls (in effect candle holders! ) and I began to arrange the slices in the small dishes like flowers. I’ve placed the remaining slices in a separate bowl; after pouring the dressing over them I waited for my guests!

We didn’t expect so much success with this, the remaining had gone quickly and probably I’ve could have made the double quantity!

At the end, the remaining sauce at the bottom of the dish had been enjoyed with some homemade rustic bread.

I will make this again for sure many times!

Roasted Pumpkin Salad with Lime and Herbs Dressing

  • Servings: 4
  • Difficulty: easy
  • Print

Credit :Artandkitchen

Ingredients

  • Pumpkin

    • 800 g pumpkin
    • 2 tablespoons olive oil

    Dressing:

    • 50 ml olive oil
    • 50 ml fresh lime juice
    • 1/2 lime, grated peel
    • 1 medium garlic clove, finely chopped
    • 1 teaspoon fresh thyme leaves or winter savoury (winter savoury is my choice as I have this in the garden), finely chopped
    • 1 teaspoon fresh mint leaves, finely chopped
    • 1 teaspoon honey
    • Salt (about 1/2 teaspoon) and pepper to taste

    Topping

    • 50 g sugar
    • 1 tablespoon lime juice
    • 50 g walnuts or pecan,
    • 1 pinch chili powder
    • 1 big pinch salt

    Assembling

    • Additional olive oil, to taste

Directions

Pumpkin

  1. Peel the pumpkin, remove the seeds and cut into ½ cm slices.
  2. Place the slices in a big bowl and toss with olive oil.
  3. Arrange the slices in a baking tray overlapping them slightly.
  4. Bake in a preheated oven at 180°C until the pumpkin is soft and the borders begins to turn brown. This takes about 20-30 minutes.
  5. Remove from the heat and set aside.

Dressing:

  1. In the meanwhile combine all the ingredients for the dressing

Topping

  1. Heat slowly the sugar with lime juice in small non-sticky skillet until sugar melts and it begins to take color. Add nuts, chili powder and salt stirring to coat them well. Let roast for 1 minute. Pour the mixture on a baking sheet and let cool down completely. After this time, chop to 1/2 cm pieces.

Assembling:

  1. Pour the dressing over the pumpkin or place the pumpkin into single portions dishes and pour the dressing over them. Let marinate at least 30 minutes.
  2. Just before serving, drizzle some more olive oil and sprinkle with the caramelized nuts. Serve with a slice of rustic bread


Dense Chocolate Mix

A ready made mix for real tasty, spiced and dense and tasty hot chocolate perfect for cold days!

Dense Chocolate Mix

  • Servings: about 50-60 single portions
  • Difficulty: easy
  • Print

Credit :Artandkitchen

Ingredients


  • 2 cups dark unsweetened cocoa (250 g)
  • 2 cups sugar (400 g)
  • 4 teaspoons cinnamon
  • 8 teaspoons vanilla powder (4 envelopes vanilla sugar)
  • 1 teaspoon chili powder (or to taste)
  • 1/2 teaspoon cardamom ground(optional)
  • 6 tablespoons sifted cornstarch ( my addition to make it thicker)

Directions

  1. Mix all the ingredients well, with a food processor or by hand for at least 10 for minutes until cornstarch is not visible.
  2. Preparation:. Heat the milk in a small pot or in the microwave. Add the mix (1 tablespoon for each cup or to taste) stir well with the whisk until dissolved and bring to boil again.
  3. Serve hot with a little whipped cream if desired and enjoy!