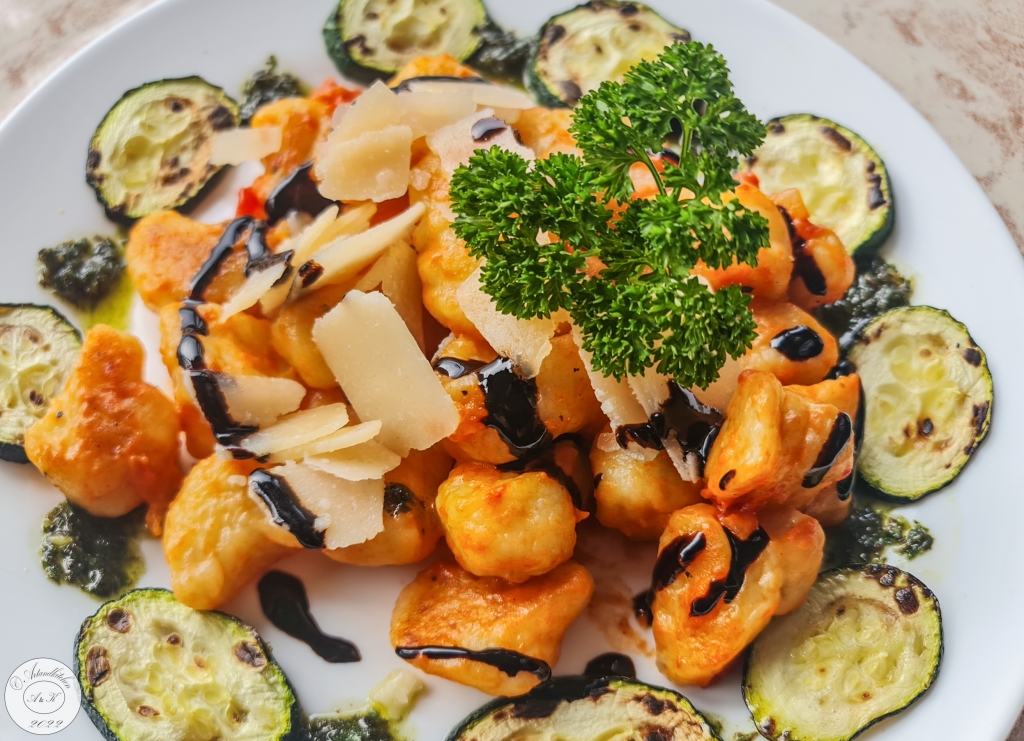
Gnocchi Pomodoro Panna Pesto

This is a copycat recipe of a fabulous gnocchi dish I got in a restaurant.

As I tasted this delish, I knew that in some way I would bring this to my family. Yes, the decision was right and it was a pleasure to see how much these gnocchi were appreciated.

Gnocchi Pomodoro Panna Pesto

  • Servings: 4
  • Difficulty: easy
  • Print

Ingredients

Gnocchi

Tomato and Cream Sauce

  • 2 tablespoon olive oil
  • 1 small onion
  • 1 1/2 cups chopped tomatoes (pelati are great as well) or passata)
  • 1/2 cup heavy cream
  • Salt and pepper to taste

Pesto (alternative store bough), you will need only a few teaspoons of pesto

  • 1 cup basil leaves
  • 1/2 cup heavy cream
  • 1 garlic clove chopped
  • 1 teaspoon salt

Additional

  • Grilled vegetables, I used zucchini (optional)
  • Cream of balsamic vinegar
  • Parmesan cheese, thinly sliced, quantity to taste
  • Herbs for decoration (optional)

Procedure

  1. Prepare the gnocchi according to the recipe, but wail for cooking them
  2. For the sauce: fry onions in olive oil until tender, add tomatoes, cream and blend shortly. Adjust to taste with salt and pepper. Keep warm.
  3. For the pesto: blend together the ingredients.
  4. Check you have the additional ingredients ready. I grilled the zucchini and arranged them on dishes and kept warm in the oven (80°C) until the gnocchi were done.
  5. Boil the gnocchi, when they come to the surface they are ready.
  6. Drain gnocchi and place them in a bowl. Add as mucho tomatoes sauce as you like and toss well.  You do not need to use all the quantity of tomatoes sauce, only to your taste.
  7. Arrange the gnocchi on the plates drop 2-4 teaspoon of pesto around, drizzle some cream of balsamic vinegar, add some slices of parmesan cheese and decorate with herbs
  8. Serve immediately still hot.

Author: https://artandkitchen.wordpress.com/

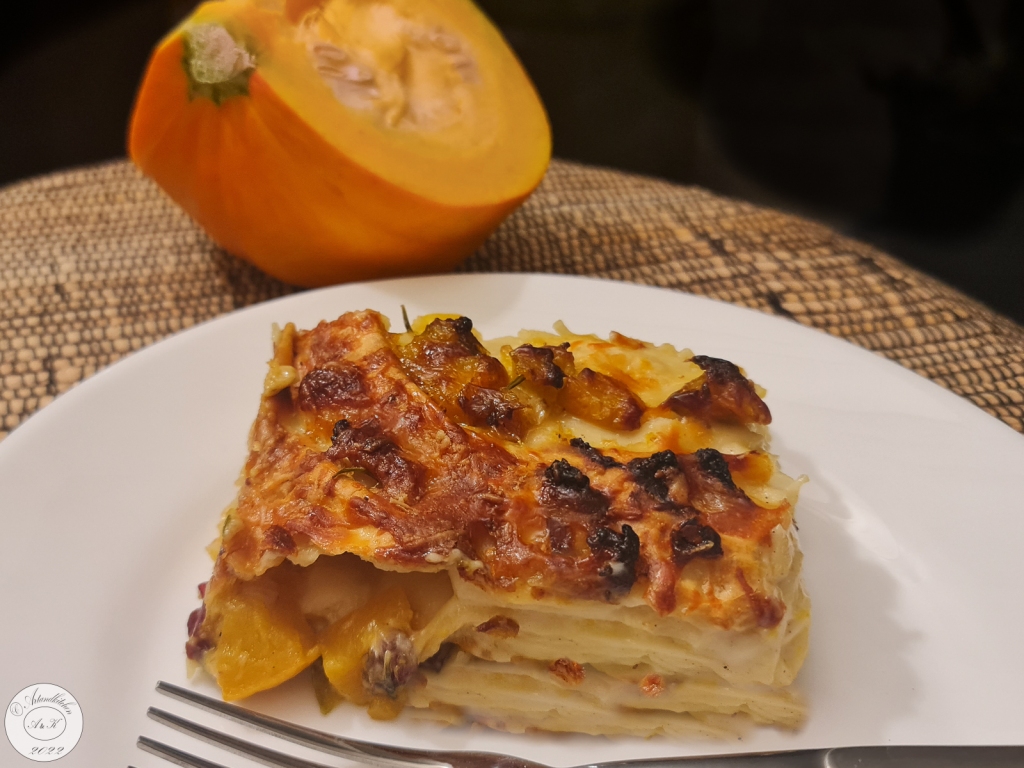
Lasagne di Zucca – Pumpkin Lasagne

This year we will have a lot of pumpkins and I’m looking for to try some new recipes. A few days ago I made ravioli with them, yesterday lasagne. It was a great success and I will make these again for sure!

I was reading a lot of recipes about pumpkin lasagne and finally I created a new recipe, combining the ideas in different ones.

As usually I made lasagne with homemade paste simply because it taste better and with kitchen machines, this is not a big work. It’s pretty easy to make homemade lasagne sheet, with or without machines, but with a food processor with dough hook for kneading and pasta machine for rolling out we can save a lot of time.

There is really a big difference in the taste of homemade pasta and store bought, even if the latter is fresh!

In the recipe preparation I do not describe my steps for the pasta preparation, as this depends on how you are used to work and my procedure is simply “my way”.

“My way for lasagne sheets”:

First of all I prepare the dough with the kneading machine and I let this rest for about an hour. Then I knead it by hand shortly to a smooth ball. For rolling it out I take a slice of the dough, I add a lot of flour on both sides and I shape it to rectangle by hand. I roll it out with the thickest setting of the machine and I add more flour on both sides again. Now, if the dough was really well kneaded and got enough time to rest, you may roll it out to the thinnest setting. If not (it may also depends on the flour itself, maybe you have to fold the sheet and pass them though again after coating it again with flour) make and intermediate setting with a medium thickness. To save space and I time, I cut the sheet to desired size, I boil it immediately in salted water and after taking it out of the hot water I brush it with cold water shortly in order to avoid burnings, I place it directly into your baking tray for layering (I don’t precook all sheets first, I really make and boil the when I use them. I found this easier to me and space saving.

I’m used to precook the fresh lasagne sheets, but you can also skip this step and in this case the sauce needs to be a little more liquid (milk).

Lasagne di Zucca – Pumpkin Lasagne

  • Servings: 4-6
  • Difficulty: medium
  • Print

Ingredients

Dough

  • 500 g flour
  • 5 eggs
  • ½ teaspoon salt
  • 2 tablespoons olive oil

Pumpkin filling

  • 2-4 tablespoons olive oil
  • 2 onions, diced
  • 50 g dried and smoked beef or dried and smoked ham (quantity to taste), finely diced
  • 800 g pumpkin, without seeds, if needed peeled and diced to 1 cm sized pieces
  • 1 fresh spring rosemary
  • 1 fresh spring thyme (or savoury)
  • Salt and pepper to taste

Béchamel sauce

  • 800 ml milk
  • 80 g butter
  • 5 tablespoons flour
  • Salt and pepper to taste
  • Nutmeg, to taste

 Additional

  • 100 g Parmesan chess, grated
  • 100 g provolone or caciocavallo (kashkaval) cheese, diced
  • More cheese if necessary
  • Oil for coating the try
  • Butter or olive oil (optional)
  • 4 tablespoons milk (optional)

Preparation

  1. To make the pasta dough with the kneading machine (as I do): Add all the ingredients to the bowl and while working add (if necessary) little water (only a few spoon!) until the dough comes together! To kame the pasta dough by hand: combine flour and salt on the kitchen board or table, make a hole into the centre. Whisk eggs and olive oil in a small bowl and add it gradually in the centre of the flour mixture while mixing with fork or fingertips to form ball of dough. For this step start to incorporate the eggs and flour by slowly bringing more flour in from the inside edges of the well. You can use a fork or scraper for this. If necessary add a few spoons of water.  Place dough on lightly floured surface; flatten slightly. To knead dough, fold dough in half toward you and press dough away from you with heels of hands. Give dough a quarter turn and continue folding, pushing, and turning. Continue kneading 5 minutes or until smooth and elastic, adding more flour to prevent sticking if necessary.
  2. Roll the dough into a ball and wrap it in cling film and let it sit for about 30 minutes, best if 1 hour. In the meantime prepare the fillings.
  3. Make the pumpkin layer: in a wide skillet, brown onions with dried meat. Add diced pumpkin, herbs salt and pepper to taste. Cook covered but stirring from time to time until just tender. Remove herbs spring and set aside
  4. Make the béchamel sauce: Warm the milk in a separate saucepan or in the microwave until warm to the touch and set aside. (Take care to have this ready). Melt the butter in a pot over medium heat, add the flour and roast (while stirring constantly) the flour until you see that it begins to change the colour. Reduce the heat to minimum. Add the milk at once (this is very important) and stir immediately in order to avoid clumps. Whisk vigorously until smooth! Cook while stirring until thickened. Switch off the heat. Now can add salt, pepper and nutmeg, adjust quantity to taste
  5. Make sure you have both kind of cheese ready.
  6. Rework the pasta dough: Unwrap dough and knead briefly on lightly floured surface folding the dough in half toward you and press dough away from you with heels of hands (repeat 3-4 times, it should not be sticky (if necessary repeat adding more flour on the working surface). Set aside.
  7. To make pasta sheets: Cut a slice of dough (cover the rest with the film), add flour on both sides and pass it though the pasta (widest thickens), add more flour again on both sides and pass it through again with a thinner setting, repeat until desired thickness. If you do not use a pasta machine, roll out the slice by Boil it immediately in salted water with addition of some oil (and use them directly for layering) or transfer the ready sheets to a drying rack or floured towels until you have all done.
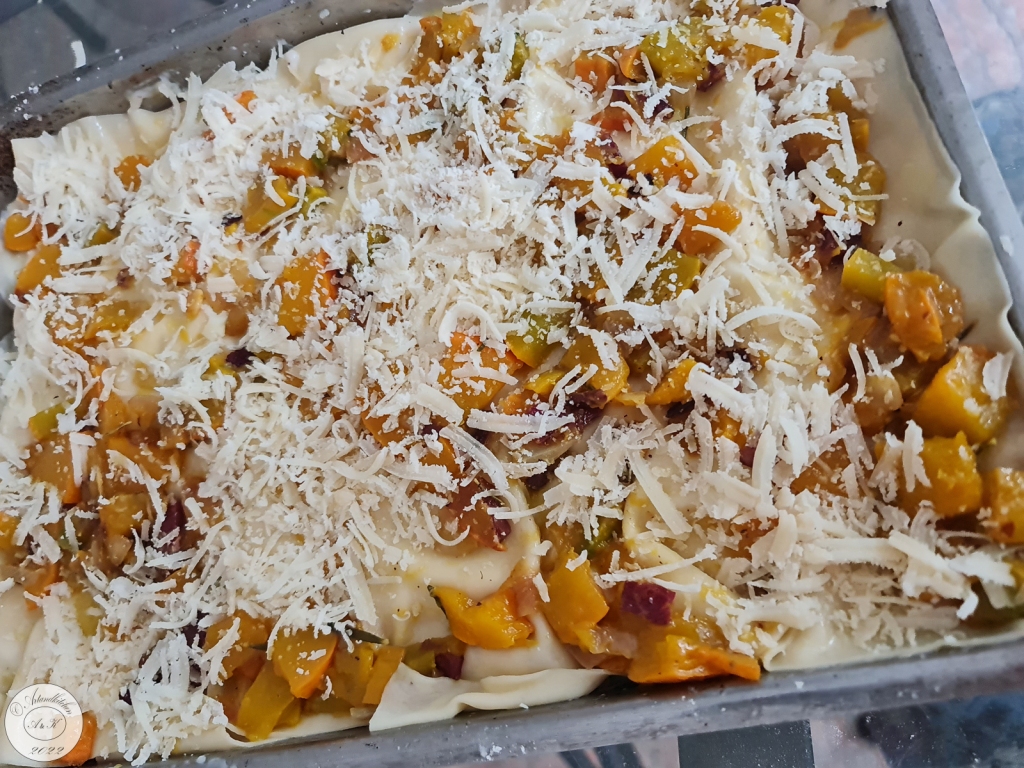
  8. Assembling: First of all I add 1 tablespoon olive oil just to coat the tray and I spread about 2 tablespoons of béchamel sauce. Lay one layer pasta sheets (precooked or not). Then follow: béchamel, pasta sheets, pumpkin mix, both kind of cheese, pasta sheets, béchamel, pasta, pumpkin mix, cheese, pasta, pumpkin mix cheese…  Take care to adjust quantities while working, grating more cheese if necessary and to finish with a pumpkin and cheese layer. Some people love to add some butter, olive oil and or milk to the top layer.
  9. Bake at 150°C for about 30 minutes. Then increase temperature to 180°C and bake until a golden brown crust is formed.
  10. For easier cutting let cool down 15 before cutting. Enjoy!

Autor: https://artandkitchen.wordpress.com/  
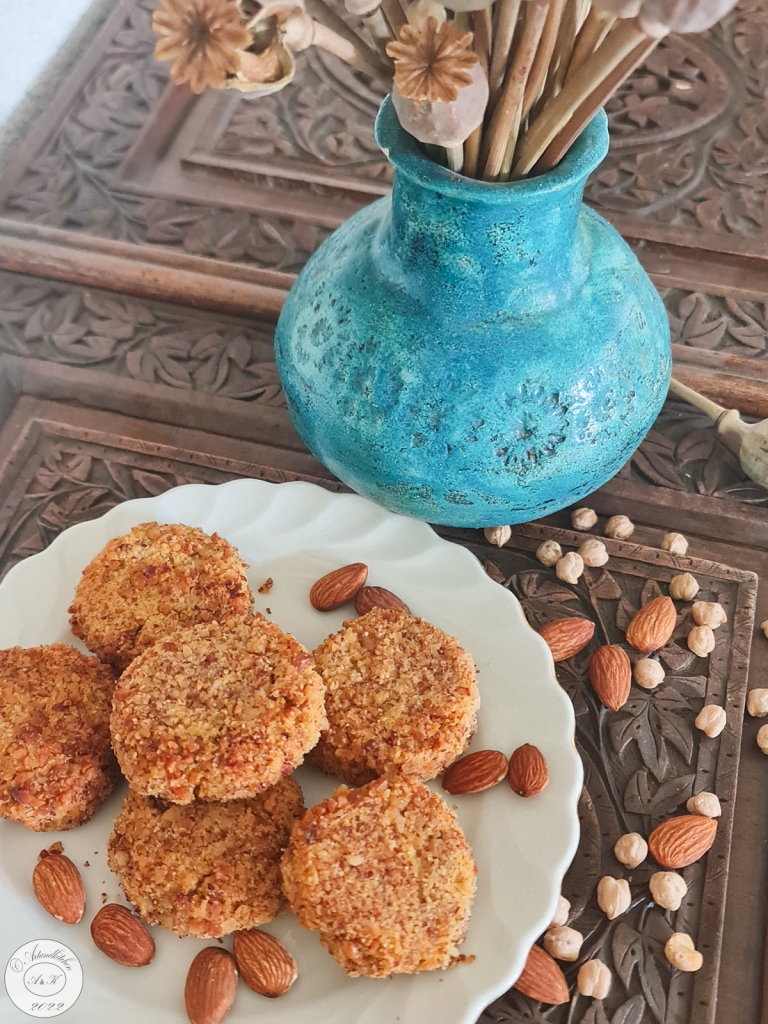
Chickpea Croquettes with Parmesan Cheese and Almonds

Today I would like to present you a very tasty recipe of chickpeas cakes enriched with Parmesan cheese, almonds and spices.

They are very easy to be prepared and only a few ingredients are needed.

With a rich salad and if you maybe a yogurt sauce they can make a great full but still light meal.

You may adapt the recipe to you taste for example with some herbs, with garlic or roasted onions or other spices. Enjoy!

You may also make bigger ones and make of them burgers.

Chickpea Croquettes with Parmesan Cheese and Almonds

  • Servings: 4-6
  • Difficulty: medium
  • Print

Ingredients

  • 400 g chickpeas, precooked and drained
  • 80 g Parmesan cheese, grated
  • 80 g almonds, grinded
  • 1 egg
  • ½ teaspoon coriander ground, quantity to taste (or other spices or herbs to taste)
  • Salt and pepper to taste
  • More or less 100 g grinded almonds for coating
  • Oil for frying (I used olive oil)

Preparation

  1. Drain well your chickpeas and blend them until smooth
  2. Add cheese, almonds, egg, spices and salt and pepper. Combine well working this with a fork or a spoon. Adjust spices, salt and pepper to taste. If the mixture results to wet, add some more grinded almonds.
  3. Scoop some mixture, form to ball with your hands, make the little flat and coat them in the additional grinded almonds. Place on a plate until you will have all them ready.
  4. In a non-sticky skillet heat little oil. Place the croquettes to fry gently. Brush or drizzle the upper side with oil. Turn when they begins to brown and cook on the other side until golden. Do not overcook them as they are delicious especially if moist.
  5. Serve them preferably warm.

Autor: https://artandkitchen.wordpress.com/  

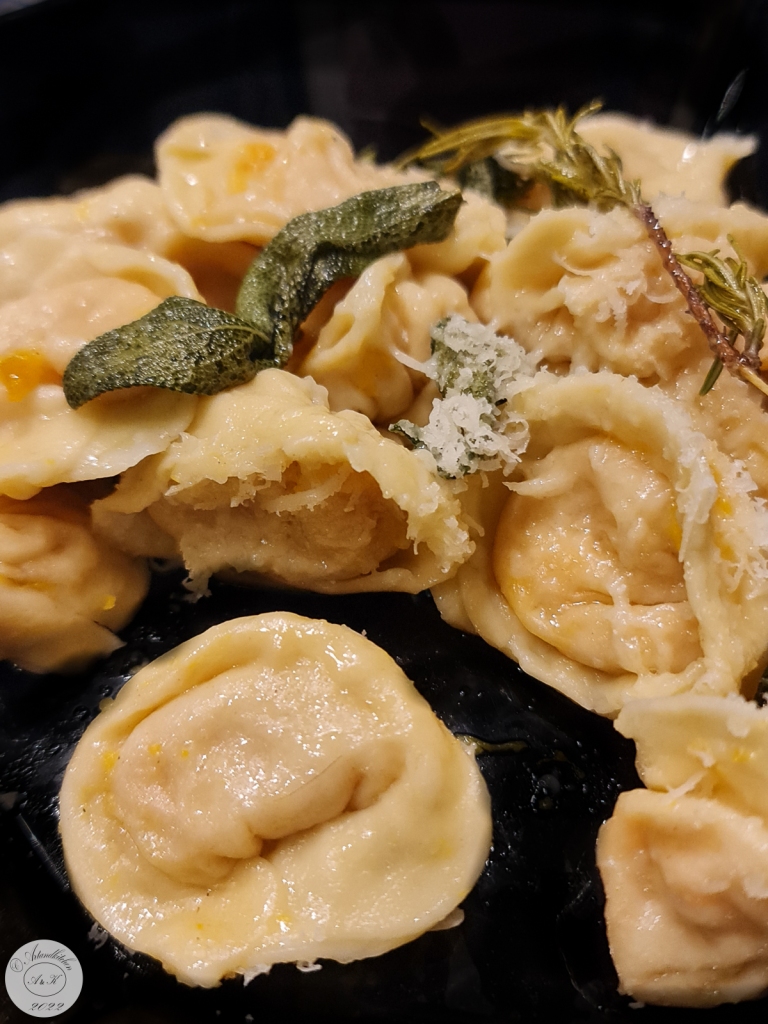
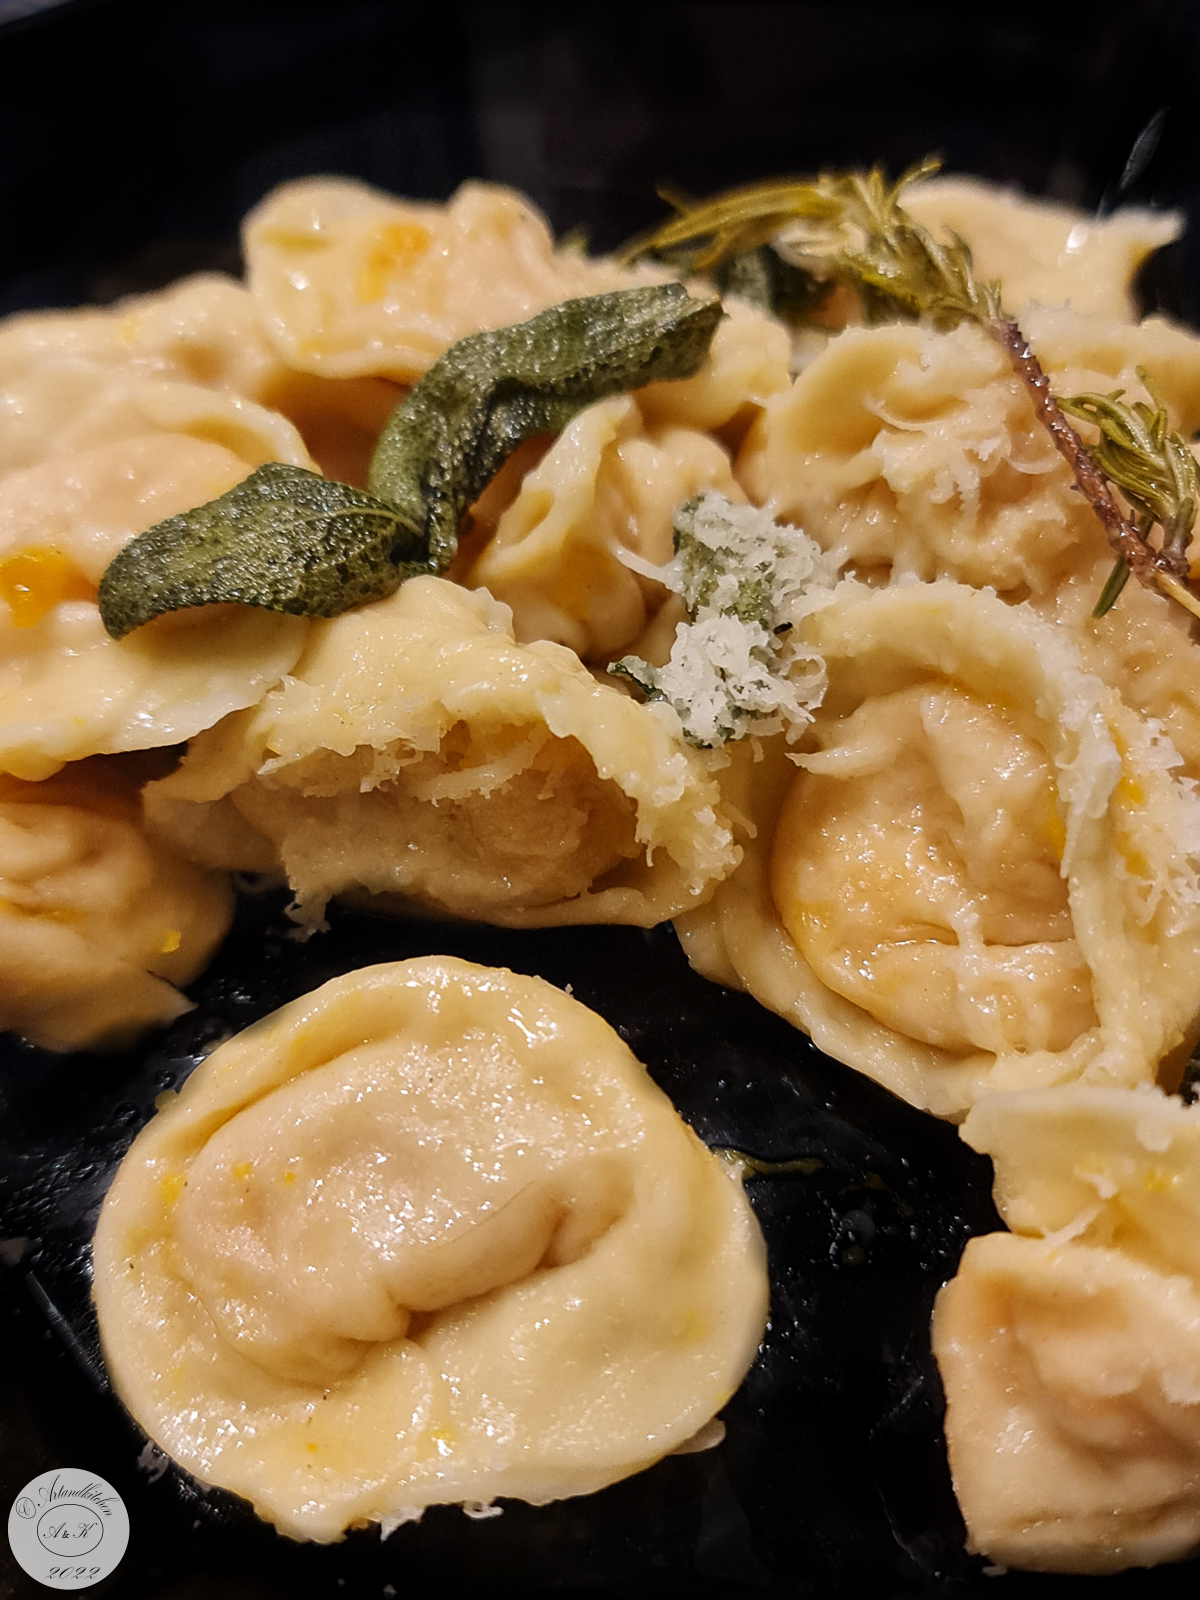
Tortelli di Zucca – Pumpkin Ravioli

Tortelli di zucca, cappellacci di zucca or ravili di zucca is a traditional dish which I always thought I should prepare once and that finally I made it for my family and for you!

This recipe of “pumpkin ravioli” (if I may translated in this way) has its roots around the city of Mantova, but you can find many different variation in the town of Ferrara (without amaretti), Piacenza (with the addition of ricotta), Cremona (with the sweet fruit mustard of Cremona, not to be confused with Dijon mustard), Pavia (where they use tomatoes with sausages for the sauce) and Reggio Emilia (less nutmeg and less mustard but more Parmesan cheese).

This specialty is are one of the most iconic dishes within the culinary repertoire of northern Italy. It should be best prepared with the “zucca mantovana” (a dry-fleshed yellow pumpkin) that has the best consistency for thefilling. The filling traditionally also takes crumbled amaretti biscuits and frequently “mostarda di Cremona” (a sweet, apple and fruits based sweet preserve) plus grated Parmesan cheese. The dough is regular fresh egg pasta (1 egg every 100 g flour), either shaped like a tortello (as I did) or like a square ravioli. I also saw different shapes, but is really up to you and how much time you would like spend for this fancy dish.

The addition of nutmeg to the filling and the herbs for the butter are essential and they give to this dish a rich and very enjoyable taste.

The version I made is without amaretti (I simply did not have them on hand), but I added a little bit of breadcrumbs the make the texture little stiffer.

Tortelli di Zucca - Pumpkin Ravioli

  • Difficulty: medium
  • Print

Ingredients

  • 400 g flour
  • 4 eggs
  • salt to taste

Filling

  • 800 di sweet yellow pumpkin (best if zucca Mantovana)
  • 80 g mostarda di Cremona
  • 100 g parmesan cheese, grated
  • 80 g di amaretti (or about 2 heaped tablespoons breadcrumbs), crushed
  • 1egg
  • Nutmeg to taste
  • Salt and white pepper to taste

Seasoning

  • 5 tablespoon butter
  • 12 fresh sage leaves, or to taste
  • little bit fresh rosemary, optional
  • Grated parmesan cheese

Procedure

  1. Roast the pumpkin in the oven: cut the pumpkin in the oven and cook it at 180°C for about 20-30 minutes or until soft.
  2. During this time prepare the dough working the ingredients until smooth. Cover or wrap with plastic foil.
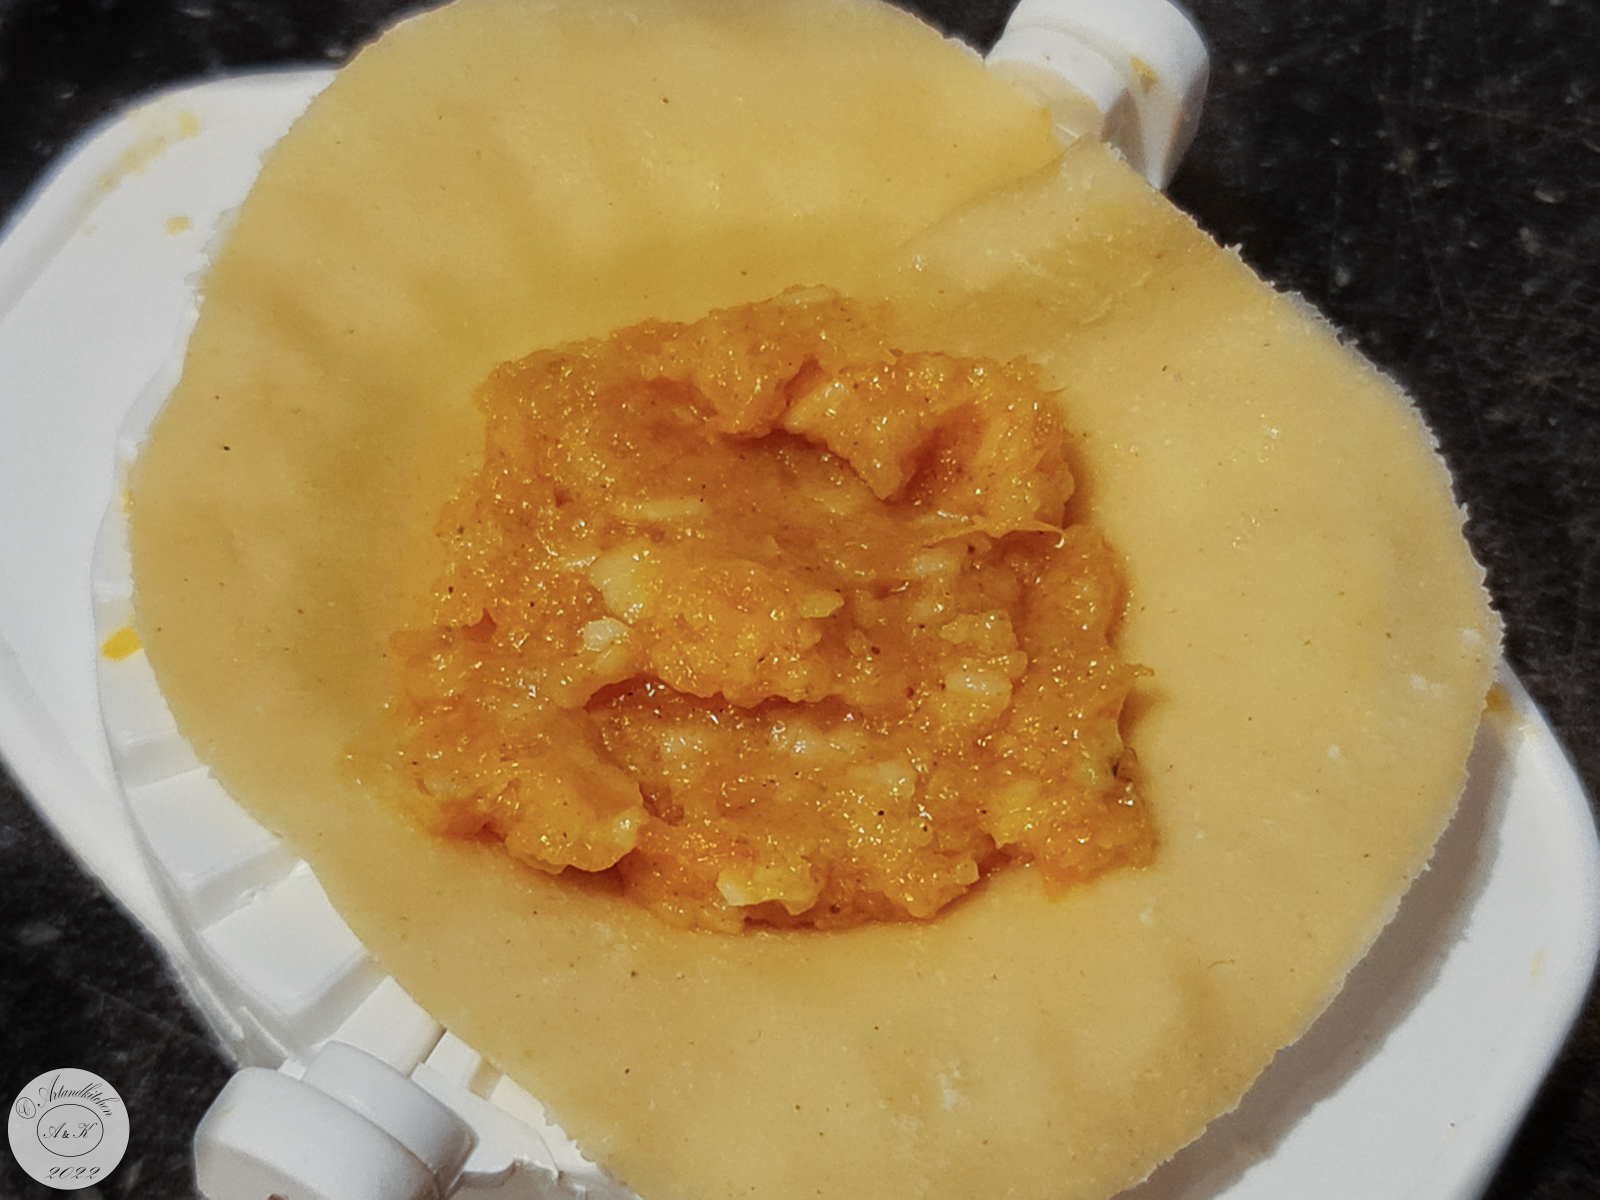
  3. Prepare the filling: Scrape out the pulp pumpkin add the mostarda di Cremona and puree it with food processor. Add the other ingredients, combine well with the spoon and season to taste.
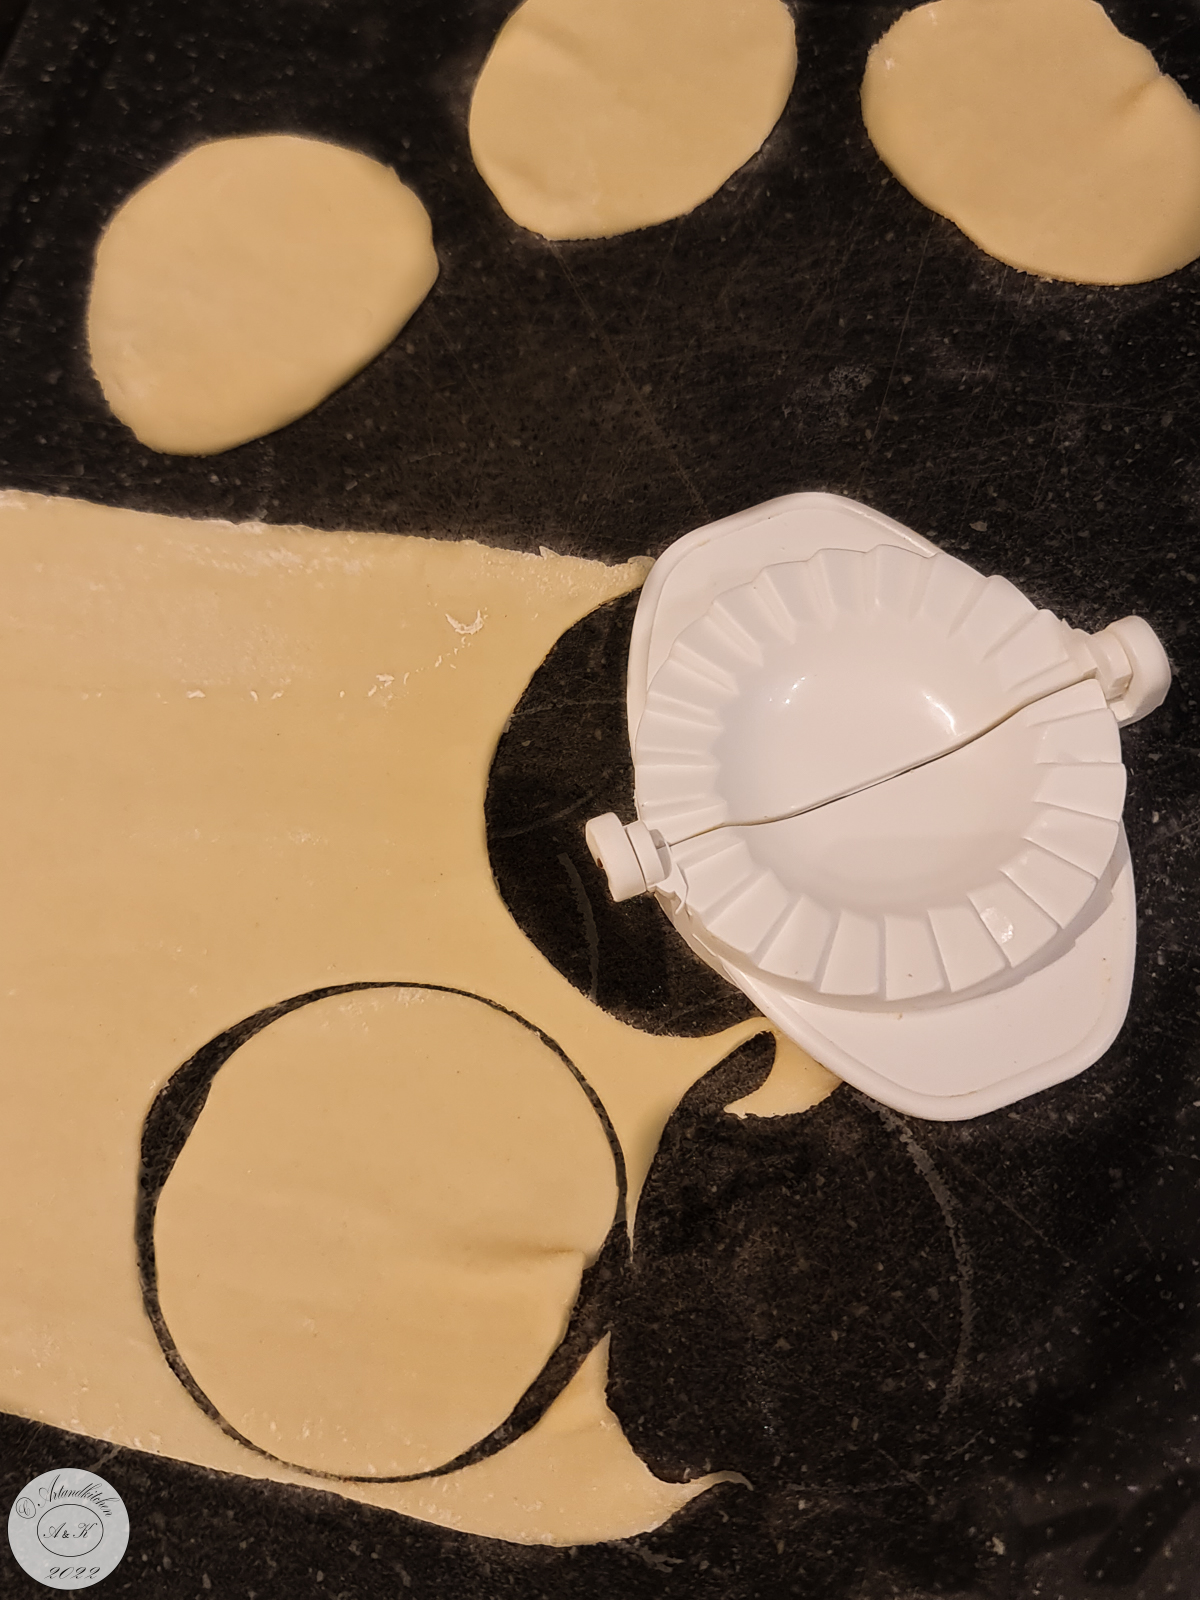
  4. Roll out the dough to thin sheets with a pasta maker or by hand.
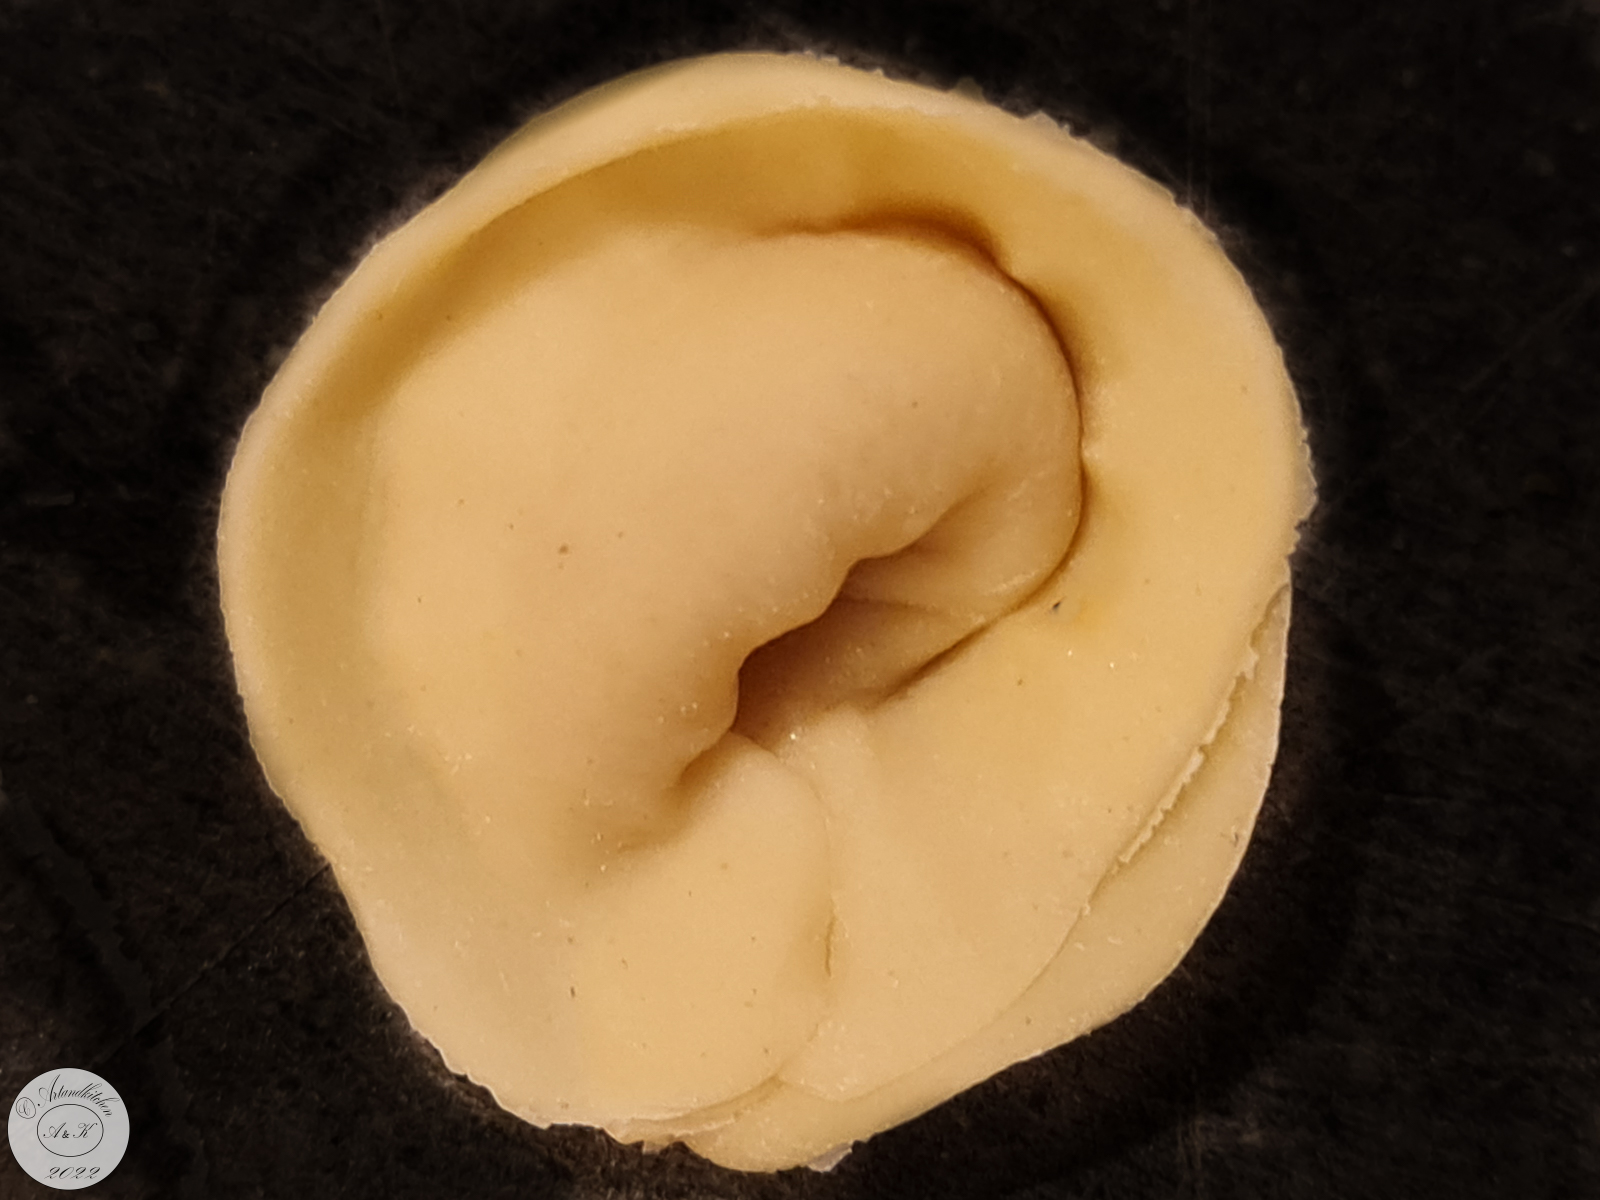
  5. Shape the tortelli or ravioli as you like. I my case I made rounds of about 5 cm diameter, filled with 1 teaspoon filling, folded once and fixed the edges together. Place them on a clean towel.
  6. Bring enough water to boil and add salt to taste (as usually for pasta).
  7. In the meantime put the butter in a small pot and let it melt and just it begins to brown add sage and brown as desired. Do not burn the herbs!
  8. Tranfer the tortelli into the boiling water, let them cook 2-3 minutes, more or less, depending how thin you have rolled the dough, obviously the ticker, the longer the time. They will float when ready.
  9. Serve the tortelli, pour butter sauce on top with fresh grated Parmesan cheese.

Autor: https://artandkitchen.wordpress.com/  

Preserved Tomatoes with Basil in Jars

Do want to keep the taste of the summer for the winter?

This is a simple but easy way to preserve the full flavour of your tomatoes and at the same time to have quick ready dish when you feel you are missing the sun and your fresh tomatoes from the garden.

This year we got a wonderful tomatoes harvest and we are still harvesting every day. We exchanged seed with friends and so we got an incredible variety of tomatoes and other vegetables. Now the winter is approaching, we all have to save electricity and with this method you will prepare great pasta dishes without spending a lot of time in cooking your tomatoes sauce.

Important! For sterilization with a pressure canner, please follow the instruction for the equipment. Depending on the Country you live, you will find completely different safety instruction about canning and possible botulinum poisoning.

Processing time for canning articles:

Preserved Tomatoes with Basil in Jars

  • Difficulty: medium
  • Print

Ingredients

natural-preserved-tomatoes-with-basil-6 All quantity to taste and according to your harvest J
  • Ripe tomatoes
  • Olive oil (about 4 tablespoons per kg tomatoes)
  • Garlic, chopped to taste
  • Balsamic vinegar (4 tablespoons per kg tomatoes), this is needed for longer storage
  • Salt (about 1 teaspoon per kg tomatoes)
  • Basil leaves or flowers to taste

Preparation

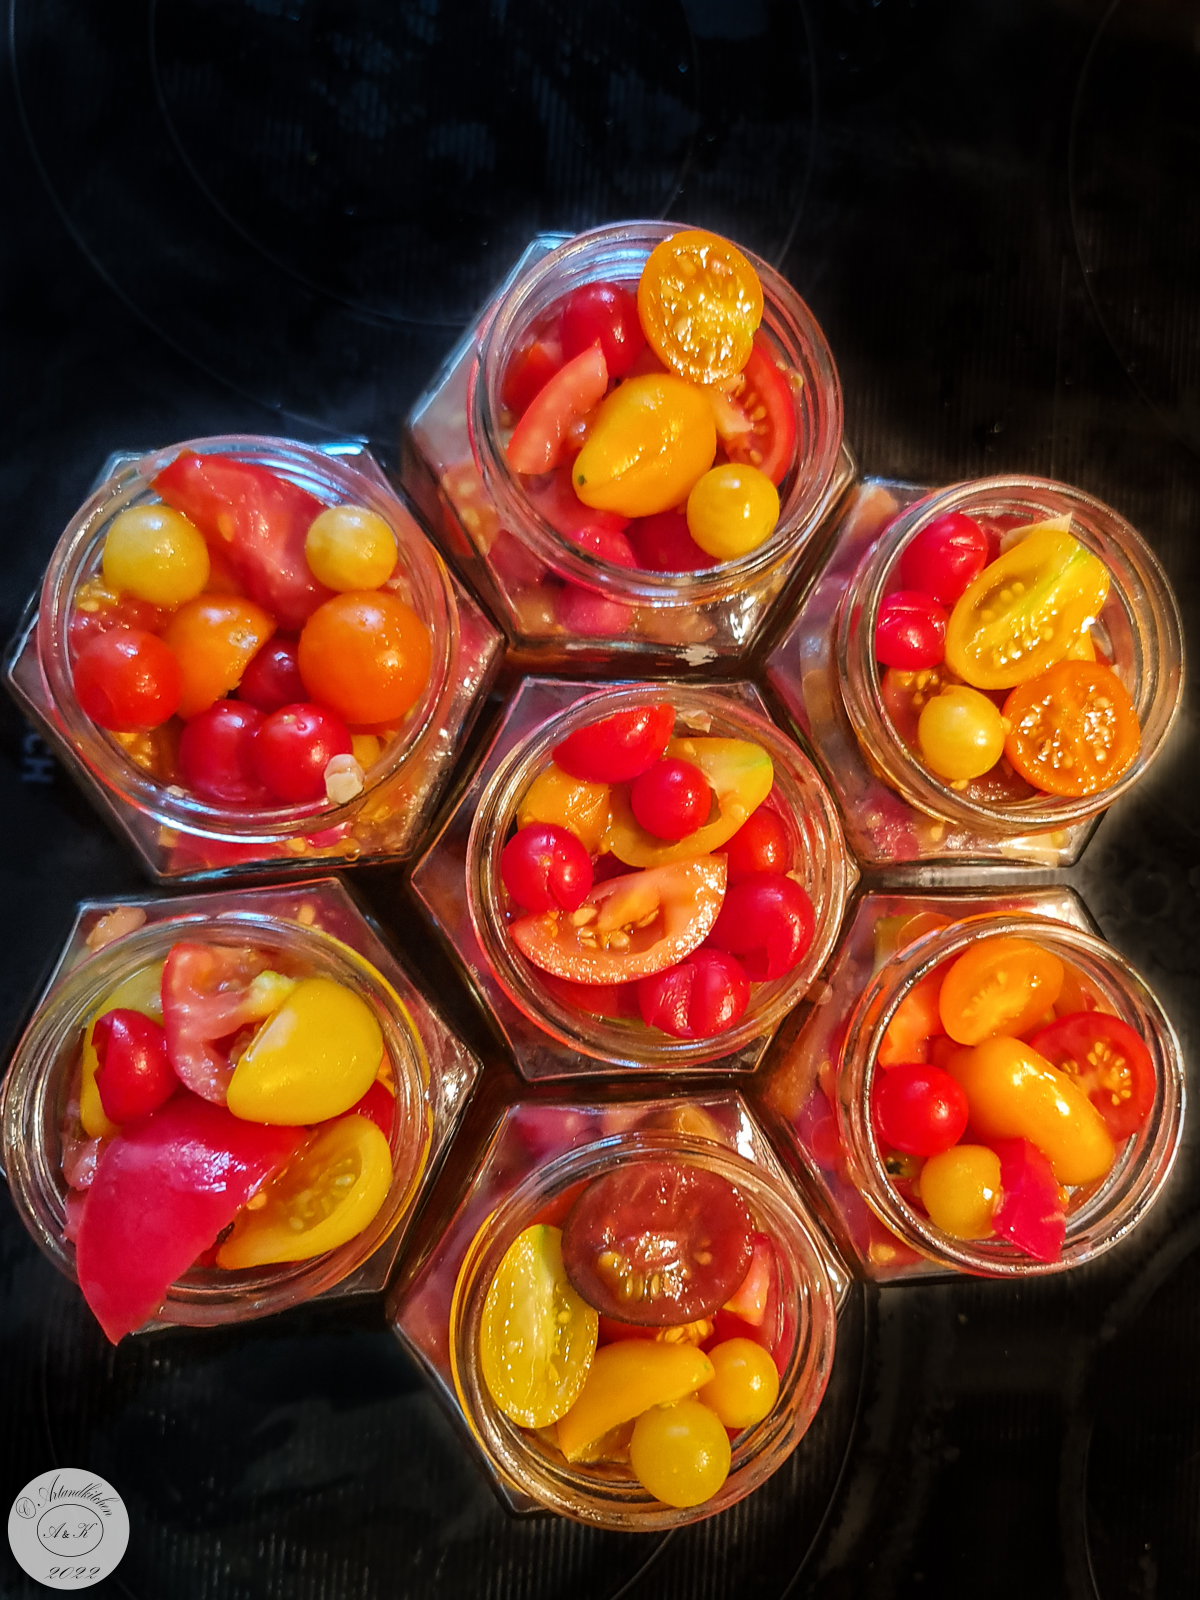
  1. Clean and dice tomatoes according to their size. I did not dice wild tomatoes, I halved cherry tomatoes and the other tomatoes in 1- 1.5 cm big sizes.
  2. Heat oil and add the garlic. Roast only a few minutes until fragrant.
  3. Remove garlic-oil mixture and pour it over the prepared tomatoes. Add vinegar and little salt.
  4. Combine gently and let sit for about 2 hours. They will release some juices.
  5. Add basil and stir well.
  6. Place the tomatoes mixture into the jars. Fill jars, leaving 2 cm headspace. Press gently down the tomatoes in order to cover the pieces with their juices.. Slide a nonmetallic spatula (a plastic knife works well) around the inside edge of the jar, pressing back gently on tomatoes to release any air bubbles. Do not add water.
  7. Use a clean, damp cloth to wipe any tomato residue from the outer rim of the jar. This is necessary in order seal tight the jars. Screw lid evenly and firmly, but not too tight; just until resistance is met and lids are fingertip tight.
  8. I performed the “heat treatment” of the canned tomatoes in water bath. Place the jars into big pot (or use a canner). Fill with warm water. The water must cover the jars by 2 cm. Bring to a rolling boil, cover the pot and boil for 60 minutes if using 250-500 ml jars. Let cool down completely before removing the jars from the pot. Check if the lid is tightly closed after cooling down.  For heat treatment, please follow the instruction of your equipment (for example the pressure canner) and the following link: https://extension.umn.edu/preserving-and-preparing/canning-quick-reference-chart.
Suggestion: place the jar in water bath or shortly in microwave and serve over hot pasta with fresh grated Parmesan cheese and fresh basil Autor: https://artandkitchen.wordpress.com/

This slideshow requires JavaScript.

Small Chili Peppers Stuffed and Preserved in Oil

Early this year we saw indoors many kind of peppers and chilies, now in September many of them are ready and it’s a challenge to use them all.

We love to prepare them in the oven (see also……) as still green; we do not use only the “Pimientos de Padron” peppers for this recipe, we found that most peppers are great for this preparation.

I bought also some small round peppers called “ciliegia piccante” peppers, which are very often served stuffed and preserved in oil.

This time I used to prepare this recipe and as we had different kind of small (chili) peppers, we decided to use them in this way.  The “pimientos de Padron” I got are quite hot (may be as we had a hot and dry summer), and with this preparation we can reduce the heat and prepare something which can be enjoyed in winter as well.

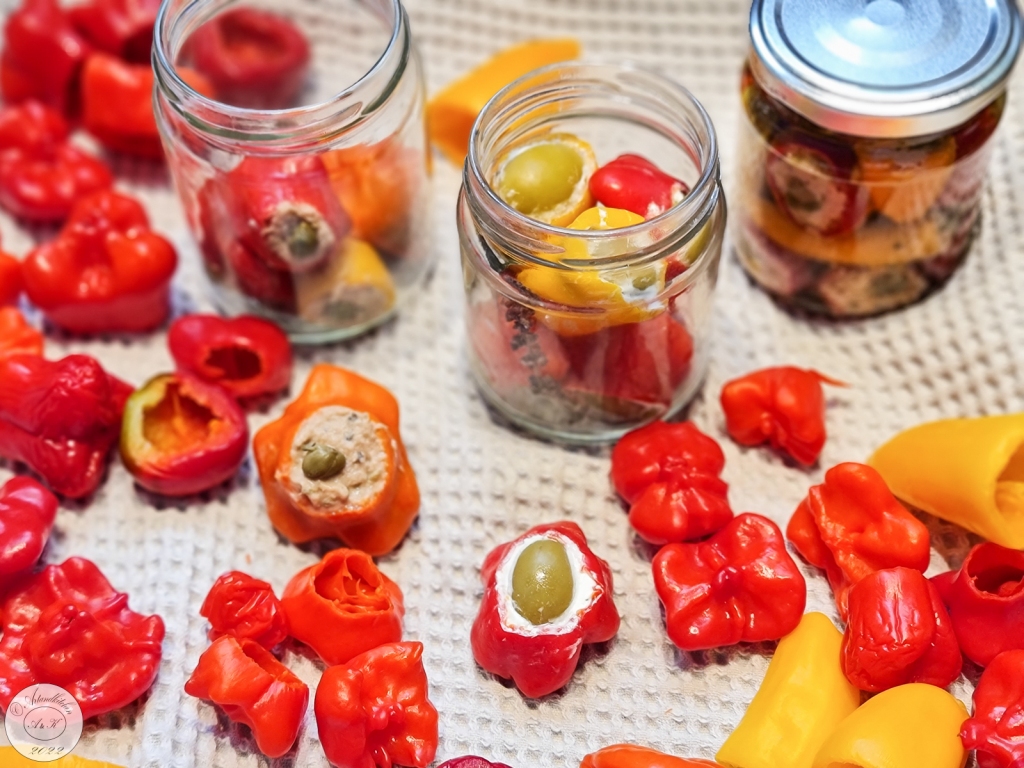
We prepared two kinds of stuffing: one with tuna fish and the other with cream cheese.

As pepper we used: hot “cherry peppers”, some “aji amarillo”, “Bishop’s Crown” Peppers, small mini peppers (as for snacks), “pimientos de Padron” peppers and some simply sweet small round peppers.

All peppers where precooked in a vinegar solution and the jars were sterilized for longer storage.

Try these stuffed pepper recipe, this makes a truly impressive antipasti dish. These small peppers are bursting with flavour, thanks to the herbed fillings.

Small Chili Peppers Stuffed and Preserved in Oil

  • Servings: prepare as much as you need
  • Difficulty: medium
  • Print

Ingredients

All quantities of the recipes are only a reference, you should adapt it to your taste

First step: Boiling

  • Mini peppers or chilies, stem and seed removed
  • 250 ml white wine vinegar
  • 50 ml water
  • ½ teaspoon salt

Second step: tuna stuffing

  • Drained tuna fish in oil
  • Capers to taste
  • Chopped green olives to taste
  • Salt to taste
  • Dried basil to taste
  • Pepper to taste to taste

Third step: cream cheese stuffing

  • Cream cheese with herbs
  • Pitted big green olives
  • Herbs or bay leaves, optional

Fourth step: preservation in oil

  • 200-450 ml jars
  • Olive oil or sunflower oil (or mixture) as needed

Procedure

  1. Remove carefully the stem and all seeds from the peppers using surgical gloves.
  2. Bring to boil vinegar, water and salt.
  3. Boil the peppers in bathes for 2 minutes, drain them quickly and place them on a towel cut side down to dry until next day (or at least 4 hours).
  4. Mix the ingredients for the tuna fish mix in bowl, blend shortly to make them smoother
  5. Fill peppers with tuna fix mixture and top with one additional capper. Place them into a small jar (filling looking outside).
  6. Fill peppers with herbed cream chess and close the opening with halved olives. Place them into a jar and add some herbs (I used thyme and bay leaves).
  7. Fill the jars with oil trying to release the air bubbles from the gaps. Close well the jars.
  8. Place the jars into big pot (or use a canner). Fill with warm water. The water must cover the jars by 2 cm. Bring to a rolling boil, cover the pot and boil for 30 minutes if using 250-450 ml jars. Let cool for 20 minutes before removing the jars from the pot.
  9. Enjoy after at least one week. If correctly canned this can be stored for a few months in the fridge or a cool and dark place.

Suggestions:

  • Remains of the oil can be added to your tomato sauce recipe.
  • Do not throw away flesh and seeds, soften them gently in olive oil for about 15 minutes, and place them into a teabag, transfer with the oil into a jar and cover with more olive oil. Keep cover with oil. You will get a wonderful hot and spicy olive oil for you dishes. During the storage this will turn hotter.

Autor: https://artandkitchen.wordpress.com/  
Cassis (Black Currants) and Lemon Cake

One of our absolute beloved, fresh and spongy super quick cake!  

The source of this recipe is a popular recipe which we got in Spain and we adapted it reducing the oil and the sugar only for personal taste. We use Greek plain yogurt + fresh lemon instead of yogurt with lemon taste. In Spain this cake is also called “bizcocho 1 2 3 “.

We prepare if you are traveling into holidays apartments (yes, we I carried the empty tin with us) for a fast breakfast and a snack for our road trips.

For the easiest version you may use the container of your yogurt as the measure of 1 cup.

See also the Spanish version on youtube: https://www.youtube.com/watch?v=pgdaD_EJX-E&ab_channel=Elrinc%C3%B3ndelpancasero

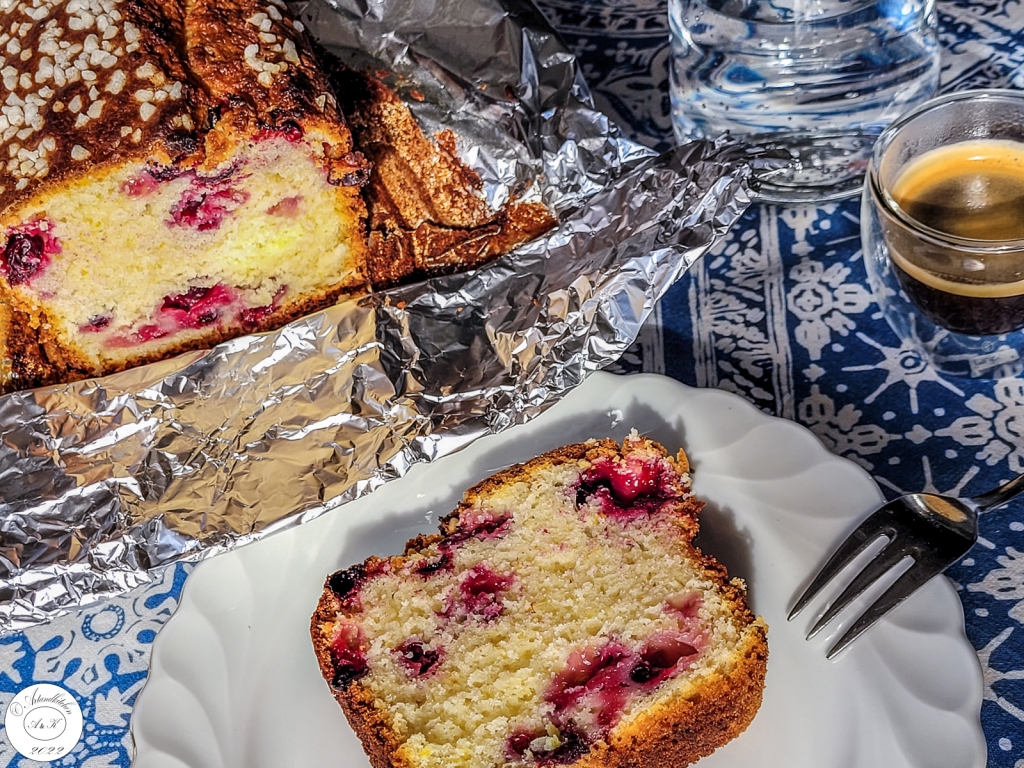
The combination of cassis and lemon gives to this cake a very strong and refreshing flavour.

We tried also these great variations:

  • Limes instead of lemons
  • Black berries, blueberries or “josta berries” instead of cassis
  • Skip the berries and convert this cake into a lemon cake

Black Currants and Lemon Cake

  • Servings: about 12
  • Difficulty: easy
  • Print

Ingredients

Batter:

  • 1 cup yogurt (any yogurt but for us Greek plain yogurt is the best)
  • ½ cup oil (original recipe: 1 cup)
  • 1 ½ cups sugar (original recipe 2 cups)
  • 3 (if you use the size of the container of the yogurt instead of “cup”) or 4 eggs (if using the official “cup”)
  • 1 lemon, zest grated
  • 1 lemon, juice
  • 3 cups flour
  • 2 teaspoons baking powder (1 envelope)
  • 1 teaspoon vanilla (1 envelope)

Fruits:

  • 1 cup black currents (cassis)  or other berries

Topping (optional)

  • Sugar pearls

Preparation:

  1. Preheat the oven to 180°C/350°F and line you mold (about 30 cm of length) with baking or aluminum foil.
  2. In a big bowl combine all the ingredients for the batter.
  3. Fold under the berries.
  4. Pour the dough into your prepared mold and add the topping.
  5. Cook for 50-60 minutes at 180°C/350°F or until done (toothpick test)
  6. Let cool down and serve.

Autor: https://artandkitchen.wordpress.com/  
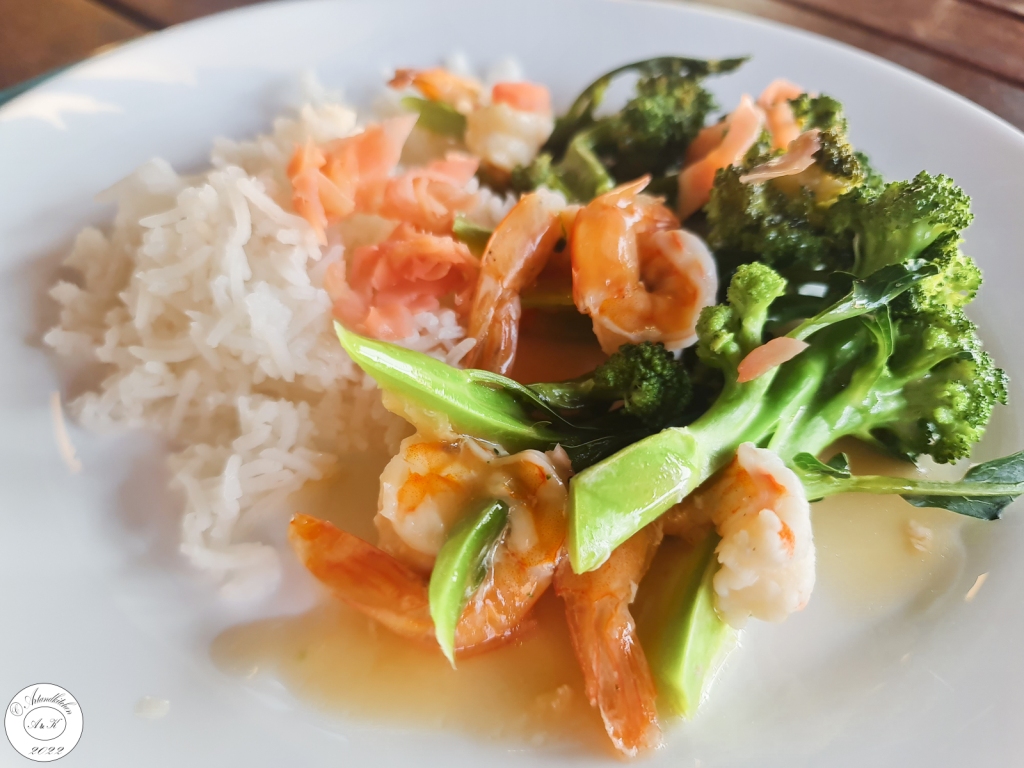
Coral and Jade Prawns

This was one of the first Chines recipes we found in a cookbook (Kare Jup Ha Kow) and prepared as we started to travel around Asia and missing the Asian taste once back at home.

With the time we adapted the recipe to our taste but we kept the to the combination of prawns, broccoli and baby ginger; the last one the big hit in this dish!

This need a bit of time for the preparation of the broccoli florets and assembling with the prawn, but it looks so pretty that we never skipped this step.

Coral and Jade Prawns

  • Servings: 2-3 persons if served alone with rice
  • Difficulty: easy
  • Print

Ingredients

  • 400-500 g prawns
  • 1 broccoli head
  • 2 tablespoons vegetal oil
  • 2 tablespoon finely diced ginger
  • 2 garlic cloves, finely chopped
  • ½ cup of water
  • 2 teaspoons cornstarch
  • 1 tablespoon Chinese rice wine or dry sherry
  • 1 tablespoon soya sauce, to taste
  • 1 tablespoons sliced preserved pink baby ginger

Preparation

  1. Shell and devein the shrimp letting the last part of the tail as it is.
  2. Wash the broccoli and with a knife prepare as many florets as the prawns. Make a point at the end of the green stalk.
  3. Make an incision on the tail of the prawn and pass the end of the broccoli stem though this hole.
  4. In a small bowl combine water with cornstarch.  Set aside.
  5. Heat the oil in a wide non-stick frying skillet. Add garlic, and ginger and stir fry until fragrant.
  6. Add the prawn with the broccoli to the skillet and fry for about 2 minutes. Turn gently and cook for one more minute,
  7. Add soya and rice wine, reduce the heat to minimum.
  8. Add the mixture of water and cornstarch cover, shake gently the skillet, and cook for two minutes or until broccoli begins to turn a bit soft. Add more water or soya sauce to taste if needed.
  9. Just before serving top with the baby ginger.
  10. Serve immediately with rice.

Autor: https://artandkitchen.wordpress.com/  

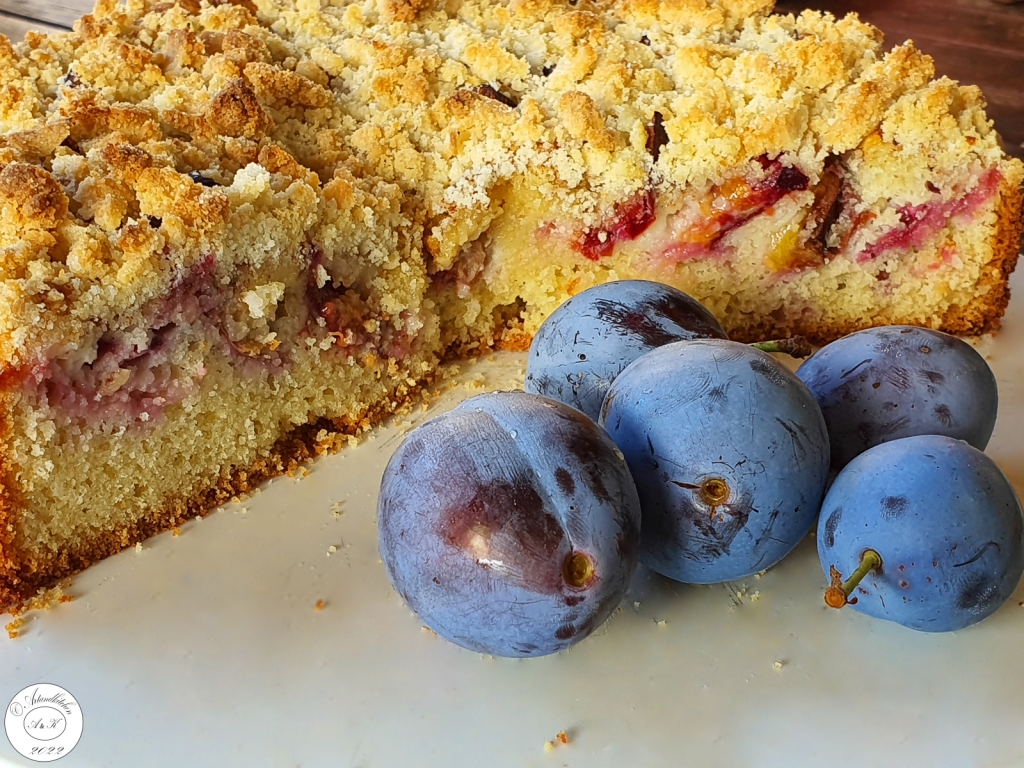
Plum Almond Crumble Cake

This sumptuous delicious almond cake is topped with plums and perfumed with cinnamon. It has a soft base, a juicy fruity layer and at the same time it has a crunchy topping.

I imagine that this recipe could be used for many kind of fruits. Not only apricots, peaches, nectarines, but also apples, pears and why not, many kind of berries.

Plum Almond Crumble Cake

  • Servings: about 12
  • Difficulty: easy
  • Print

Ingredients

Tin preparation

  • Oil or butter to coat the tin
  • About 2 tablespoons ground almonds

Cake

  • 80 g oil
  • 185 g sugar
  • 4 large eggs
  • 250 g flour
  • 2 tsp baking powder
  • 1 tsp vanilla powder
  • 100 g ground almonds
  • 85 g plain Greek yogurt (10 %fat)

Topping

  • 500 fresh plums , quartered and stoned
  • Cinnamon to dust, optional

Crumble

  • 100 g ground almonds (minus almonds used for the tin)
  • 30 g flour
  • 50 g sugar
  • 50 g butter

Preparation

  1. Preheat the oven to 175°C (convection oven) or 180°C (conventional oven).
  2. Coat the tin (I used a 26 cm wide springform) with oil or butter and dust with ground almonds.
  3. For the cake, put the oil, sugar, eggs, flour, baking powder, vanilla, ground almonds and yogurt in a big bowl. Beat with an electric whisk until smooth and pour this batter into the tin.
  4. Arrange the plums vertically pushing them partially into the sponge batter and dust with cinnamon to taste.
  5. Put all the crumble ingredients in a bowl, cut in the butter with a forj and rub together with your hands until crumbly. Finally scatter the crumble over the plums
  6. Bake for about 50 minutes until done (test: a skewer poked into the cake mixture comes out clean but plums will remain sticky).
  7. Let cool down on a wire rack.

Serving suggestion:

  • Serve cold with plain yogurt, sour cream or whipped cream
    • Serve lukewarm with vanilla ice cream

Autor: https://artandkitchen.wordpress.com/  
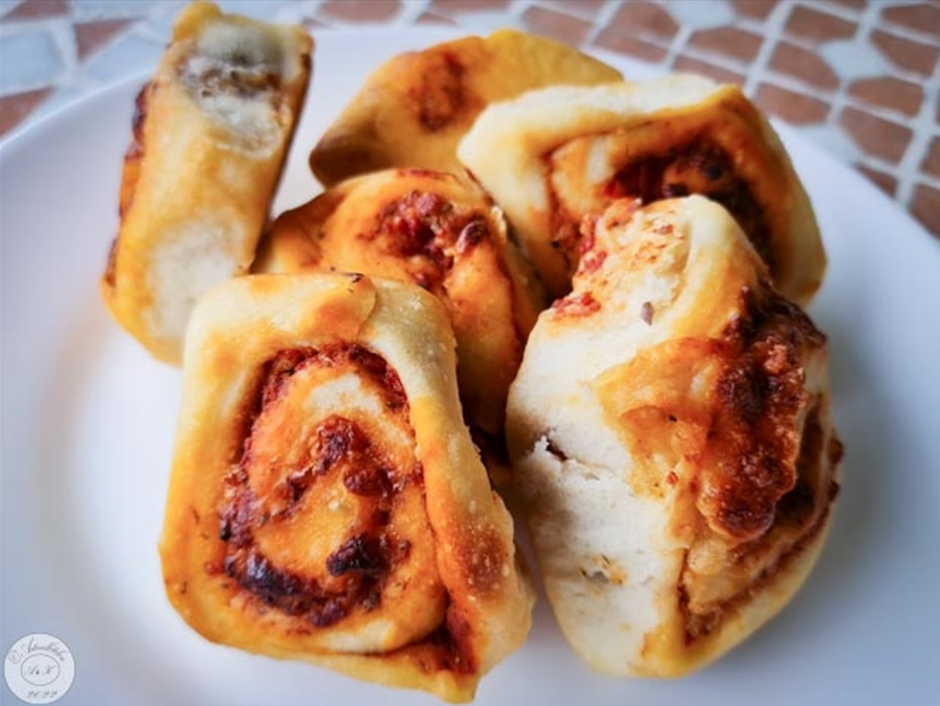
Easy Pizza Rolls from Scratch

These pizza rolls are surprisingly easy to be prepared, but you need to start about 3 hours in advance as the dough need some time for rising. If you do not have time, skip the homemade pizza dough and try with a good quality store bough pizza dough.

The proposed filling is very simple, but you any other ingredients you like on pizzas.

Easy Pizza Rolls from Scratch

  • Servings: 24 pieces
  • Difficulty: easy
  • Print

Ingredients

Pizza Dough

  • 500 g flour
  • 300 ml water, lukewarm (about 30°C)
  • 1 teaspoon dry active yeast
  • 1 teaspoon salt
  • 4-5 tablespoons olive oil (or as needed), this for the dough and for rolling

Filling

  • 1 tin chopped tomatoes (pelati), drained
  • 1 tablespoon tomatoes concentrate paste
  • 1 tablespoon pesto
  • ½ teaspoon oregano, dried (quantity to taste)
  • Salt and pepper to taste
  • 250 g shredded mozzarella cheese (store bought)
  • 2 tablespoons grated parmesan cheese
  • Additional ingredients to taste: dried onions, olives, capers….

Preparation

  1. Dissolve the yeast in about 100 ml water and 50 g of flour. Wait until yeast is active and foamy.
  2. Now all the remaining flour, water and salt. Mix well and set aside for about 20-30 minutes.
  3. In the meantime place drain the tomatoes over a sieve in order to eliminate excessive water.
  4. Stretch and fold about 5 times or until dough becomes elastic and smooth. For this step I add about 1 tablespoon of oil on the sides of the bowl. Cover and set aside until doubled.
  5. Roll out the dough on a well-floured surface to the size of about 40 X 60 cm.
  6. Combine the drained tomatoes with the tomatoes paste, the pesto, the oregano and adjust to taste with salt and pepper.
  7. Spread the tomatoes mixture over the dough letting about 3 cm of the long side free (you will need the border to close the roll). Sprinkle mozzarella and parmesan. Top the cheese with additional ingredients to taste.
  8. Start rolling the dough from the long side to a tight log. Seal the end by pinching the dough free of filling.
  9. Spread about 3 tablespoons of olive oil over the log and coat it well with your hands or a baker’s brush.
  10. Using a super sharp knife slice the pizza dough log into equal rolls, placing them onto baking tray lined with parchment paper.  For this step I made 24 pieces for 4 x 6 rolls in my baking tray. We prefer to bake these on a tray quite near to each other so that while rising they will fill the tray completely; the oil will make the step of separating them super easy.
  11. Brush the top rolls with little olive oil.
  12. Let the rolls rise for about 1 hour or until you see the dough is filling the gaps of the tray between the single rolls before baking.
  13. Preheat the oven to 200°C.
  14. Important: just before baking splash about 1/2 cup of water into the oven (if not possible place a flat bowl with boiling water into the oven)  in order to increase the humidity. Place immediately the tray into the oven and bake for about 25 minutes or until the dough appears golden.
  15. Remove from the oven and cool the rolls for 10 to 15 minutes before serving or let cool down partially, cover with parchment foil and serve when desired.  We love them lukewarm.
  16. Store any leftovers in airtight containers in the refrigerator for up to 5 days and kept frozen for up to three months.

Autor: https://artandkitchen.wordpress.com/