Guacamole con Tomates

Guacamole is very popular Mexican dip with many variations.

This variation, which includes also the use of tomatoes, is the most appreciated in our family and every times is comes out a bit different as we do not measure the ingredients, we change it a little bit depending on what we have on hand.

This is great as appetizer with tortilla chips, but also with wraps or other dishes.

Guacamole con Tomates

  • Servings: 2
  • Difficulty: easy
  • Print

Ingredients

  • 50 g chopped onions
  • 1 avocado, ripe
  • 1 tablespoon lime juice
  • 1 tablespoon fresh cilantro, chopped
  • 1 pinch of salt, to taste
  • 1 medium tomato or about 10 cherry tomatoes, diced
  • 1 teaspoon Worcestershire sauce (optional)
  • 1 dash chili powder or other little chili sauce or some paprika powder (optional)

Procedure

  1. Place the chopped onions in a small bowl with cold water (this for about 10 minutes)
  2. In a small bowl mash the avocado with the fork
  3. Drain the onions and add them to the mashed avocado along with the other ingredients.
  4. Combine very well and season to taste

Autor: https://artandkitchen.wordpress.com/

Day 22 Stay at Home or In the Garden: Greek Chickpeas Soup

Missing Crete and missing Greece, we made a culinary excursion to Sifnos preparing and enjoying a super simple and delicous chickpeas soup called “revithia soupa” (ρεβύθια σούπα).

The ingredients for this soup are super simple: chickpeas, lemon, oilive oil, onion, water and salt. 

As traditionally these soup is prepared in the night from Saturday to Sunday with the remaining heat of the wooden oven and we really used the wooden oven the day before, this was just the right moment for this soup.

More about the history of this soup and the recipe: https://artandkitchen.wordpress.com/2015/03/24/revithia-soupa-greek-chickpeas-soup/


Day 6: Stay at Home or In the Garden: Bowl of Spring

The weather feels really like spring or almost summer.  The garden is already rich of edible flowers and if you have the opportunity, then put spring into your salad with flowers you can eat.

The thought of eating flowers didn’t seem to be fair (they are to beautiful), but many of these little cute flowers have its own unique taste and they make your salad more attractive.

This greens salad had been enrichted with: leaf celery (Apium graveolens var. secalinum), primrose flowers (primula vulgaris), rosemary flowers (Rosmarinus officinalis) and cuckooflower (cardamine pratensis).

This slideshow requires JavaScript.

Dried Figs stuffed with Almonds and Orange Zest

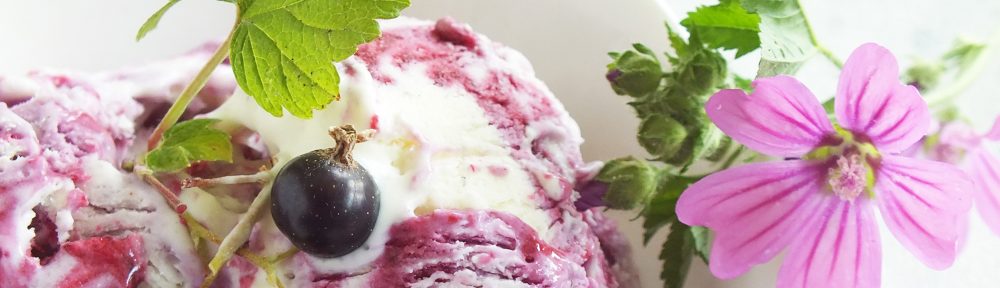
This year we had a very warm summer and the garden gave us a lot delicious figs, which we shared with friends.

However, it was only during our holidays on Crete after noticing that most of the figs fall on the floor and, as I hate food waste, I decided to try to dry some figs and prepare a great souvenir of the summer in a jar.

The good thing we had for this, beside the figs of course was the sun; the strong Greek sun is best to preserve these figs and for this reason, I searched in the internet how I should proceed.

To make them more special, I decided to modify an Italian recipe (from the *Puglie* region) and so I started to collect ripe but still firm green and black figs and to dry them in the sun!

Figs can be dried halved or cut in two pieces; I opted to cut them into two halves as the effect of the sun would be stronger drying the figs quickly and the rays would destroy all possible parasites.

The best way to dry them would be on a grid, but since I did not have this, I used my normal baking try with a black baking foil, which attracted the sun and kept the heat; in two days, the figs were dry enough, some of them almost to dry! J

If you don’t have the opportunity to collect and dry the figs, you should opt for the dry figs from the store and halve them with a scissor taking care to keep them partially attached.

These figs are an unusual addition to the holiday table and make a unique Christmas gift from the kitchen!

Dried Figs stuffed with Almonds and Orange Zest

  • Difficulty: easy
  • Print

You need

  • 50 dried figs, butterflied
  • 1 orange, peel only removed with a vegetable peeler and cut into small pieces
  • 50 almonds
  • 1 tablespoon powdered sugar
  • 1 pinch o cinnamon
  • 10-20 bay leaves

Procedure

  1. Add a piece of orange peel on one side of the butterflied fig.
  2. Add an almond on each it and cover with the other side. Press them well together.
  3. Bake for 10 minutes at 180°C/350°F, Check on the color and temperature as cooking time may vary from oven to oven!
  4. In the meantime, combine the powdered sugar with the cinnamon.
  5. Switch off the oven, take out the figs out, dust with sugar and place them in the oven for other 5 minutes.
  6. In order to store them for a long time, place the still warm figs into sterilized jars layered and with several bay leaves between the layers for added flavor. Store the jar in a cool dry place.

Tip1: After sun drying the figs, some of them resulted very dry, too dry for this preparation, for this reason I placed them in bowl, sprinkled them with water (about tablespoons for 5 cups of dried figs) covered them, and placed in the microwave for 2 two minutes. After resting for about 10 minutes they were ready for this preparation.

Tip2: Quartered walnuts and orange zest by lemon or tangerine zest may replace Almonds!

Author: https://artandkitchen.wordpress.com/

This slideshow requires JavaScript.

Jeera Rice – Indian Cumin Rice

This is a very popular Indian side dish, which can be prepared with raw rice, but it is also a way to upgrade white rice leftovers and give them a new dress.

Jeera means cumin, but in this recipe more spices are added and this version is very much appreciated in my family.

Jeera Rice – Indian Cumin Rice

  • Servings: 3-6
  • Difficulty: easy
  • Print

You need

  • 1 1/2 cups basmati rice
  • 2 tablespoons ghee or pure vegetal oil
  • 2 teaspoons cumin seeds
  • 2 -3 green cardamoms, lightly crushed
  • 2 cloves
  • 1 small piece cinnamon stick, about 1 cm
  • 1 star anise (optional)
  • 1 black cardamon (optional)
  • 1tej patta (Indian bay leaf)
  • 1 teaspoon salt
  • 3 cups water

Procedure

  1. Rinse the rice until the water run out clear and soak the rice for 30 water in cold water. Drain
  2. In a pot heat the ghee or oil over medium heat until hot.
  3. Add cumin, cardamom, cloves, cinnamon, star anise and black cardamom. Roast until the cumin begins to crackle. Add bay leaf and stir quickly.
  4. Add the rice and cook stirring constantly for about 2 minutes.
  5. Add water and salt increase the heat and bring to boil again.
  6. Reduce the heat, cover and let cook until water is adsorbed.
  7. Let rest for 5 minutes before serving.

Note: If using rice leftovers, simply roast the spices in ghee/oil, add the cold cooked plain rice add 2-3 tablespoons water and stir well to combine. Cook stirring constantly until the rice is warm, remove from heat, cover and let rest a few minutes before serving.

Autor: https://artandkitchen.wordpress.com/

Pimientos de Padrón al Horno – Oven Baked Peppers from Tenerife

We tried these simply and delicious dish on Tenerife as we escaped the European winter for a few days.

Originally these peppers had been imported from America and now they are very much appreciated in Spain and all over the world. For this recipe you should use small green peppers (called pimientos de Padrón) each one just one bite!

Traditionally these peppers should be fried, after this some salt (with “sal Maldon“) is added and they are served immediately. In this version we will toss them with little olive oil and bake them in the oven.

These are usually served as appetizer, but as side dish works very well for us.


Pimientos de Padrón al Horno – Oven Baked Peppers from Tenerife

  • Servings: 4-8
  • Difficulty: easy
  • Print

You need:

  • 250 g small green peppers (pimientos de Padrón)
  • 2 tablespoons olive oil
  • Pepper to taste
  • coarsely salt (sal Maldon), to taste

Procedure

  1. Preheat the oven to 200°C.
  2. Wash peppers, pat dry and add oil and pepper.
  3. Toss with your hands to coat them.
  4. Transfer to baking mold (if possible in only one layer).
  5. Sprinkle with salt (you can also add the salt after baking) and bake them until lightly roasted for about 15-20 minutes.
  6. Serve immediately and enjoy!

Autor: https://artandkitchen.wordpress.com/

Lemon Marmalade


Recently I got a batch of fresh organic lemons from the garden of friends and I really could not resist trying the preparation of a refreshing marmalade.

I googled here and there to get enough knowledge in order to prepare something I knew everybody would love and something I could prepare as a gift for friends especially for my Christmas baskets.

My Greek lemons were quite huge, around 250-300 each, thick zest and not so many seeds. The smell was so intense and delicate at the same time that I had to try to preserve it in a jar for next months!

This recipe does not need additional pectin as the seed and the filaments are the source of the jelly. Well, as I supposed,  my lemons did not have a lot seeds, so I needed to cook the marmalade a bit longer (not 20 minutes as “usually”), but it worked and the result is amazing. With 4 lemons I got 4 small jars of about 200 ml.

The quantity is easy: same amount in weight of lemons, water and sugar. Be aware that the amount of water will be reduced while cooking and I did not add more water.

You don’t need to use exactly 1000 g lemons and so on, adjust the quantities of water and sugar according the weight of the lemons.

Lemon marmalade

  • Servings: about 10 of 200 ml per 1ooo g lemons
  • Difficulty: medium
  • Print

You need

  • 1000 g organic lemons
  • 1000 ml water
  • 1000 g sugar

Procedure

  1. Wash well your lemons and scrub to remove the impurities if any.
  2. Place some metal spoon into the freezer for the jelly test.
  3. Measure the weight of the lemons and place them into a pot with the same amount of water. Bring to boil.
  4. Boil until you feel that the zest is soft. This takes about 30-40 minutes.
  5. Remove the lemons from the water to cool down for about 15 minutes or until they are not too hot for you. Don’t discard the water. If necessary sieve the water and clean up the borders of the pot.
  6. Halve the lemons with a knife and with a spoon out the flesh with the seed and give this over a sieve placed over a bowl. Remove also the stem and filaments; place them into the sieve as well.
  7. Cut the zest into strips and slice it. Put the sliced zest back into the water as well as liquid dropped from the sieve and the sugar.
  8. Bring slowly to boil, in the meantime work the remaining into the sieve with the back of the spoon in order to press out as much as possible. Place the leftovers into a small cheese cloth and hang it into the pot. Note: I used a stainless steel tea ball.
  9. While boiling you will see that the zest will turn translucent and the liquid clearer. When you feel that the jelly begins to form, drop a few drops into a frozen spoon and you will see if turn hard enough: push your finger through the drops and you will see the marmalade’s surface will wrinkle if it is set. My lemon did not have a lot of seeds which are the source of pectin so I had to boil for about 40 minutes!
  10. Fill your sterilized jars if possible with a jar funnel close them immediately and place them upside down on a safe working place. After 10 minutes invert them again and let them cool down completely to set.

Autor: https://artandkitchen.wordpress.com/

Vegetables Potpourri with Preserved Lemon Dressing

It’s always a big advantage havening at home many delicious ingredients ready to be used for surprising good preparation as this salad or side dish with a preserved lemon dressing. I know that this can be hardly be found in your shop, but you can easily prepare some or better than nothing for this recipe use simply a mixture of lemon juice, lemon zest and salt.

For the preparation I used the ingredients listed below, but you can use any vegetables who would fit to be roasted in the oven. I served the dish warmfebeta from the oven, but it can be served lukewarm or cold as salad as well.

Suggestion: prepare more dressing and serve it with grilled chicken breasts.

For the recipe for preserved lemons click HERE

Vegetables Potpourri with Preserved Lemon Dressing

  • Servings: 3-6
  • Difficulty: easy
  • Print

You need

Vegetables

  • 1000 small potatoes, peeled (I used yellow and purple ones)
  • 2 small zucchini, sliced
  • 2 red peppers, seed and stem removed, sliced
  • 3 carrots, peeled and sliced
  • 2 tablespoons olive oil
  • Salt to taste

Dressing

  • 1 small preserved lemon (about 80 g)
  • 5 tablespoons olive oil
  • 5 tablespoons water
  • 1 tablespoon grated fresh ginger
  • 4 tablespoons chopped coriander or parsley
  • Pepper to taste

Preparation

  1. Preheat the oven to 200°C/400°F.
  2. Combine all the vegetables and oil in a big bowl, toss to coat with the oil well.
  3. Arrange vegetables in an oven proof mold.
  4. Bake at 200°C/400°F for about 30 minutes until all vegetables are done.
  5. While the vegetables are in the oven combine all the ingredients for dressing in a blender and blend until smooth.
  6. Serve the vegetables warm, lukewarm or cold with the dressing.

Autor: https://artandkitchen.wordpress.com/

Carrot and Raisin Salad with a Twist

Carrot-and-Raisin-Salad-with-a-Twist

This Bahamian salad should make 4 portions, but it was so delicious that yesterday I ate this alone with my son and we did not let any leftovers. It’s one of the best carrot salad I’ve ever tried!

The result is an exquisite exotic salad we loved very much and I will prepare soon for all of us…. doubling the quantity!

Carrot and Raisin Salad with a Twist

  • Servings: 2-4
  • Difficulty: easy
  • Print

Autor: https://artandkitchen.wordpress.com/  Carrot-and-Raisin-Salad-with-a-Twist

You need:

  • 2 cups carrots, peeled and grated
  • 1/2 cup raisins
  • 1/2 cup cashew
  • 2 tablespoon dried coconut flakes
  • 2 tablespoons white rum, or to taste
  • Oil
  • White vinegar (I used white balsamic vinegar)
  • Pepper
  • Salad leaves to serve

Procedure:

  1. Grate the carrots.
  2. Dry roast the cashews, set aside.
  3. Dry roast the coconut flakes until light browned.
  4. Combine carrots, raisins, cashew and coconut but reverse little coconut and cashew for decoration.
  5. Season with rum, oil, vinegar and pepper to taste.
  6. Spoon over salad leaves (single plates or in a bowl) top with reserved cashew and coconut!

Nocino/Ratafià – Italian Walnut Liqueur

Nocino

Have you ever tried the NOCINO the Italian green-walnuts liqueur? It’s delicious and it is very easy to prepare this! Simply follow my instructions and you will prepare this next year as well! It makes a wonderful gift for your friends!

Nocino is a  sticky dark brown liqueur very popular in Northern Italy as well as in the Ticino the Southern Italian speaking part of Switzerland were it mostly called “ratafià”. It is much appreciated for it’s an aromatic but bittersweet flavor.

It’s origins are unknown but it is during the Middle Ages, Italian monasteries used nocino for its medicinal properties and also as an alcoholic treat; some sources says it has even Celtic origins.

In any case I can say that it particular delicious and after a heavy meal this helps the digestion!

“Noci” means nuts; as this is made from unripe green walnuts. According the tradition the nuts should be picked in the night of St Johannes, but I would suggest to pick the nuts before they are “wooden” and size is around 3 cm. Don’t forget to use plastic gloves while picking the nuts as the juice would brown your skin and cloths!

Almost every family has its recipe, I will live the first recipe I got. I still follow this recipe, but the alternative I follow is to use “tsikoudia” (τσικουδιά,the Cretan grappa/raki) instead of alcohol and water. The result different but it is delicious as well and I can’t say which version s better!

Other spices that can be used for this recipe: vanilla, nutmeg, maces and, cardamom.

In the photo: before and after result.

Nocino/Ratafià – Italian Walnut Liqueur

  • Servings: 4 loaves
  • Difficulty: medium
  • Print

Autor: https://artandkitchen.wordpress.com/  Nocino

You need:

  • 20 green walnuts, halved or quartered (more if too small)
  • 1 liter 90% alcohol for preparation of liqueurs
  • 1 lemon zest, cut into strips
  • 5 cloves
  • 1 big piece of cinnamon
  • 400 g sugar
  • 300 ml water, boiled and cooled down

Procedure:

  1. Prepare the walnuts .
  2. Place all the ingredients in a big pot/bottle and close tightly.
  3. Let sit for 40 days in a warm place, best if at the sun.
  4. Sieve and fill in bottles.

Suggestion:

I place again all the ingredients (expect of the filled nocino) in the original bottle, I cover it with a sweet rose wine (you may add some sugar if you like) and I let it sit for a few month. I’m sure you will enjoy this very much as well! It is less strong but delicious as well!