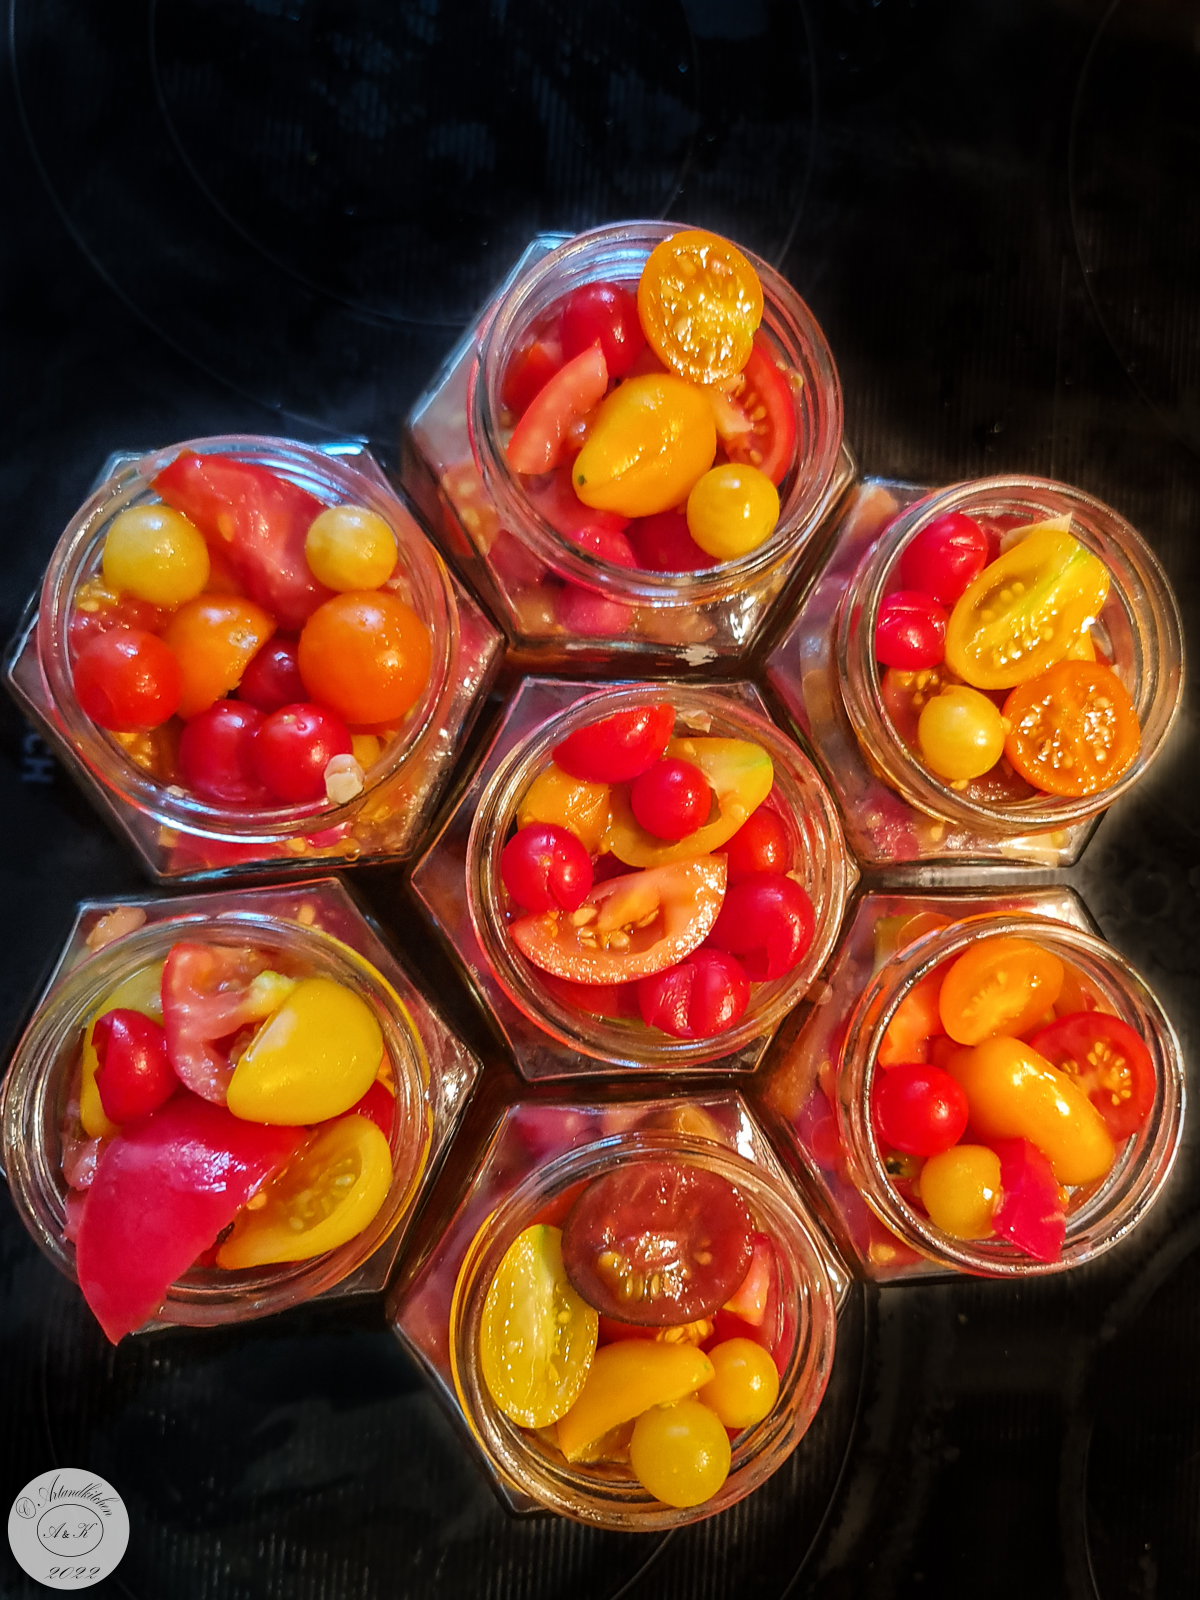
Preserved Tomatoes with Basil in Jars

Do want to keep the taste of the summer for the winter?

This is a simple but easy way to preserve the full flavour of your tomatoes and at the same time to have quick ready dish when you feel you are missing the sun and your fresh tomatoes from the garden.

This year we got a wonderful tomatoes harvest and we are still harvesting every day. We exchanged seed with friends and so we got an incredible variety of tomatoes and other vegetables. Now the winter is approaching, we all have to save electricity and with this method you will prepare great pasta dishes without spending a lot of time in cooking your tomatoes sauce.

Important! For sterilization with a pressure canner, please follow the instruction for the equipment. Depending on the Country you live, you will find completely different safety instruction about canning and possible botulinum poisoning.

Processing time for canning articles:

Preserved Tomatoes with Basil in Jars

  • Difficulty: medium
  • Print

Ingredients

natural-preserved-tomatoes-with-basil-6 All quantity to taste and according to your harvest J
  • Ripe tomatoes
  • Olive oil (about 4 tablespoons per kg tomatoes)
  • Garlic, chopped to taste
  • Balsamic vinegar (4 tablespoons per kg tomatoes), this is needed for longer storage
  • Salt (about 1 teaspoon per kg tomatoes)
  • Basil leaves or flowers to taste

Preparation

  1. Clean and dice tomatoes according to their size. I did not dice wild tomatoes, I halved cherry tomatoes and the other tomatoes in 1- 1.5 cm big sizes.
  2. Heat oil and add the garlic. Roast only a few minutes until fragrant.
  3. Remove garlic-oil mixture and pour it over the prepared tomatoes. Add vinegar and little salt.
  4. Combine gently and let sit for about 2 hours. They will release some juices.
  5. Add basil and stir well.
  6. Place the tomatoes mixture into the jars. Fill jars, leaving 2 cm headspace. Press gently down the tomatoes in order to cover the pieces with their juices.. Slide a nonmetallic spatula (a plastic knife works well) around the inside edge of the jar, pressing back gently on tomatoes to release any air bubbles. Do not add water.
  7. Use a clean, damp cloth to wipe any tomato residue from the outer rim of the jar. This is necessary in order seal tight the jars. Screw lid evenly and firmly, but not too tight; just until resistance is met and lids are fingertip tight.
  8. I performed the “heat treatment” of the canned tomatoes in water bath. Place the jars into big pot (or use a canner). Fill with warm water. The water must cover the jars by 2 cm. Bring to a rolling boil, cover the pot and boil for 60 minutes if using 250-500 ml jars. Let cool down completely before removing the jars from the pot. Check if the lid is tightly closed after cooling down.  For heat treatment, please follow the instruction of your equipment (for example the pressure canner) and the following link: https://extension.umn.edu/preserving-and-preparing/canning-quick-reference-chart.
Suggestion: place the jar in water bath or shortly in microwave and serve over hot pasta with fresh grated Parmesan cheese and fresh basil Autor: https://artandkitchen.wordpress.com/

This slideshow requires JavaScript.

Day 7: Stay at Home: Filo Twisted Spinach Pie from Scratch

I made this Greek spinach pie in about 30 minutes working time, thanks my kneading machine. I did not measure the exactly amount of the ingredients for the filo. While the kneading machine was working/kneading, I had the time to prepare the filling. At the end, it was a very simplified version of my post  Spanakotiropita with Homemade Filo Dough.  I could have used more ingredients, but at these times, I preferred to skip some and for example save the feta and eggs for other recipes. No shopping excursions now! I will simply list the ingrediens and the procedure. We miss Crete so much!

Filo Twisted Spinach Pie from Scratch

  • Servings: 2-4
  • Difficulty: medium
  • Print

Ingredients:

Filo

  • 1 1/2 cups four
  • 1 tablespoon olive oil
  • 1 teaspoon salt
  • 2 tablespona ouzo
  • about 1/3 cups water water

Filling

  • olive oil
  • 300 g spinach, whashed
  • 1 big onion, sliced
  • mint, chopped
  • dill, chopped
  • salt and pepper to taste

Topping

  • 2 tablespoon water
  • 2 tablesppons olive oil
  • 1/2 tablespoon flour
  • salt to taste
  • sesame and nigella seeds

Procedure

  1. For the filo combine flour, oil, salt and ouzo in the kneading bowl. While kneading add water until you see the dough forms, turns smooth and elastic. Let kneed while you prepare the filling.
  2. Fry the onion in about 2 tablespoons olive oil until translucent. Add the other ingredients and let cook until spinach turn soft and the liquid is adsorbed.
  3. Roll out half of the dough to a rectangle of about 20 to 40 cm. Stretch with the back of our hand until about 30 to 60 long.  Brush with oil. Spoon the filling (on the shorter side of the rectangle) but do not go all the way to the edges so that the pastry sheet margins could be folded in slightly. Roll or pack lengthwise. Place the roll in spiral in your round baking tray ( 28 cm diameter). Repeat with the second portion.
  4. Combine the water, oil, salt and flour for the topping. Brush the spiral with this and top with seeds.
  5. Bake in a preheated oven for about 20-25 minutes at 190°C until golden and crispy.
  6. Enjoy warm, lukewarm or cold.
Autor: https://artandkitchen.wordpress.com/

This slideshow requires JavaScript.

Day 4: Stay at Home or In the Garden; Poached Pears with Saffron and Chocolate Sauce

It’s very quite around us, not so much noise as usual. The sun is warm and  we are lucky we have a garden where we can sit outide and enjoy the day with homemade preserved products.

Pears are an excellent canning fruit because they keep their shape (let simmer only gently) and if places in nice jar, they make wonderful presents.

For this process, it’s necessary to use firm maybe lithely unripe pears. Peel them using a potatoes peeler taking care, not to remove the stem.

I used small pears from the Turkish shop (the same pears I am used to fin on Crete in October), but if you have big pears, suggest to peel them and cut them into big slices.

I prepared this jars in December just before Christmas and today we decided to enjoy them in the garden because we got another warm early spring (or better late winter) day.

Poached Pears with Saffron and Chocolate Sauce

  • Servings: 6
  • Difficulty: medium
  • Print

Ingredients

Poached pears

  • 12 small or 6 medium firm pears, whole and peeled
  • 200 ml water
  • 200 ml white wine
  • 200 g sugar
  • 1 big pinch (about ½ tsp) saffron stems
  • 6 green cardamom pods, lightly crushed
  • 1 pinch cinnamon

Chocolate sauce ( for 2-4 persons)

  • 1/4 cup heavy cream
  • 2-4 tablespoons brandy
  • 50 g bittersweet chocolate, diced

Procedure

  1. Mix water, wine, sugar, and spices into a saucepot and bring to simmer for 15 minutes.
  2. Add pears and poach covered. For this procedure do not bring to boil. Cook, partially covered, turning occasionally, for20 to 30 minutes or until pears are just tender.
  3. Use a slotted spoon to transfer the pears and arrange the, upright into jars. Try to place them quite tightly.
  4. Cover the pears with the hot syrup leaving 1/2-inch headspace in each jar. Secure canning lids.​
  5. Process in a boiling water bath (80-85°C), 20 minutes for 500 ml jars or 25 minutes for 1000 ml jars. Store them in a chilly place.
  6. For the chocolate sauce: heat heavy cream with brandy in the microwave (about 30 seconds) until hot but not boiling. Add chocolate and stir to dissolve. If necessary place a few more seconds in the microwave.
  7. Place pears into single serving plates, add some syrup (optional), top with warm chocolate sauce and serve immediately.

Autor: https://artandkitchen.wordpress.com/

Day 3: Stay at Home or In the Garden; the Smoorbetto

Start your day in a delicious way with a lot of vitamins and a Smoorbetto! In alternative have a break and make yourself a nice present! That’s exactly what our body and our soul need! If possible, add a few edible flowers for a better presentation!

What is a Smoorbetto it’s smoothie prepared with frozen fruit, the result is very similar to a sorbetto but it is lightly frozen.

For this recipe, we used fruits form the past year, which I still have in our freezer. It’s almost spring now, but we still have a lot of them and now, as we will stay mostly at home this is best opportunity to reduce the overflow and make something good for yourself and the family.

Smoorbetto

  • Servings: 2
  • Difficulty: easy
  • Print

Ingredients

  • 2 cups of chopped or diced frozen fruits of your choice (I used apricot and Indian blood peach)
  • 1 cup of water
  • 2 tablespoons honey, or to taste

Procedure

  1. Place all the ingredients in the bowl of a strong mixer and pulse until smooth.
  2. Note: if the fruits are too hard (frozen), wait a few minutes and pulse again.
  3. If you like top with fresh edible fruits or other suitable decorative goods.
  4. Serve immediately!

Autor: https://artandkitchen.wordpress.com/

Bread Swirls with Olives

Prepare these savory small breads in advance and freeze them. You will need only 2 minutes in a preheated oven and you have something special to serve as appetizer, as side for a meal or simply for a snack. They will be very much appreciated!

Variation: Add some oregano to the dough or top the swirls with sesame seeds

Bread Swirls with Olives

  • Servings: about 24 pieces
  • Difficulty: easy
  • Print

Ingredients:

  • 100 g sourdough starter (or 50 g water + 50 g flour + 1/4 teaspoon dried yeast)
  • 1 cups water
  • 2 cups white flour
  • 1 cups black flour or any whole kind of flour
  • 1 teaspoon salt
  • 1/2 cup black olives, pitted and chopped
  • Olive oil (optional)

Procedure

  1. The evening before combine well the starter, water, flours and salt. Knead about 5 minutes. Place in a bowl, cover and let rise in a warm place overnight.
  2. The next morning the dough should have risen, stretch it to a rectangle of about 50 to 30 cm on a well-floured surface.
  3. Distribute the olives on the dough leaving 5 cm of the long border free. Roll it so that you get a long (50 cm) roll and slice it into 2 cm think swirls. Place the pieces on a baking tray. Brush with olive oil if you like.
  4. Let rise again in a warm place (this took me about 1 hour, but it depends on the temperature and the kind of yeast).

Bake in a preheated oven for about 15 minutes until golden brown.

Autor: https://artandkitchen.wordpress.com/

This slideshow requires JavaScript.

Pimientos de Padrón al Horno – Oven Baked Peppers from Tenerife

We tried these simply and delicious dish on Tenerife as we escaped the European winter for a few days.

Originally these peppers had been imported from America and now they are very much appreciated in Spain and all over the world. For this recipe you should use small green peppers (called pimientos de Padrón) each one just one bite!

Traditionally these peppers should be fried, after this some salt (with “sal Maldon“) is added and they are served immediately. In this version we will toss them with little olive oil and bake them in the oven.

These are usually served as appetizer, but as side dish works very well for us.


Pimientos de Padrón al Horno – Oven Baked Peppers from Tenerife

  • Servings: 4-8
  • Difficulty: easy
  • Print

You need:

  • 250 g small green peppers (pimientos de Padrón)
  • 2 tablespoons olive oil
  • Pepper to taste
  • coarsely salt (sal Maldon), to taste

Procedure

  1. Preheat the oven to 200°C.
  2. Wash peppers, pat dry and add oil and pepper.
  3. Toss with your hands to coat them.
  4. Transfer to baking mold (if possible in only one layer).
  5. Sprinkle with salt (you can also add the salt after baking) and bake them until lightly roasted for about 15-20 minutes.
  6. Serve immediately and enjoy!

Autor: https://artandkitchen.wordpress.com/

Vegetables Potpourri with Preserved Lemon Dressing

It’s always a big advantage havening at home many delicious ingredients ready to be used for surprising good preparation as this salad or side dish with a preserved lemon dressing. I know that this can be hardly be found in your shop, but you can easily prepare some or better than nothing for this recipe use simply a mixture of lemon juice, lemon zest and salt.

For the preparation I used the ingredients listed below, but you can use any vegetables who would fit to be roasted in the oven. I served the dish warmfebeta from the oven, but it can be served lukewarm or cold as salad as well.

Suggestion: prepare more dressing and serve it with grilled chicken breasts.

For the recipe for preserved lemons click HERE

Vegetables Potpourri with Preserved Lemon Dressing

  • Servings: 3-6
  • Difficulty: easy
  • Print

You need

Vegetables

  • 1000 small potatoes, peeled (I used yellow and purple ones)
  • 2 small zucchini, sliced
  • 2 red peppers, seed and stem removed, sliced
  • 3 carrots, peeled and sliced
  • 2 tablespoons olive oil
  • Salt to taste

Dressing

  • 1 small preserved lemon (about 80 g)
  • 5 tablespoons olive oil
  • 5 tablespoons water
  • 1 tablespoon grated fresh ginger
  • 4 tablespoons chopped coriander or parsley
  • Pepper to taste

Preparation

  1. Preheat the oven to 200°C/400°F.
  2. Combine all the vegetables and oil in a big bowl, toss to coat with the oil well.
  3. Arrange vegetables in an oven proof mold.
  4. Bake at 200°C/400°F for about 30 minutes until all vegetables are done.
  5. While the vegetables are in the oven combine all the ingredients for dressing in a blender and blend until smooth.
  6. Serve the vegetables warm, lukewarm or cold with the dressing.

Autor: https://artandkitchen.wordpress.com/

Ceviche de Champiñones

Ceviche de Champiñones

Ceviche is very popular dish in Peru mostly with raw fish as main ingredient. You can find many variations of this dish with many different kinds of additional ingredients. This is a vegetarian version!

Quite unusual is the use of mushrooms as main ingredient, but the procedure is the same and you can get a delicious light vegetarian/vegan salad to serve as starter.

You need

  • 1 package champignons mushroom (250 g), washed and sliced
  • 1 small onion, very thinly sliced
  • 1/2 cup lime juice
  • 2 tablespoon olive oil
  • 1 garlic clove, finely chopped
  • 1 red chili pepper, chopped
  • 1 tablespoon fresh cilantro, chopped
  • Pepper to taste
  • Worcestershire sauce, optional
  • Salt to taste
  • Lettuce leaves
  • One sweet potato or yam sliced, boiled (not to soft) and sliced
  • One avocado, sliced pulp

Suggestion for optional ingredients:

Procedure

  1. Place mushrooms over a colander and pour hot water over them. As alternative e you can fry them in a very hot skillet until lightly golden for a few minutes.
  2. Let cool down.
  3. In the meantime soak onions slices in very cold water to make them milder for about 10 minutes. Then drain well.
  4. In bowl marinate the champignons and onions with lime juice, olive oil, chili, cilantro and pepper for about 15 minutes.
  5. Just before serving remove part of the liquid (if too much is produced) and season with Worcestershire sauce and salt to taste.
  6. Serve immediately over a bed of lettuce/sweet potato/yam/avocado.

Balsamic Onions

Balsamic Onions

Have you ever tried to prepare balsamic onions at home? It’s really easy and your will get a very versatile side dish to come your meal and get some very tasty dishes.

I used this as onion salad for our first raclette this year but here some more suggestions:

  • a spoonful for your burgers and sandwiches
  • complete your cold meat or salad appetizers
  • while cooking you can add it to soups, casseroles, pasta sauces or braised dishes
  • serve it to boiling meat or other meat dishes

Prepare this in a big skillet to medium heat, and let the onions cook slowly avoiding burning. In this way the wine and sugars have time to get inside the onion layers and caramelize steadily. Don’t stir while cooking as you want them look attractive!

The quantity of sugar you will add is up to you, it depends on your taste and the way you will use it.

Caramelized onions will keep just fine in the fridge for around a week, but you can also freeze them or place them in jar and make pretty presents. For canning remember to place the bay leaf and the herbs of the side of the jar to make it look more beautiful and sterilize them.

I found that a mixture of yellow and red onions is delicious and looks really beautiful!

Balsamic onions

  • Servings: 8
  • Difficulty: easy
  • Print

Autor: https://artandkitchen.wordpress.com/

You Need

  • 8-12 small onions (if possible a mixture of yellow and red onions)
  • 1 1/2 cup of white wine
  • 1-3 tablespoons brown sugar (for the raclette side dish I used only one)
  • 1 bay leaf
  • 4-8 savory or thyme springs (I used the winter savory, Satureja montana)
  • 1 teaspoon peppercorns
  • Salt to taste
  • 4 tablespoons balsamic vinegar

Procedure

  1. Trim the tip and as less as possible of the root from the onions, cut them in half and remove the skins. Slice the onion vertically in wedges
  2. Add all the onions to the skillet add 1 cup of wine, sugar herbs, peppercorns and salt and cook slowly covered for about 20 minutes.
  3. Remove lid and cook until wine liquid is almost evaporated and onions begins to caramelize.
  4. When your onions have finished cooking, pour 1/4 cup wine. As the liquid bubbles, scrape up the fond and stir it into the onions. Use additional liquid as necessary to scrape up gently all the fond. Salt the onions to taste and add the balsamic vinegar.
  5. Let them cool in the skillet and transfer to a serving dish or storage container.